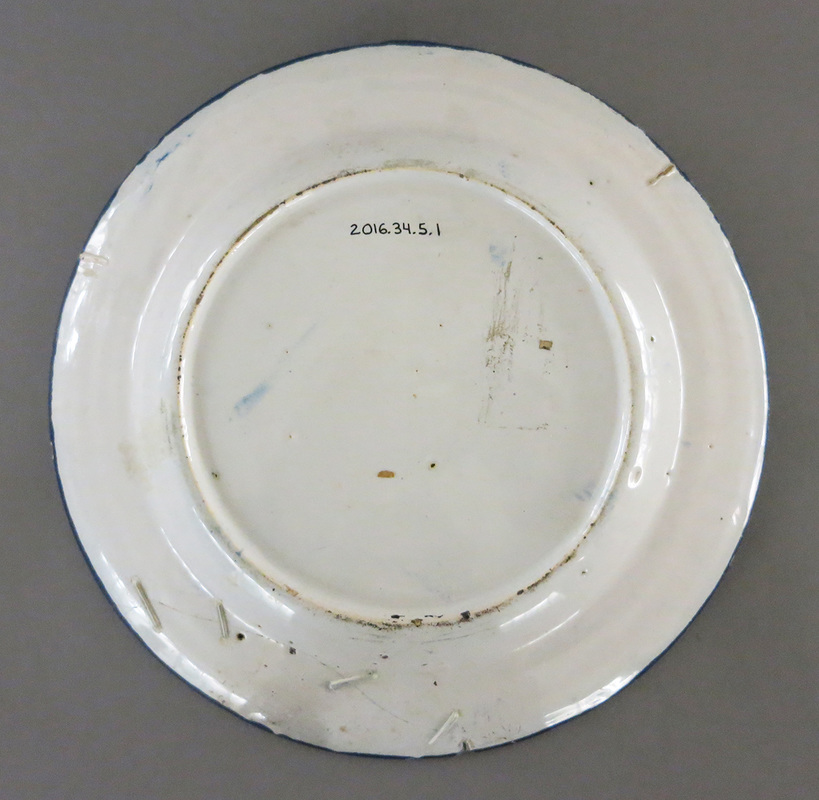
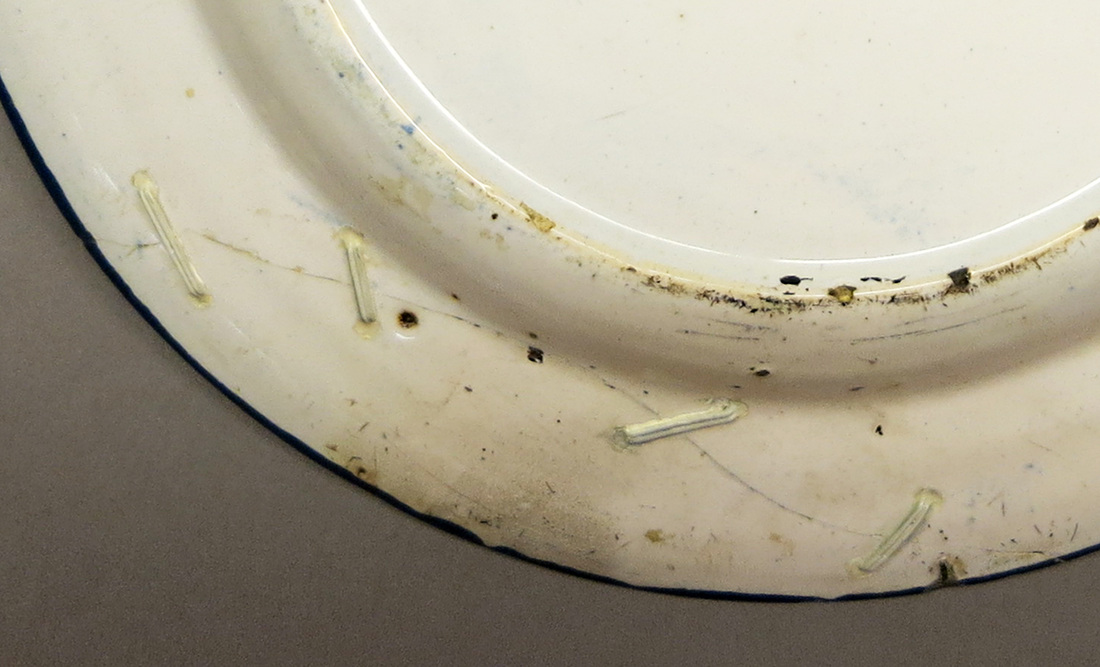
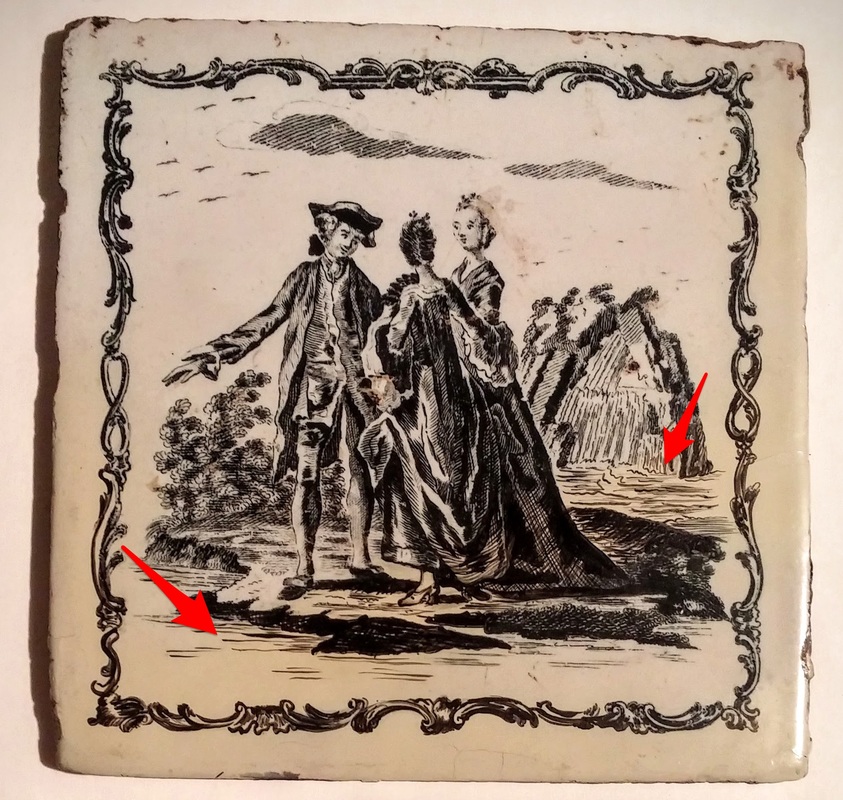
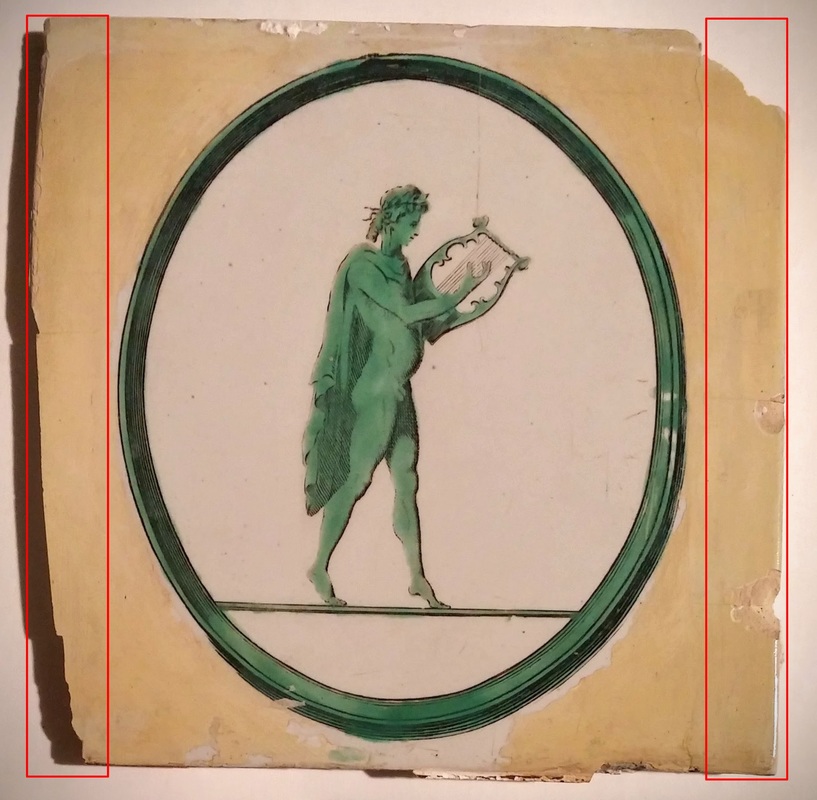
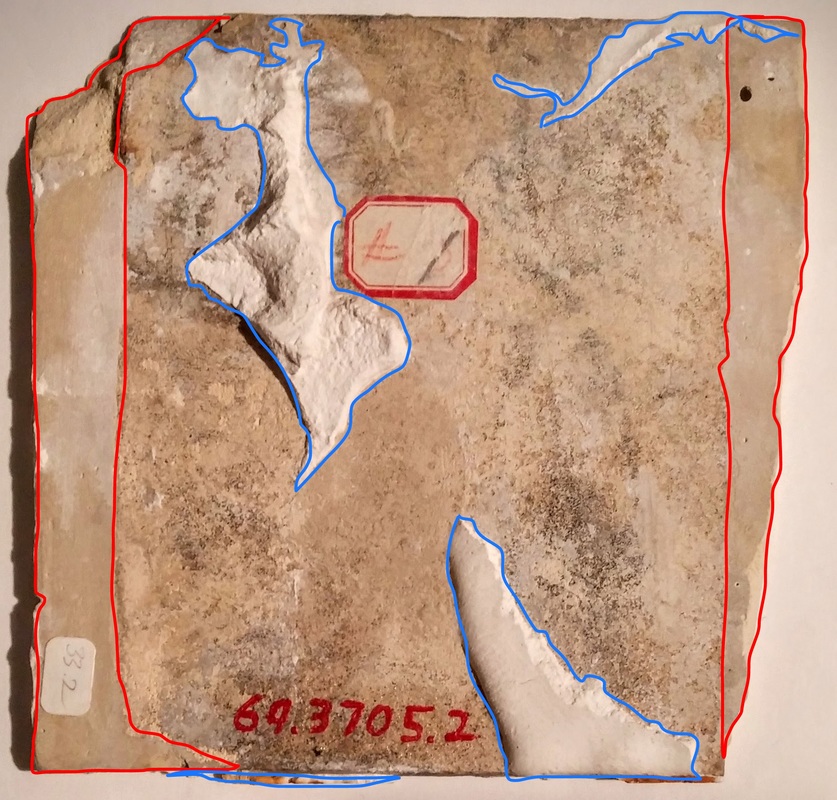
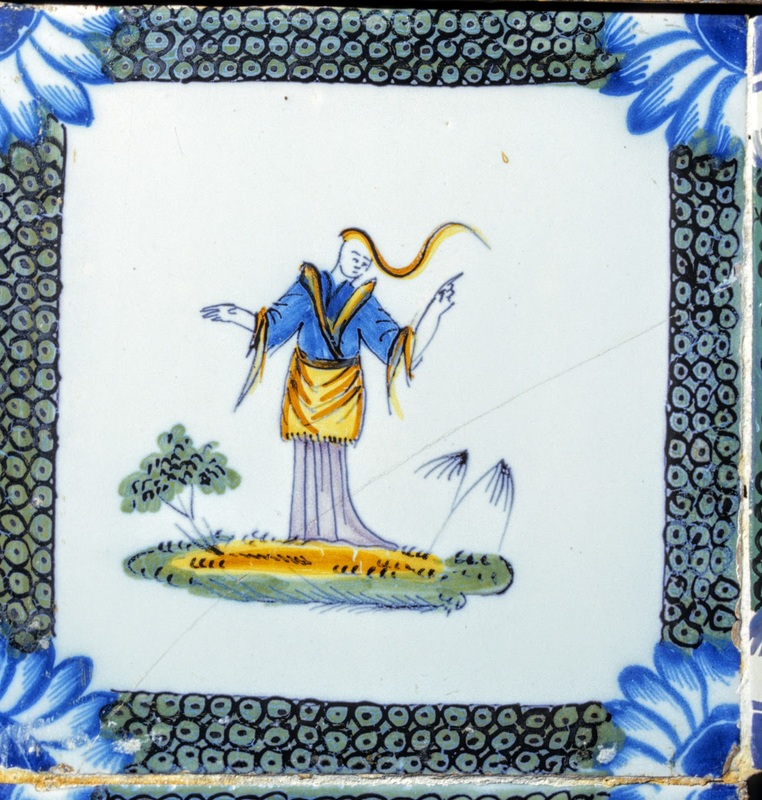
An Incredibly Brief History of Ceramic RepairsAs long as humans have been making ceramics, they have tried to find ways to fix these objects that shatter when dropped. In antiquity, this most often took the form of restoring function to a broken pot. This was accomplished in a variety of ways. Sometimes sherds (fragments of a pot) would be put together by drilling holes in the ceramic and using some sort of material, like plant fiber or metal wire, to tie two pieces together. From around the 1800s onward, restorers and menders began utilizing adhesives like animal glues to readhere ceramics. They also made "fills" out of materials like clay or plaster to fill missing pieces in the ceramic. Like today, early restorers used paints to disguise these fills. Even though modern conservators use similar techniques to their historic counterparts, the materials we now use have changed. 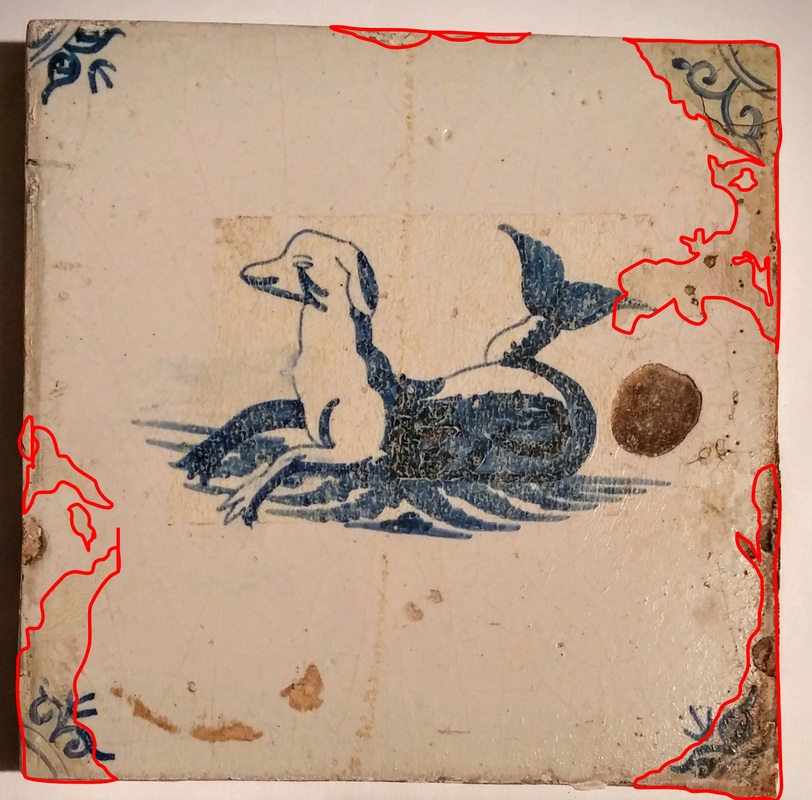 Dutch Delft tile c. 1650 with discolored historical repairs, outlined in red. The paint used to restore the tile has yellowed with age. The yellowed area in the center of the tile is residue from a piece of tape. Winterthur Collection. The materials these historic restorers used don't necessarily age well. Paints, adhesives, and other materials used in the past by conservators and others to repair broken ceramics deteriorated with age (see above!). Even materials used in the past 50 years are now discoloring and failing, necessitating the intervention of a conservator. Repairs from anytime before the present are commonly deemed historic repairs/restorations. The tiles in Winterthur's collection display a variety of fascinating, innovative, and sometimes disfiguring repairs. Some of the most interesting examples include repairs with metal rivets, discolored paint, and strange fill material. Rivets? Repairs with metalWhile remnants of natural resins, like bitumen can be found as adhesives on ancient ceramics, evidence exists for the repair of highly valuable ceramics with metal as far back as 7000 B.C. The Ancient Greeks made grooves between two sherds to be joined. Lead was poured into the grooves to bind them together. Nineteenth century restorers also used lead "solders" to repair ceramics, but they introduced a new technological advancement--iron rivets--to ceramics restoration. 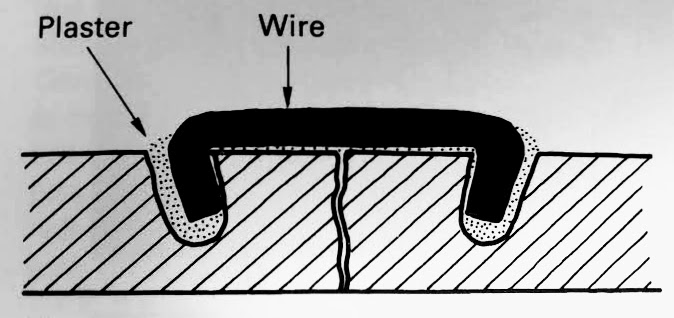 Diagram showing how rivets were constructed. (Buys & Oakley 1993, pg. 65 Figure 5.1 a). To create the repair, holes were drilled into the ceramic body at a 15 degree angle with a hand drill. Rivets, essentially metal staples, were fit into the holes to re-introduce tension into a broken vessel. Repairs with rivets can still be found on ceramics today, those made out of iron alloys have a tendency to rust. Conservators closer to the present began removing these "unsightly" rivets. The Liverpool tile above was treated by Philadelphia restoration firm H.A. Eberhardt and Son, probably around 1950. The restorer removed the rivets on the back of the tile and filled in the space left behind with plaster. He or she then overpainted the front of the tile to hide the repair. Over time, the paint has yellowed (above, left). Overpaint and OverfillIn their quest to create seamless restorations, early conservators often overfilled and overpainted ceramics. The edges of the green enamel, transfer-print tile below were probably ground down when it was installed in a fireplace. A conservator at some point in the past decided to create large areas of fill to restore the tile to its original dimensions. Areas outlined in red demarcate the historic fill, which was made with an unknown, yellowed, spongy material. Blue areas show remnants of plaster left over from when the tile was mounted in a fireplace. The overpaint on the front of the tile has yellowed significantly. When it was restored, it would have been the same white as the central oval to disguise the fill material--now it clearly shows where the fill is located. In another example of overpainting, these chinoiserie tiles are installed in the Bertrand room fireplace. The Michaelmas Daisy corner elements are original on the tile on the left, but have been remade on tile on the right. A historic restorer put plaster over the original surface of the tile and replicated the border and corners in paint. He or she painted over everything but the figure. Ethical Considerations Some may see these historic repairs as disfiguring, but when we as conservators "re-conserve" artifacts, we remove significant evidence of the history of that object and destroy evidence of the fascinating history of conservation. After consultation, some curators and conservators choose to remove historical repairs that are distracting (ie. yellowed paint or adhesive) or actively causing damage to objects (ie. rusting rivets that are no longer holding the ceramic together). Whether they are taken out or not, it is best practice to photograph and document these interesting and inventive historical repairs. Same as now, early conservators, repairers, and restorers were doing the best with the materials they had to fix the objects in their care. I will be starting to treat some of the tiles in this post in the coming weeks! Because the goals of treatment mainly involve restoring the aesthetic integrity of the tiles, I will remove the discolored overpaint and historic fills on the tiles above. However, I have made sure to record each step of my conservation treatment so the information about historic fills is accessible to future conservators. Tune in December 14th to learn about a series of tiles featuring 18th century actors in the Simsbury Room fireplace! 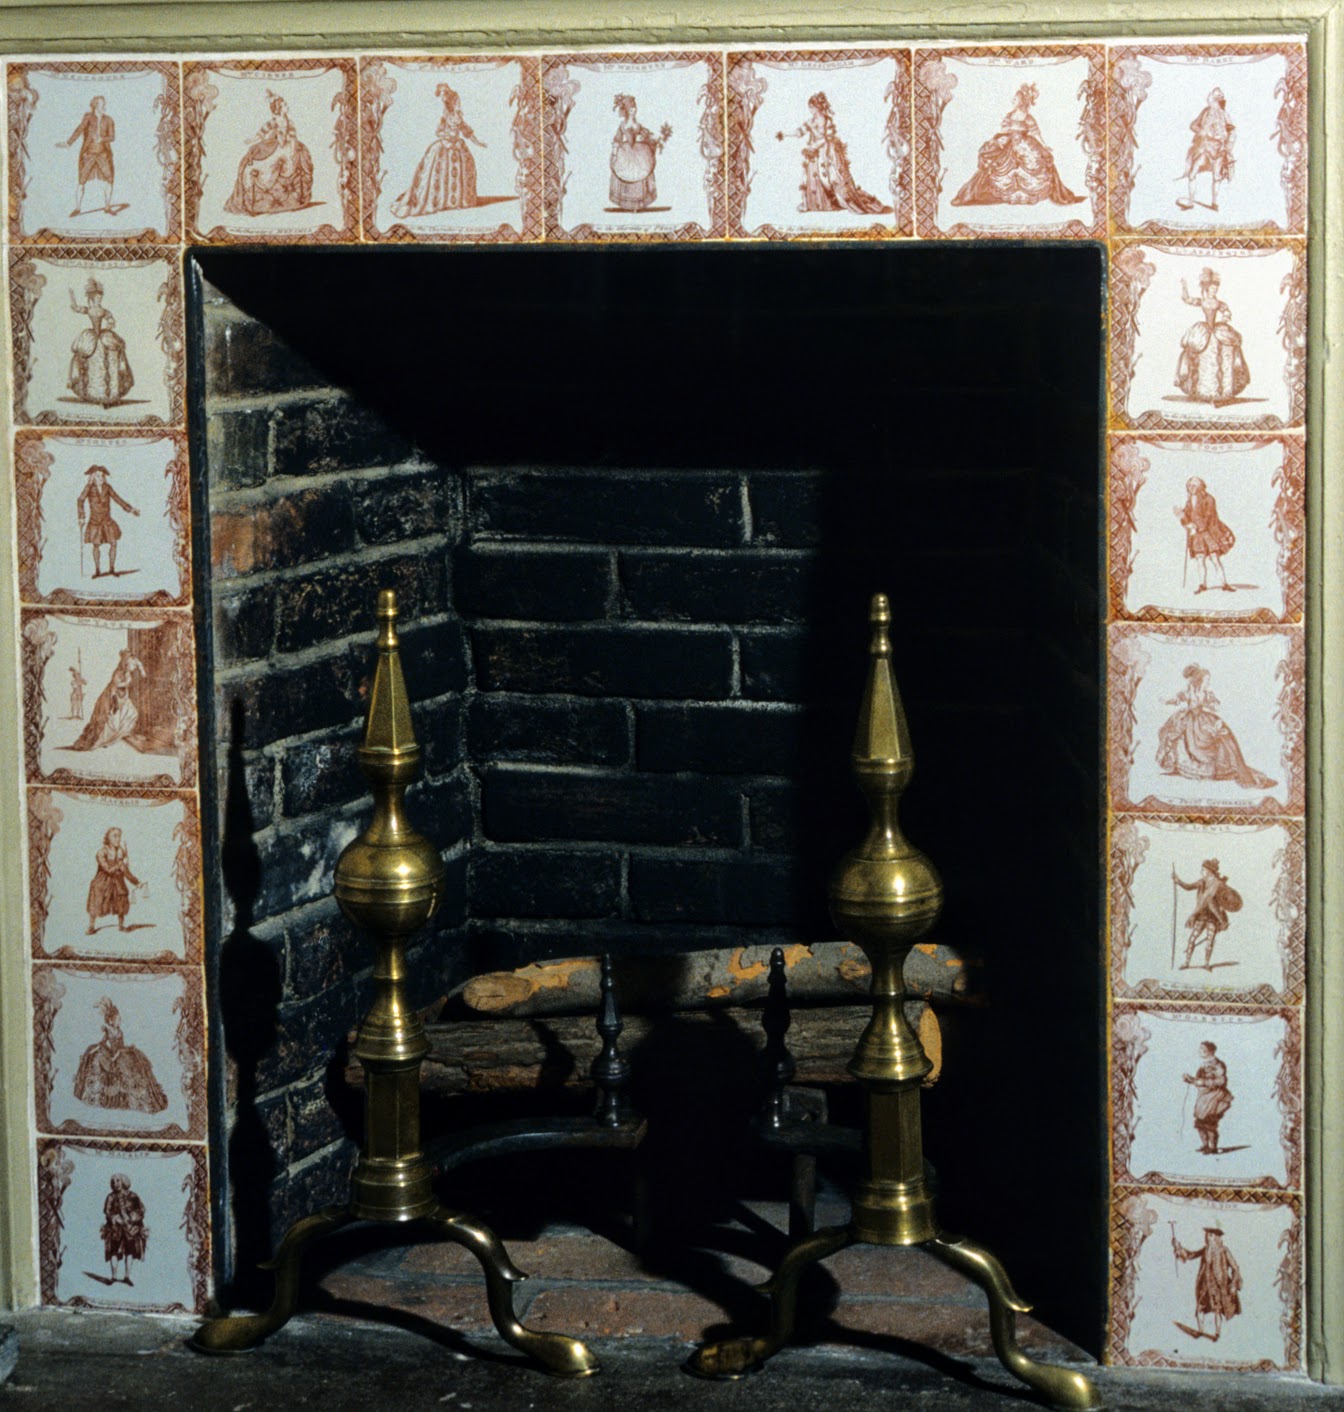 For more information, see:
Susan Buys and Victoria Oakley, 1993. Conservation of Ceramic Artefacts. London: Butterworth and Heinemann. Isabelle Garachon, 2010. Old Repairs of China and Glass. The Rijksmuseum Bulletin 58/1, 35-54. Stephen Koob, 1998. Obsolete Fill Materials Found on Ceramics. Journal of the American Institute for Conservation 37/1, 49-67.
0 Comments
On my first day at Winterthur, I met with Senior Curator of Ceramics and Glass, Leslie Grigby to see the unmounted tiles in the museum's storage areas. 160 of the 515 tiles in the collection are kept in storage and 22 are displayed in the Ceramics and Glass Study Area (below). A major component of my project at Winterthur involves conducting a condition survey of all of these tiles.  Talking about the tiles with Senior Curator Leslie Grigsby in the Ceramics and Glass Study Area on my first day at Winterthur. Where to Begin?Before I went into the collection to start my survey, I had to come up with a way to record my data. I decided to create a survey spreadsheet on Microsoft Excel rather than using a paper form. This way I could take my laptop into the collections and enter data right away rather than having to type up my observations later. The information I collected would be used to prioritize my conservation treatments. One of the major challenges in creating a database or survey form is standardizing the nomenclature, or wording that you use. Consistency makes information much easier to find and sort during data review. To this end, I made specific categories and wrote in set terms to organize the information I wanted to collect. 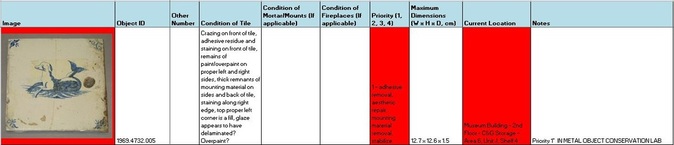 Sample data collected on a tile in storage marked "High Priority." I placed an image of each tile in my spreadsheet in order to make sure I was assessing the correct tile. The next field is "Object ID," where I placed Winterthur's accession number, for example 1969.4732.005. An accession number identifies each individual object in the collection and relates it to similar objects based on the year they were collection and their “accession group number.” For example, a group of objects donated by the same person at the same time would be part of the same accession group. 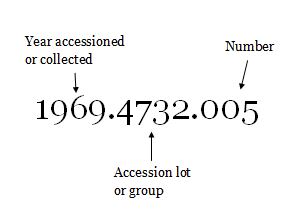 "Other Number" records any number on the back of tiles from other cataloging systems. "Condition of Tile" is a free text field in which I recorded any condition issues with the tile, such as structural instabilities and historic repairs. "Condition of Mortar/Mounts" and "Condition of Fireplaces" applies more to the mounted tiles in the house. "Priority" sorts the tiles by minor to major condition problems and will help me prioritize which tiles to treat first. "Maximum Dimensions" gives the measurements of each tile. "Current Location" shows where the tile is located in the collection. Priorities A “Priorities” field in a condition survey allows conservators to easily rank objects by conservation needs. For example in my survey, I sorted the tiles into four groups: Low Priority: treatment not necessary, minor aesthetic repairs, dirty surface, structurally stable Medium-Low Priority: treatment suggested, more significant aesthetic repairs, chips, small cracks Medium-High Priority: treatment recommended, significant aesthetic repairs, structural cracks, spalling, chips, large areas of loss High Priority: treatment necessary, ceramics is actively deteriorating, extremely disfigured by historic restorations, or unstable A majority of tiles will probably fall into Medium-Low or Medium-High priority. 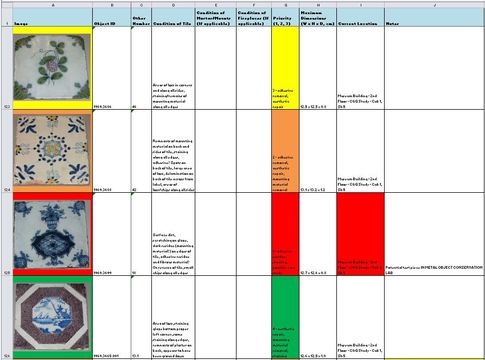 View of the spreadsheet showing tiles of every different priority. Organizing the TilesThe first thing I noticed when I got into the collection was that the tiles were stored and stacked seemingly randomly. Because my spreadsheet was sorted by object number, step one involved sorting the tiles by number. 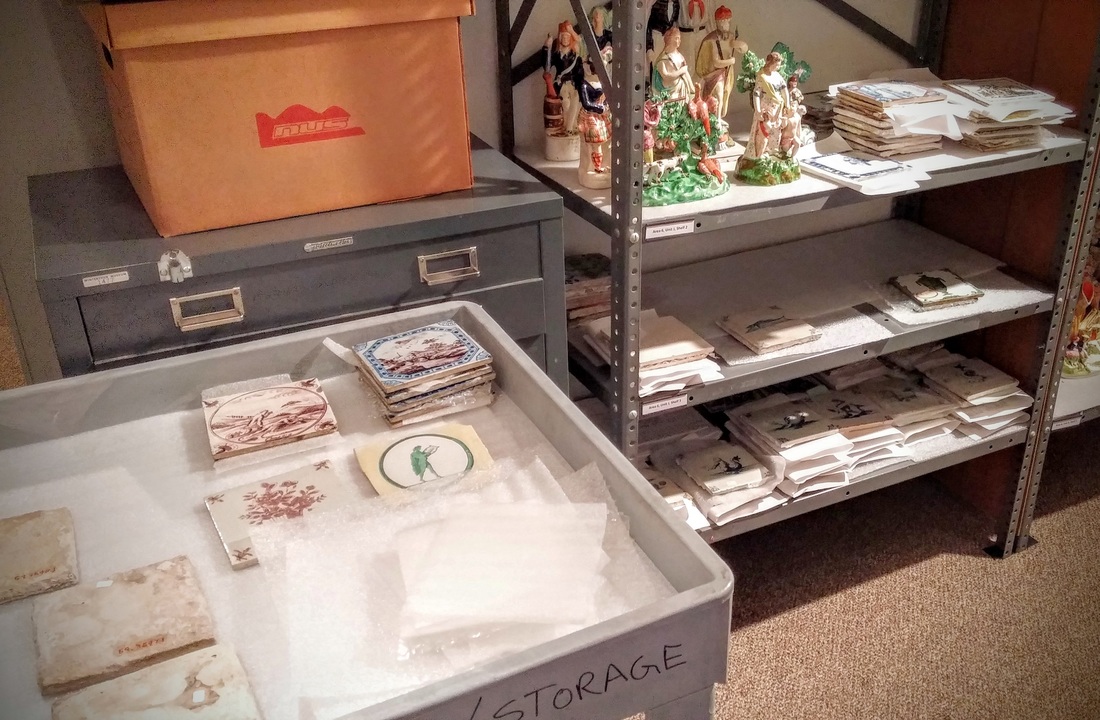 Sorting the tiles by number and design to make condition surveying easier. Once I finished sorting the tiles, I was ready to start my survey! Tune in next week as I talk about some of the major condition issues I noticed as I began to look at the individual tiles more closely.
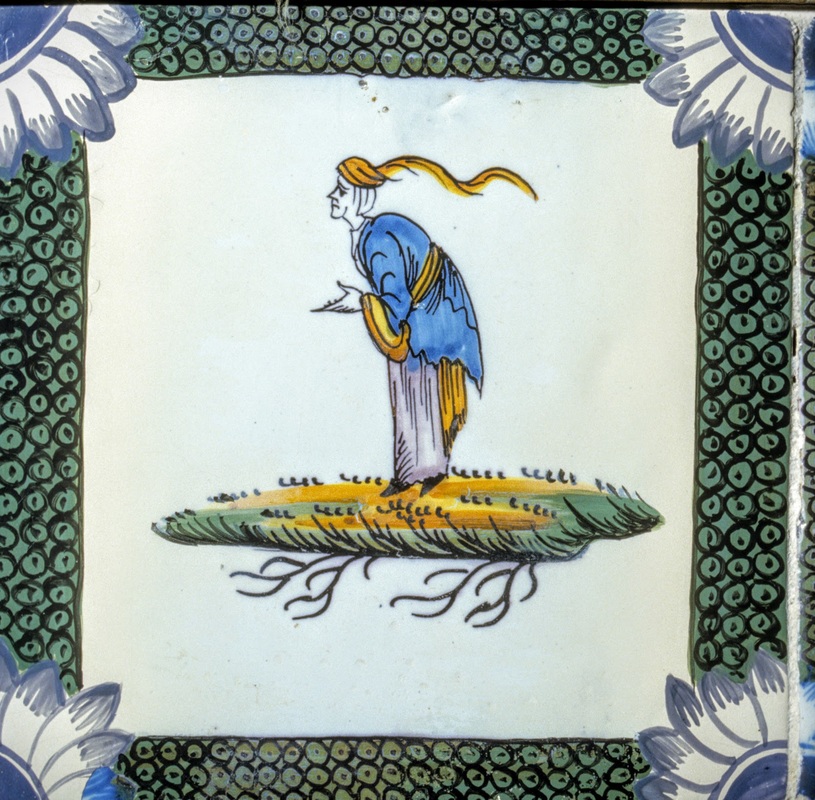
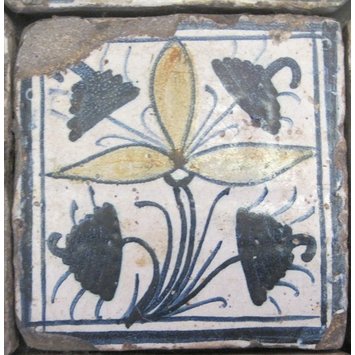
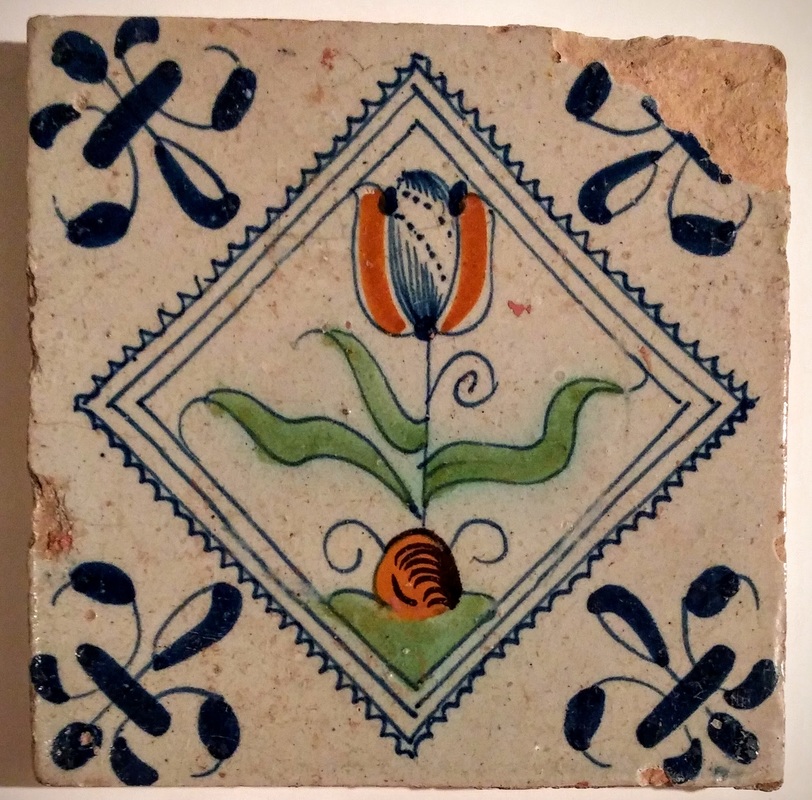
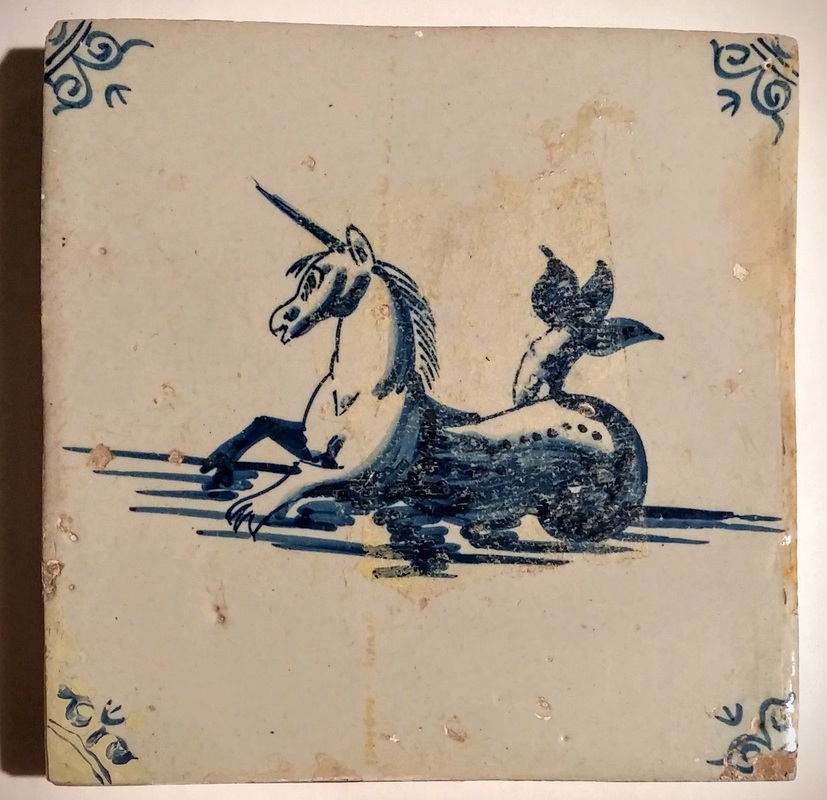
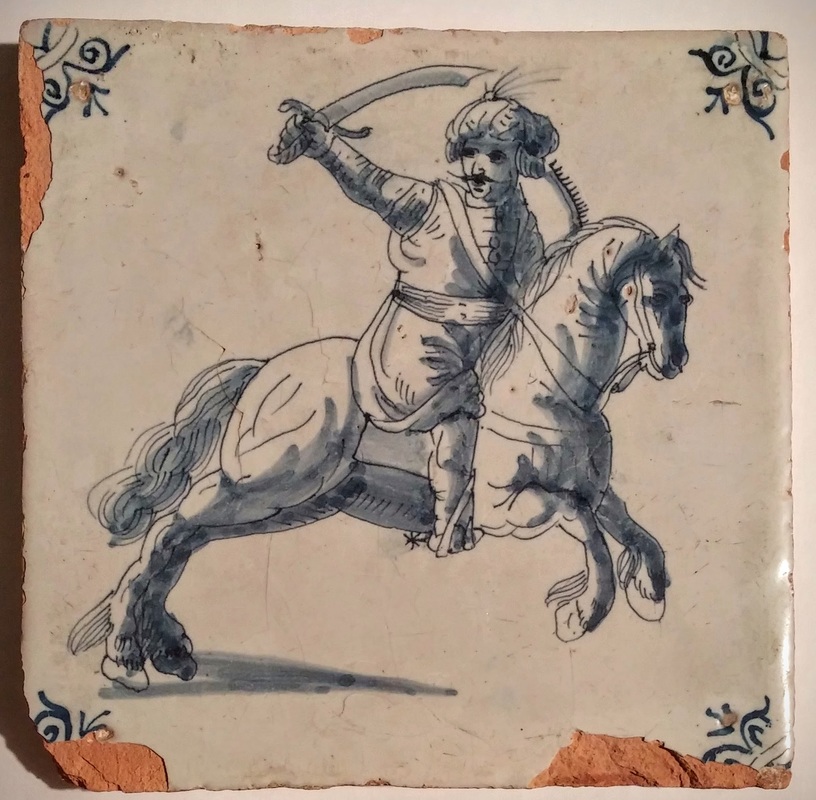
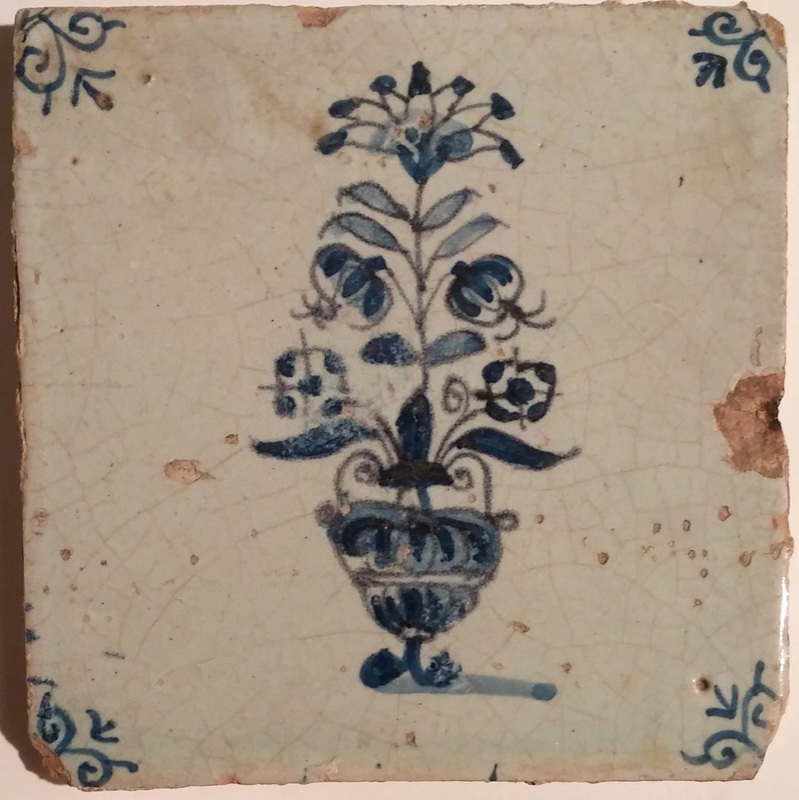
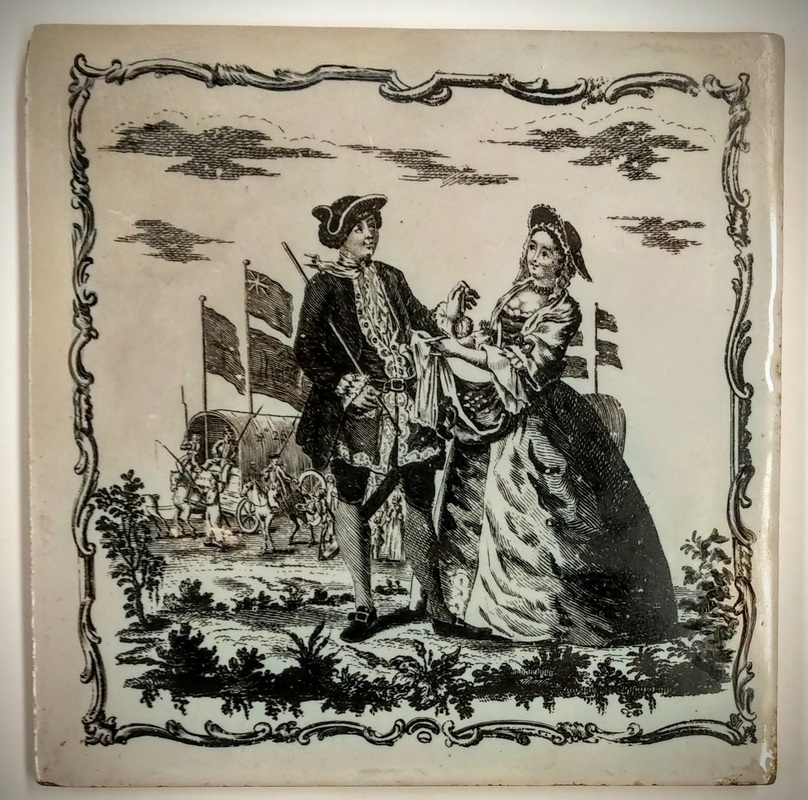
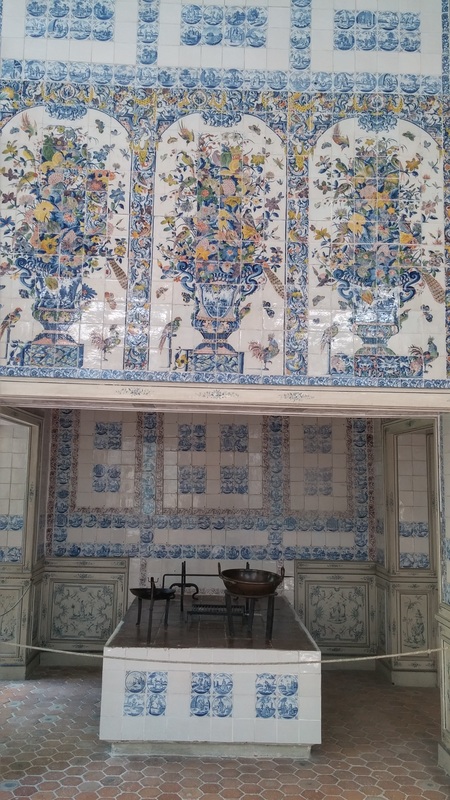
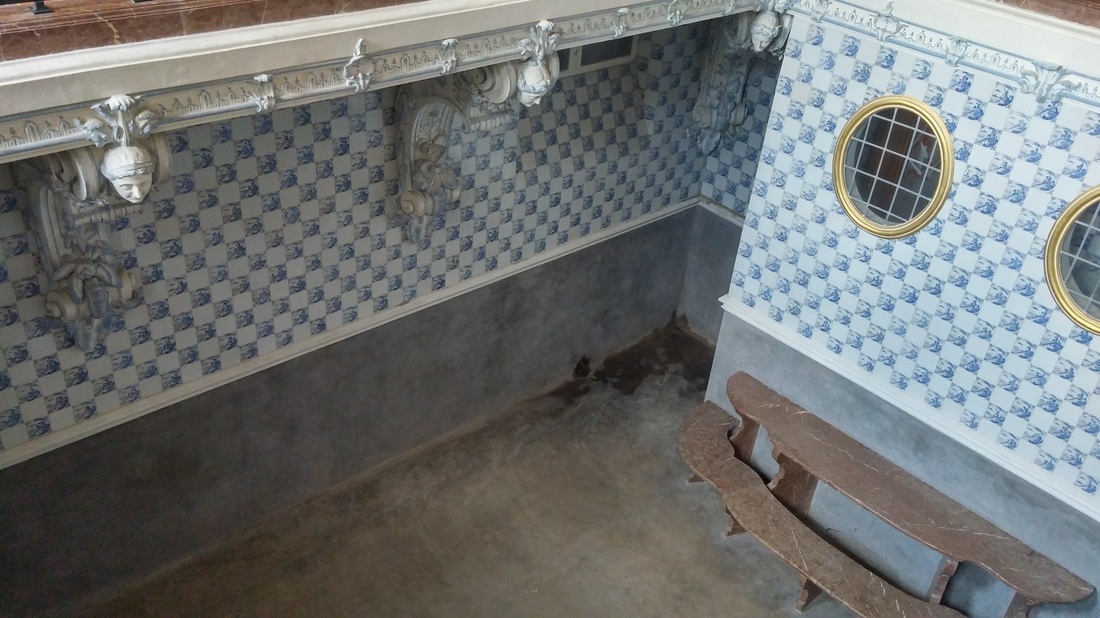
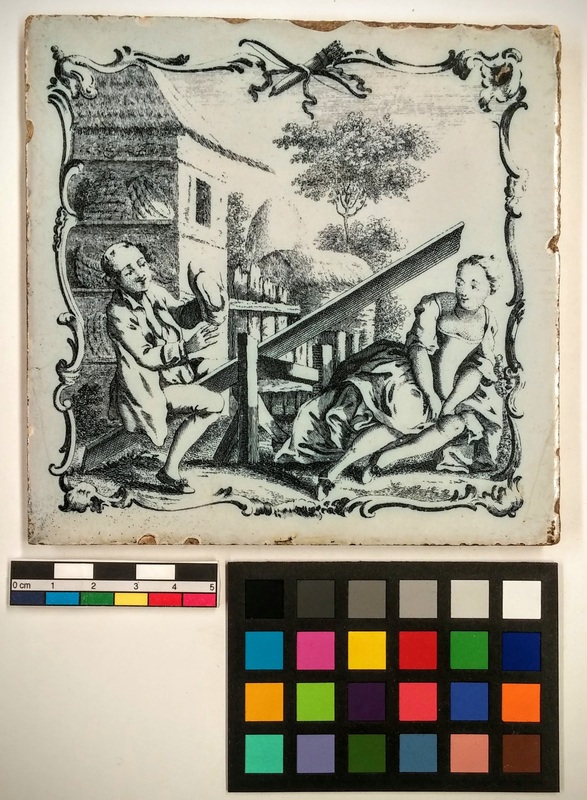
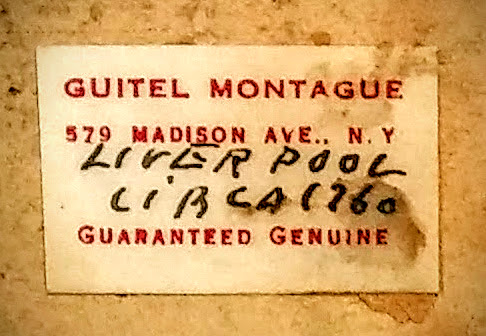
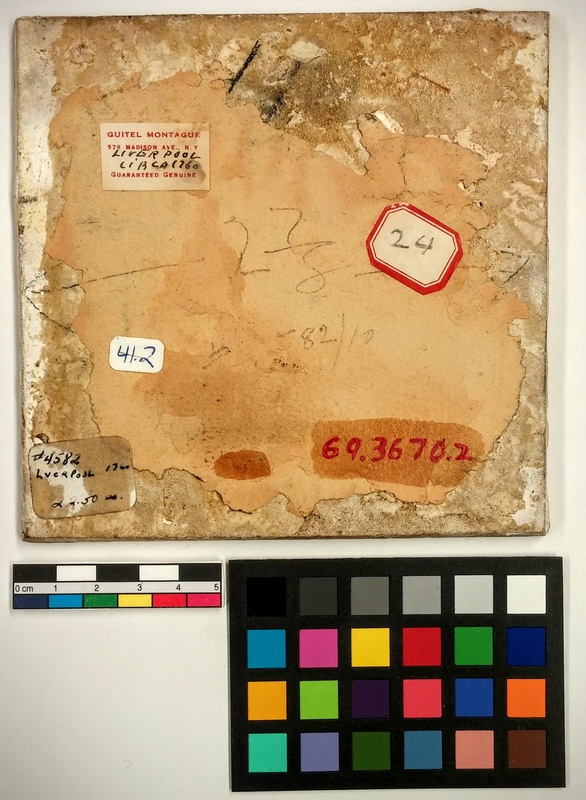
Watch this blog for weekly or biweekly updates and follow me on Twitter to learn more about some of the individual tiles I’ll be looking at on #WeirdTileWednesday and #WeirdTileoftheDay. In 1648, the Dutch Republic gained its independence following the Thirty Years War. Freedom from Habsburg Spain led to the rise of a middle class with money to burn. These newly wealthy merchants spent their riches on fashionable decorations for even the mundane, everyday areas in their houses--kitchens and fireplaces. Early Delft TilesDrawing inspiration from maiolica (sometimes spelled majolica) floor tiles manufactured in southern Europe from the 16th century onward, potters in Delft in the Netherlands began creating hand-painted wall tiles for their newly wealthy middle class clients in the early 17th century. These tiles served a dual purpose of decorating utilitarian spaces, such as fireplaces, while also providing an easily cleanable surface. 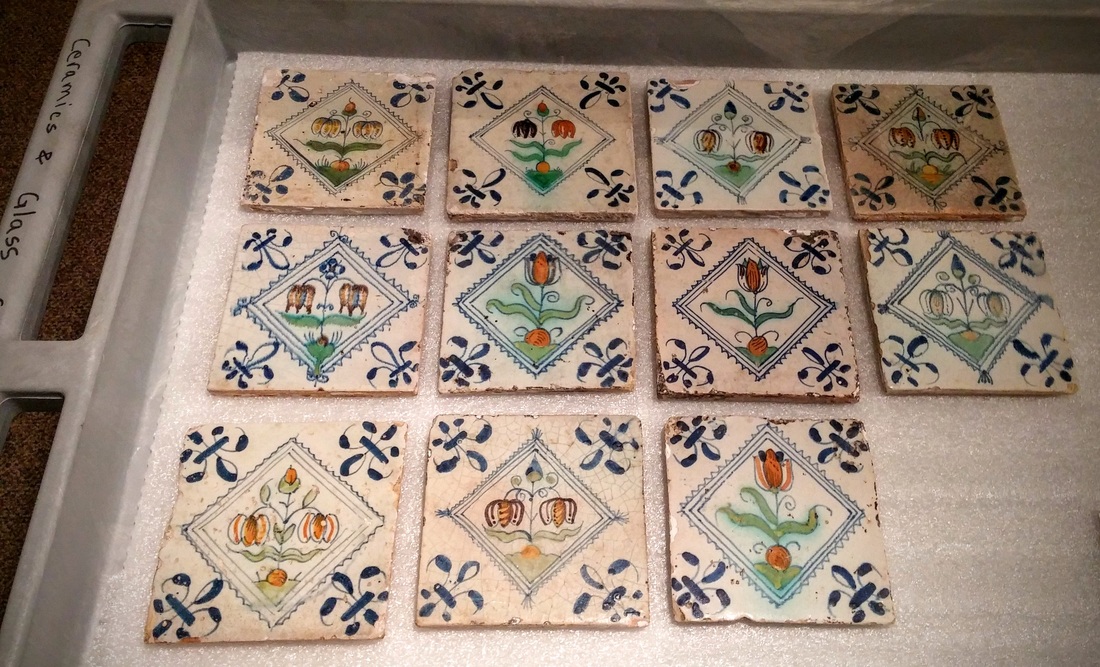 "Tulipomania" flower and vase type tiles in the Winterthur Collection, c. 1640-1675. Early Delft tiles (1620s-1650s) mainly used a palate of blue, orange, and green. The tiles above are the by-product of "Tulipomania," a time in Dutch history where speculation on the hottest commodity of the day, tulips, created the world's first economic bubble. Later 17th and early 18th century tiles emulated fashionable blue-and-white Chinese porcelain brought in to Europe by the Dutch East India Company (below). Manufacturing MethodsTraditional Delft tiles were made of tin-glazed earthenware, a type of ceramic that is much more porous than porcelain, which was not produced in Europe until the early 18th century. Prior to glaze application, the earthenware tiles, usually formed from a mixture of red and white clay, were put through an initial "biscuit" firing. Tin-glaze was then applied to the front of the tile and artists hand-painted the decoration using different colored glazes. The tin-glaze gives these tiles their uniformly glossy, white background color. Dutch tile-makers brought their techniques to Liverpool, Bristol, Glasgow, and London, which grew as centers of production in Britain. The tiles made there first copied Dutch designs. However, in 1756, John Sadler (1720-1789), an engraver in Liverpool, invented a process called “transfer printing.” To create a transfer print, an artist engraved a copper plate with a design. Ink was applied to the plate and transferred to the glazed ceramic tile using paper or glue. The tiles created by transfer print had crisp, uniform designs and were much easier to mass-produce than hand-painted Delft tiles. Utilizing finer, whiter clays common in Britain, Liverpudlian tile-makers produced tiles that did not suffer as extensively from problems like crazing—a by-product of poor glaze to ceramic fit on the lower-fire earthenware tiles from the Netherlands. On these tiles, the ceramic body and glaze expanded or contracted at different rates creating fine cracks in the glaze that allowed dirt and debris to enter into the ceramic. 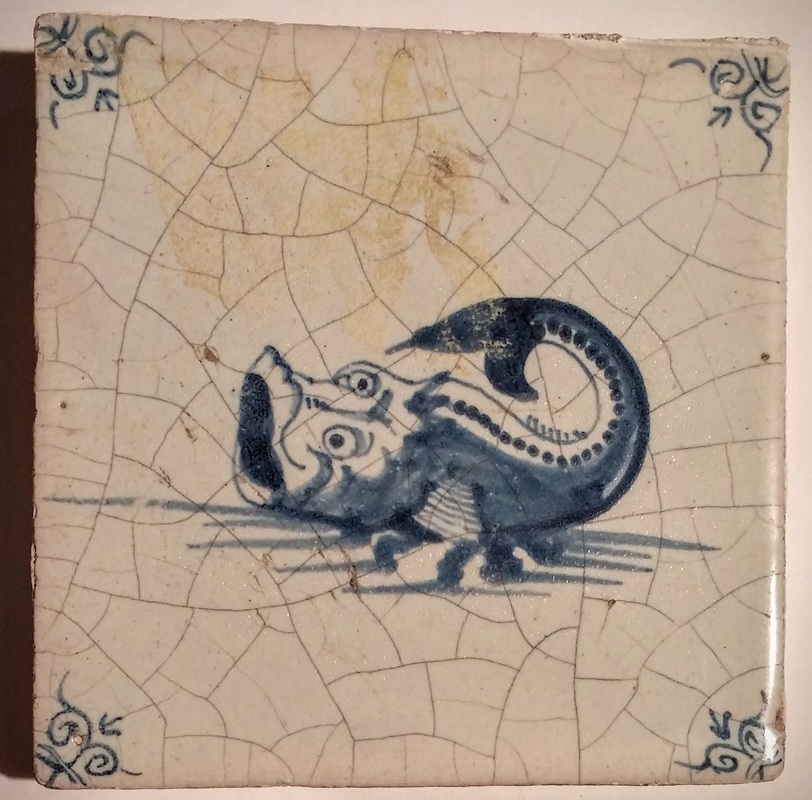 Highly crazed Delft tile, c. 1650-1700, Winterthur Fashion of the DayMy first experience with Delft tiles was at Schloss Nymphenburg (Nymphenburg Palace), near Munich. I was fortunate enough to visit in the summer of 2015. Even before I knew I would be spending a long time researching the tiles, I was fascinated by the amazing designs at the palace (below). They were even used to tile an indoor bath! In the 17th and 18th centuries, Delft tiles grew exponentially in popularity, spreading across Europe and Asia like wildfire. Eventually, these tiles made their way to Dutch and English colonies in the Americas. Delft tiles fell out of fashion in the early 19th century, but they survive in homes and palaces around the world. History of Winterthur's Tiles?Winterthur's tiles are either installed in fireplaces or unmounted. I’m still not sure where the individual tiles in the collection came from, but they are probably not original to the house. I've found some clues on the back of tiles like stickers for antique dealers. The one above reads: “GUITEL MONTAGUE/579 MADISON AVE., N.Y/LIVERPOOL CIRCA 1760/GUARANTEED GENUINE.” Hopefully this sticker will give me potential leads into the history of these tiles--stay tuned! Watch this blog for weekly updates and follow me on Twitter to learn more about some of the individual tiles I’ll be looking at on #WeirdTileWednesday and #WeirdTileoftheDay. See you next week as I start my condition survey of the tiles in the collection!
For more information about the history of Delft fireplace tiles, see:
|
Madeline HagermanWinterthur Postgraduate Fellowship in Objects Conservation Archives
July 2018
Categories
All
|


 RSS Feed
