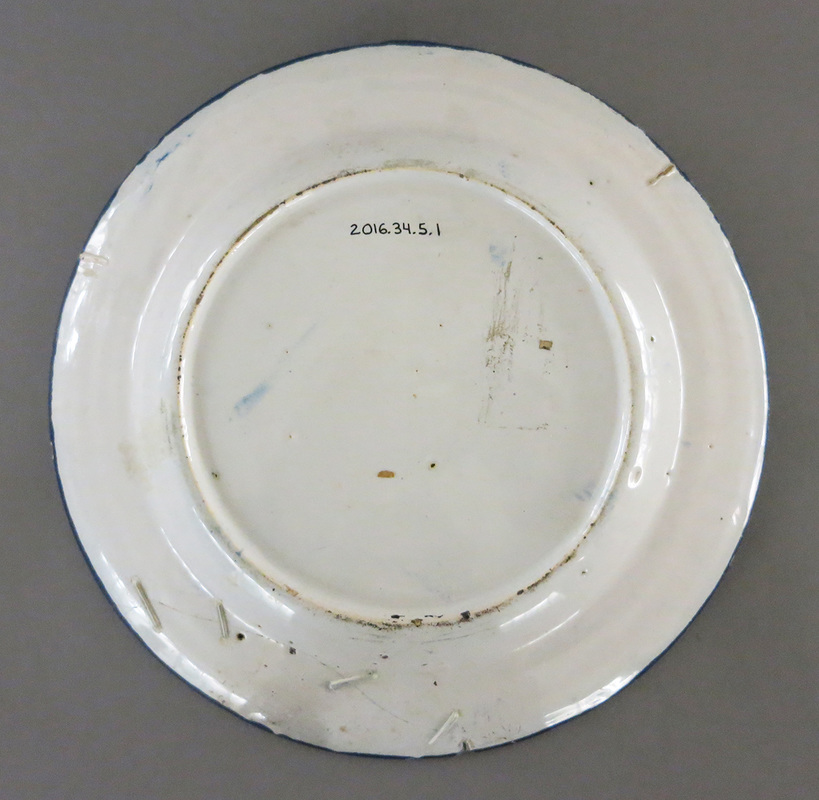
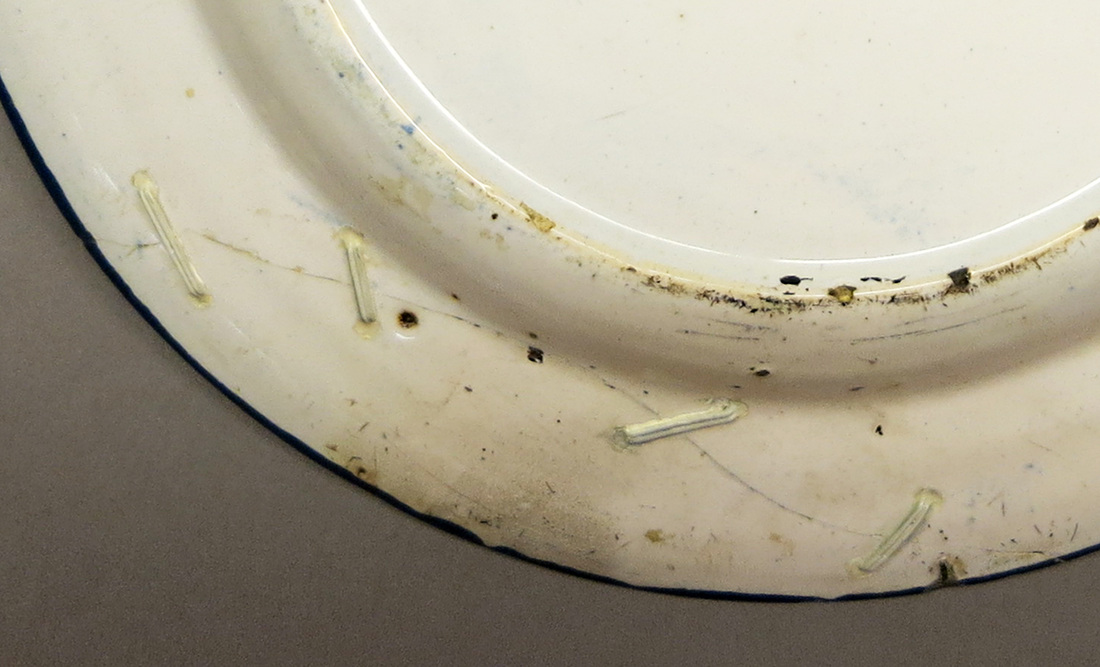
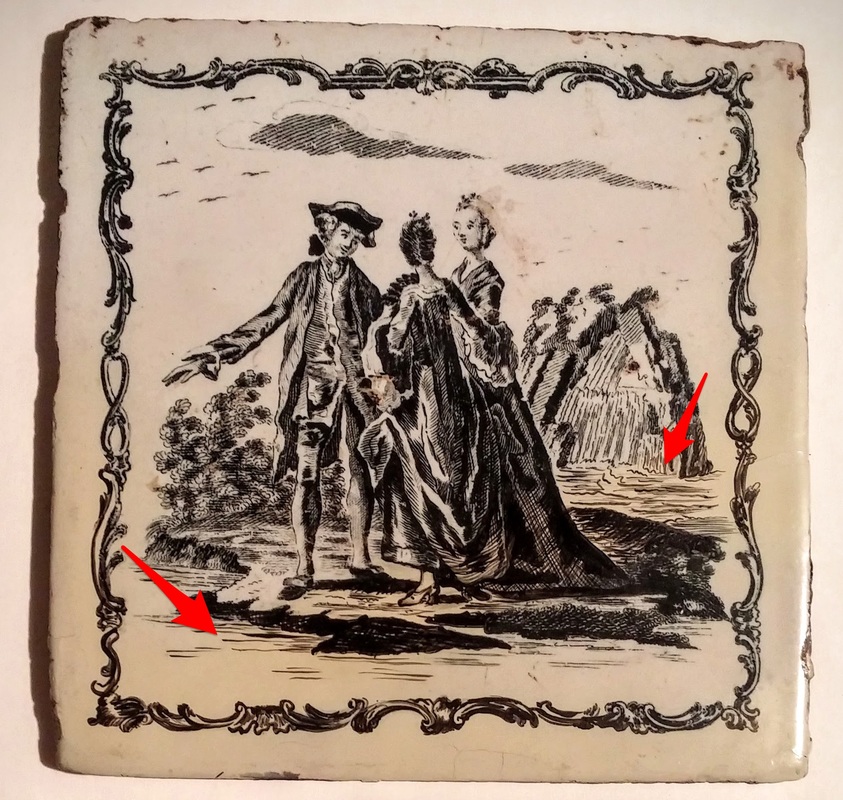
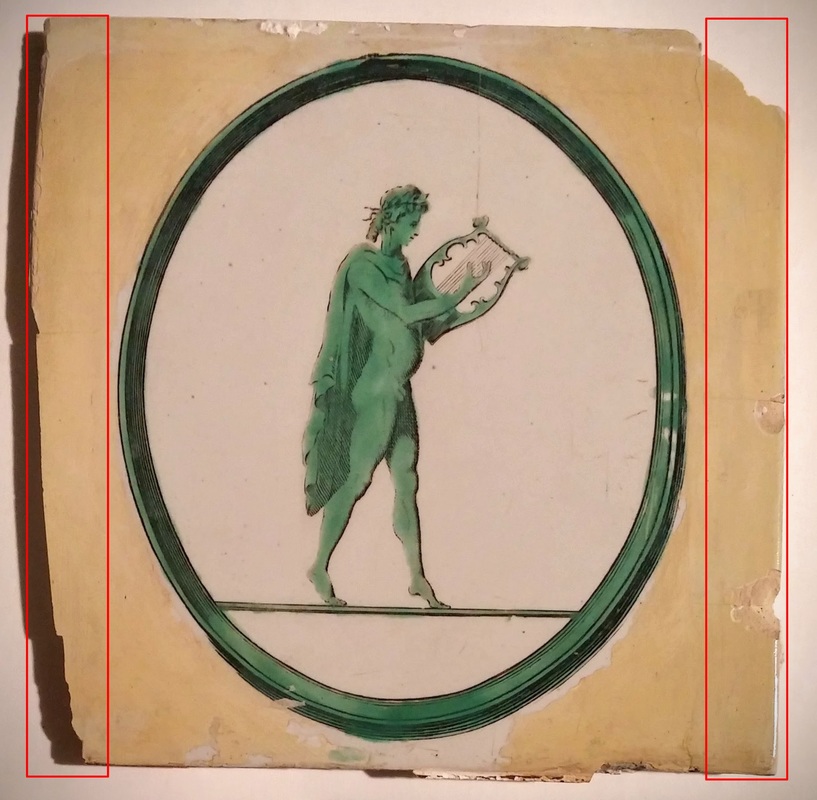
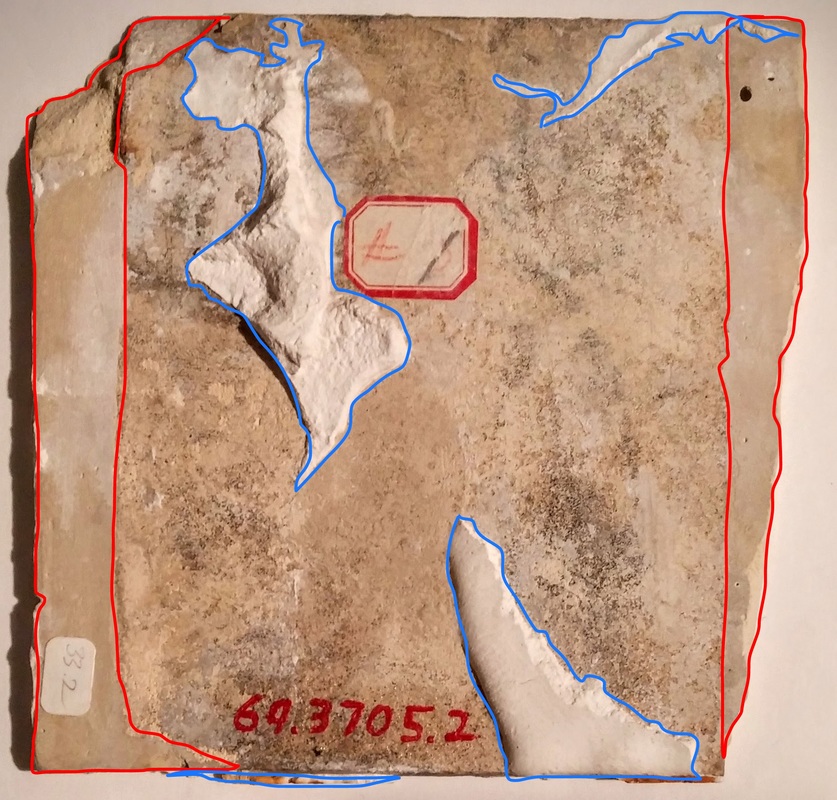
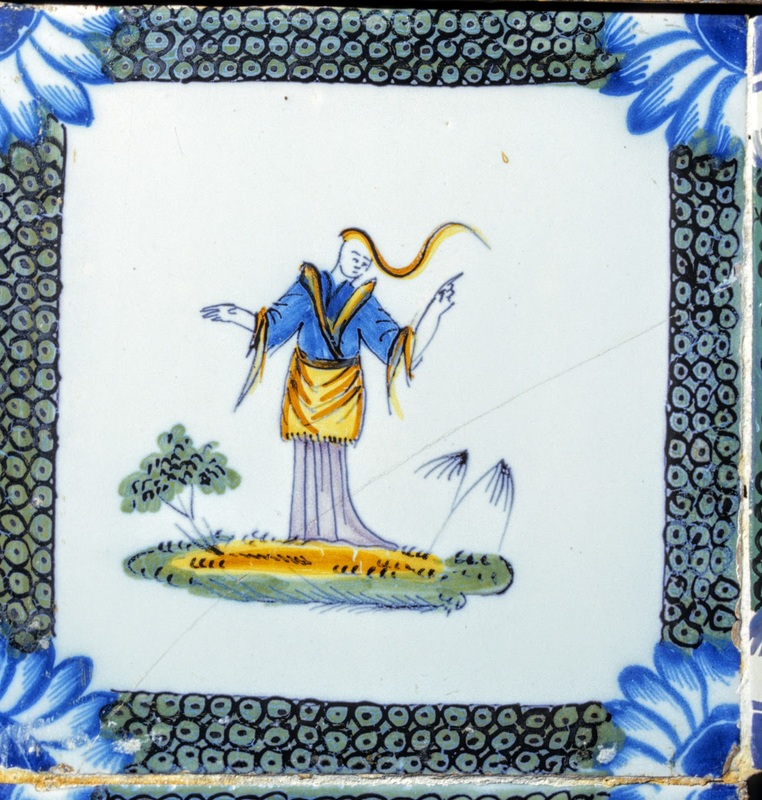
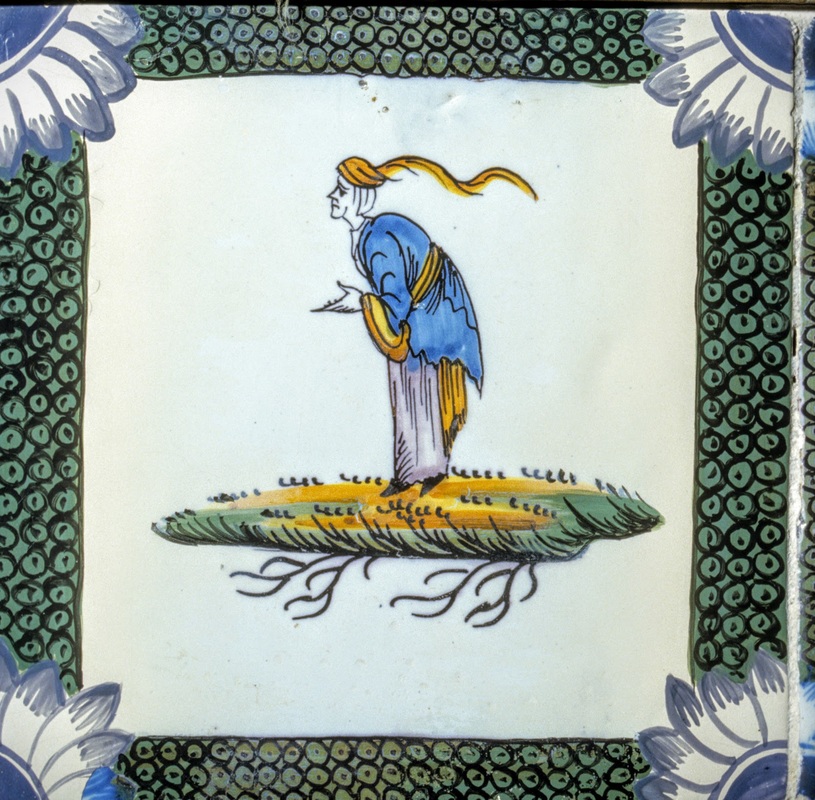
An Incredibly Brief History of Ceramic RepairsAs long as humans have been making ceramics, they have tried to find ways to fix these objects that shatter when dropped. In antiquity, this most often took the form of restoring function to a broken pot. This was accomplished in a variety of ways. Sometimes sherds (fragments of a pot) would be put together by drilling holes in the ceramic and using some sort of material, like plant fiber or metal wire, to tie two pieces together. From around the 1800s onward, restorers and menders began utilizing adhesives like animal glues to readhere ceramics. They also made "fills" out of materials like clay or plaster to fill missing pieces in the ceramic. Like today, early restorers used paints to disguise these fills. Even though modern conservators use similar techniques to their historic counterparts, the materials we now use have changed. 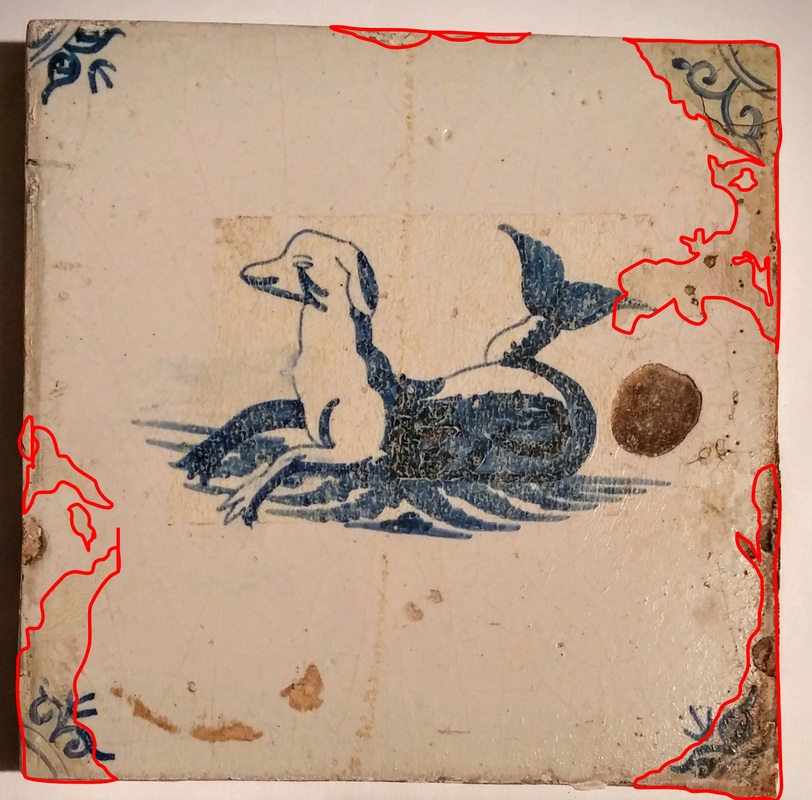 Dutch Delft tile c. 1650 with discolored historical repairs, outlined in red. The paint used to restore the tile has yellowed with age. The yellowed area in the center of the tile is residue from a piece of tape. Winterthur Collection. The materials these historic restorers used don't necessarily age well. Paints, adhesives, and other materials used in the past by conservators and others to repair broken ceramics deteriorated with age (see above!). Even materials used in the past 50 years are now discoloring and failing, necessitating the intervention of a conservator. Repairs from anytime before the present are commonly deemed historic repairs/restorations. The tiles in Winterthur's collection display a variety of fascinating, innovative, and sometimes disfiguring repairs. Some of the most interesting examples include repairs with metal rivets, discolored paint, and strange fill material. Rivets? Repairs with metalWhile remnants of natural resins, like bitumen can be found as adhesives on ancient ceramics, evidence exists for the repair of highly valuable ceramics with metal as far back as 7000 B.C. The Ancient Greeks made grooves between two sherds to be joined. Lead was poured into the grooves to bind them together. Nineteenth century restorers also used lead "solders" to repair ceramics, but they introduced a new technological advancement--iron rivets--to ceramics restoration. 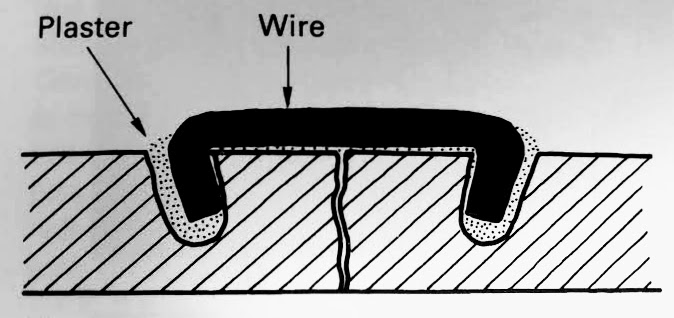 Diagram showing how rivets were constructed. (Buys & Oakley 1993, pg. 65 Figure 5.1 a). To create the repair, holes were drilled into the ceramic body at a 15 degree angle with a hand drill. Rivets, essentially metal staples, were fit into the holes to re-introduce tension into a broken vessel. Repairs with rivets can still be found on ceramics today, those made out of iron alloys have a tendency to rust. Conservators closer to the present began removing these "unsightly" rivets. The Liverpool tile above was treated by Philadelphia restoration firm H.A. Eberhardt and Son, probably around 1950. The restorer removed the rivets on the back of the tile and filled in the space left behind with plaster. He or she then overpainted the front of the tile to hide the repair. Over time, the paint has yellowed (above, left). Overpaint and OverfillIn their quest to create seamless restorations, early conservators often overfilled and overpainted ceramics. The edges of the green enamel, transfer-print tile below were probably ground down when it was installed in a fireplace. A conservator at some point in the past decided to create large areas of fill to restore the tile to its original dimensions. Areas outlined in red demarcate the historic fill, which was made with an unknown, yellowed, spongy material. Blue areas show remnants of plaster left over from when the tile was mounted in a fireplace. The overpaint on the front of the tile has yellowed significantly. When it was restored, it would have been the same white as the central oval to disguise the fill material--now it clearly shows where the fill is located. In another example of overpainting, these chinoiserie tiles are installed in the Bertrand room fireplace. The Michaelmas Daisy corner elements are original on the tile on the left, but have been remade on tile on the right. A historic restorer put plaster over the original surface of the tile and replicated the border and corners in paint. He or she painted over everything but the figure. Ethical Considerations Some may see these historic repairs as disfiguring, but when we as conservators "re-conserve" artifacts, we remove significant evidence of the history of that object and destroy evidence of the fascinating history of conservation. After consultation, some curators and conservators choose to remove historical repairs that are distracting (ie. yellowed paint or adhesive) or actively causing damage to objects (ie. rusting rivets that are no longer holding the ceramic together). Whether they are taken out or not, it is best practice to photograph and document these interesting and inventive historical repairs. Same as now, early conservators, repairers, and restorers were doing the best with the materials they had to fix the objects in their care. I will be starting to treat some of the tiles in this post in the coming weeks! Because the goals of treatment mainly involve restoring the aesthetic integrity of the tiles, I will remove the discolored overpaint and historic fills on the tiles above. However, I have made sure to record each step of my conservation treatment so the information about historic fills is accessible to future conservators. Tune in December 14th to learn about a series of tiles featuring 18th century actors in the Simsbury Room fireplace! 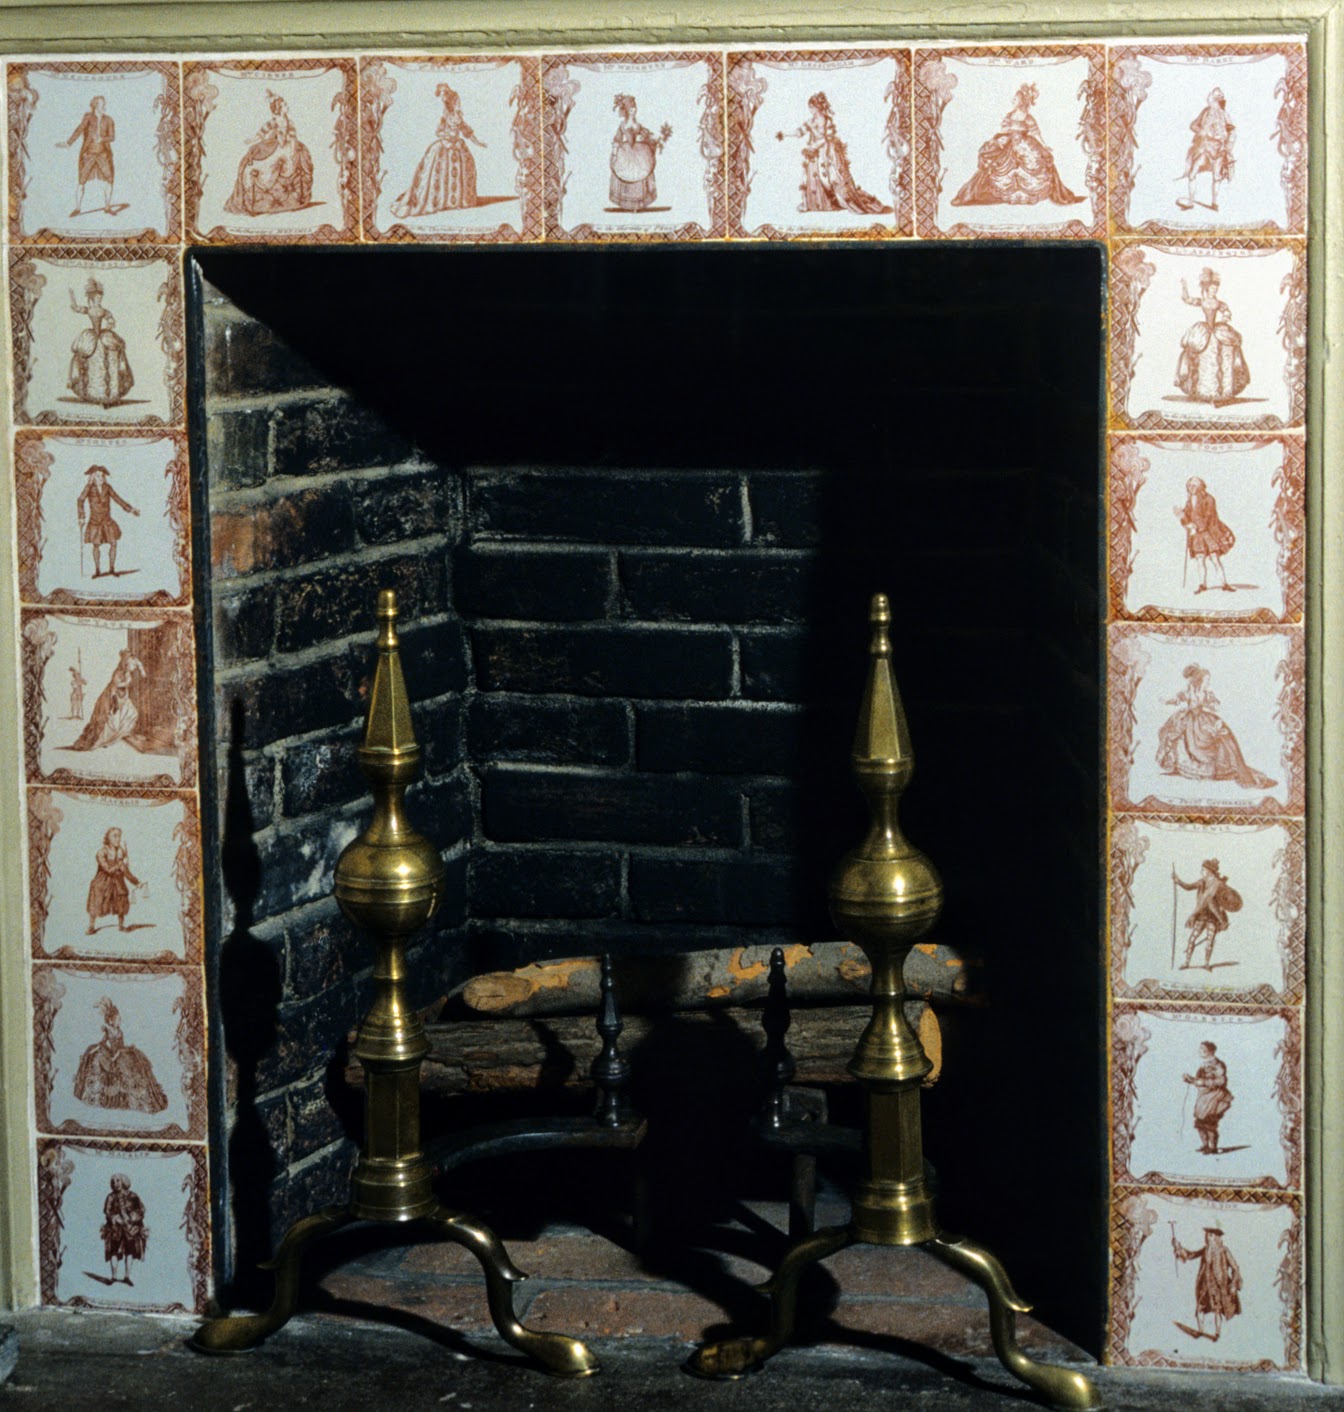 For more information, see:
Susan Buys and Victoria Oakley, 1993. Conservation of Ceramic Artefacts. London: Butterworth and Heinemann. Isabelle Garachon, 2010. Old Repairs of China and Glass. The Rijksmuseum Bulletin 58/1, 35-54. Stephen Koob, 1998. Obsolete Fill Materials Found on Ceramics. Journal of the American Institute for Conservation 37/1, 49-67.
0 Comments
Leave a Reply. |
Madeline HagermanWinterthur Postgraduate Fellowship in Objects Conservation Archives
July 2018
Categories
All
|

 RSS Feed
