|
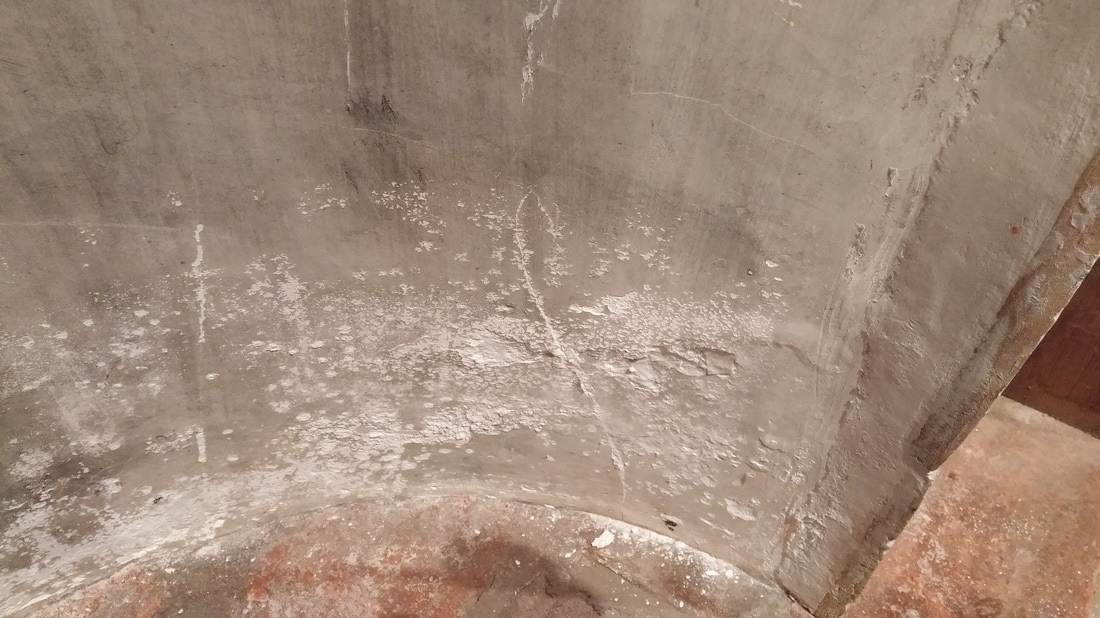
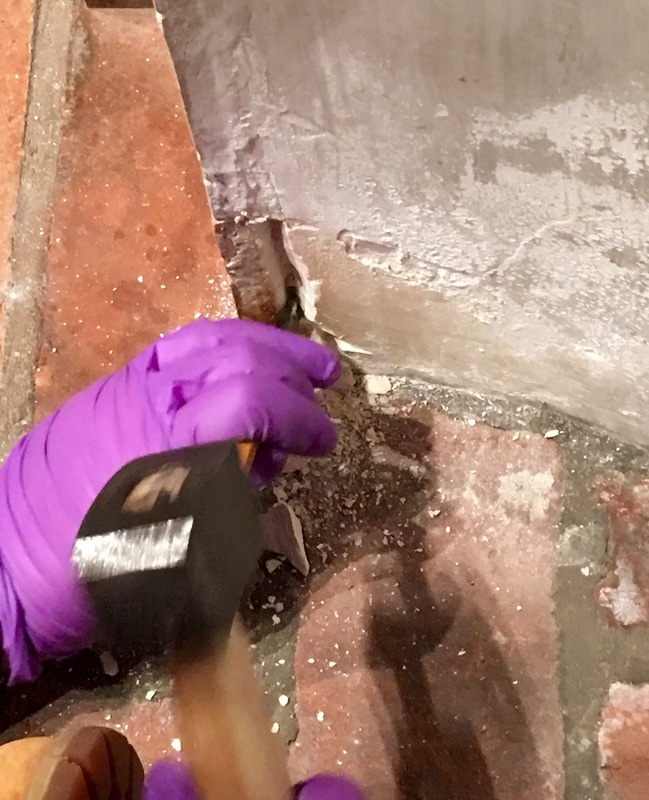
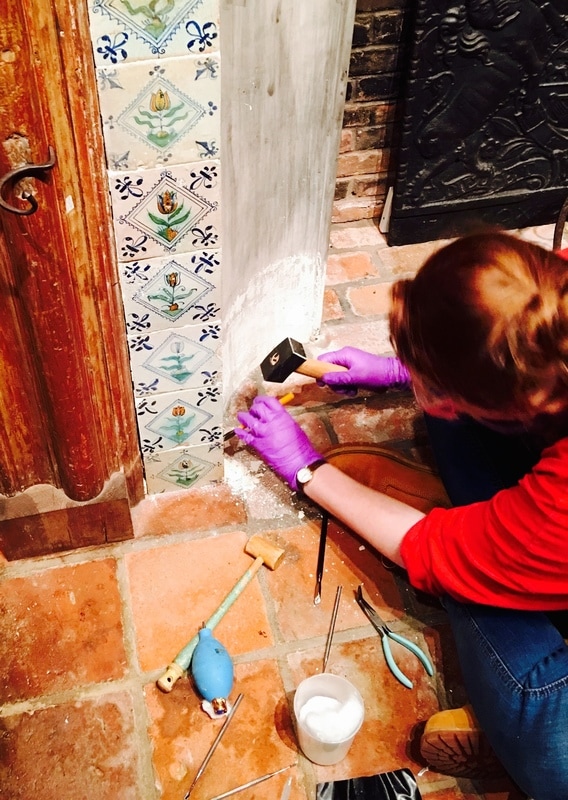
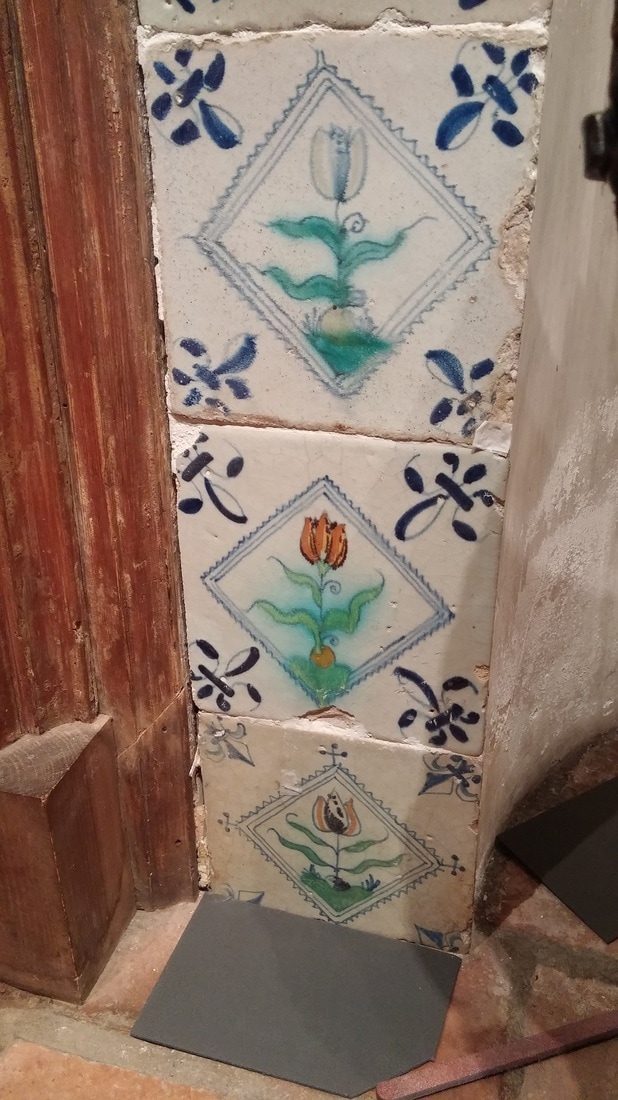
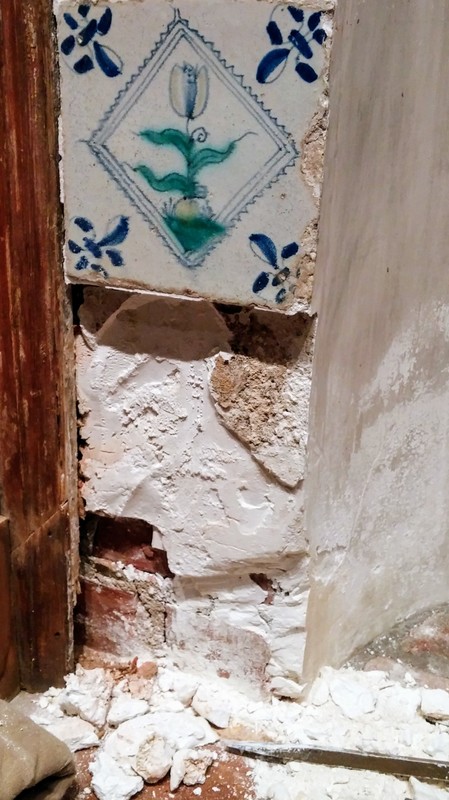
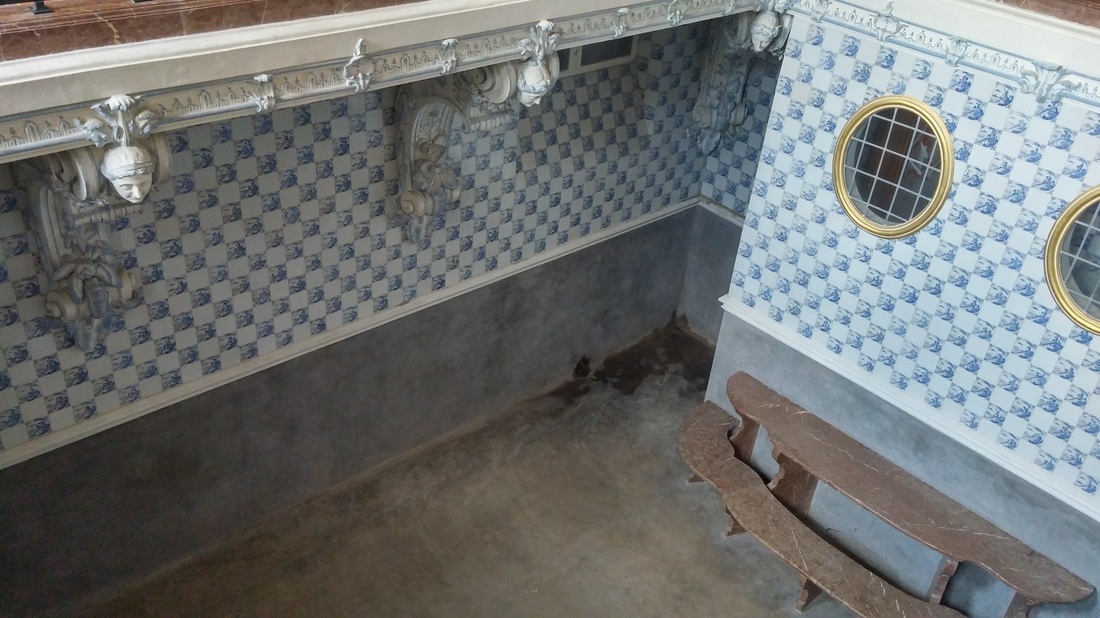
Most if not all of the Delft-tiled fireplaces at Winterthur are probably not original to the house. The Museum's Registration Department holds copies of Henry Francis du Pont's daybooks, journals where he meticulously recorded each and every antique and piece of art that he purchased. By comparing entries in his daybook to receipts from antique dealers, I can hypothesize that du Pont bought all of the tiles in his collection sometime between 1920 and 1940. These dates also correspond to when many of the rooms in the house with tiled fireplaces were installed. 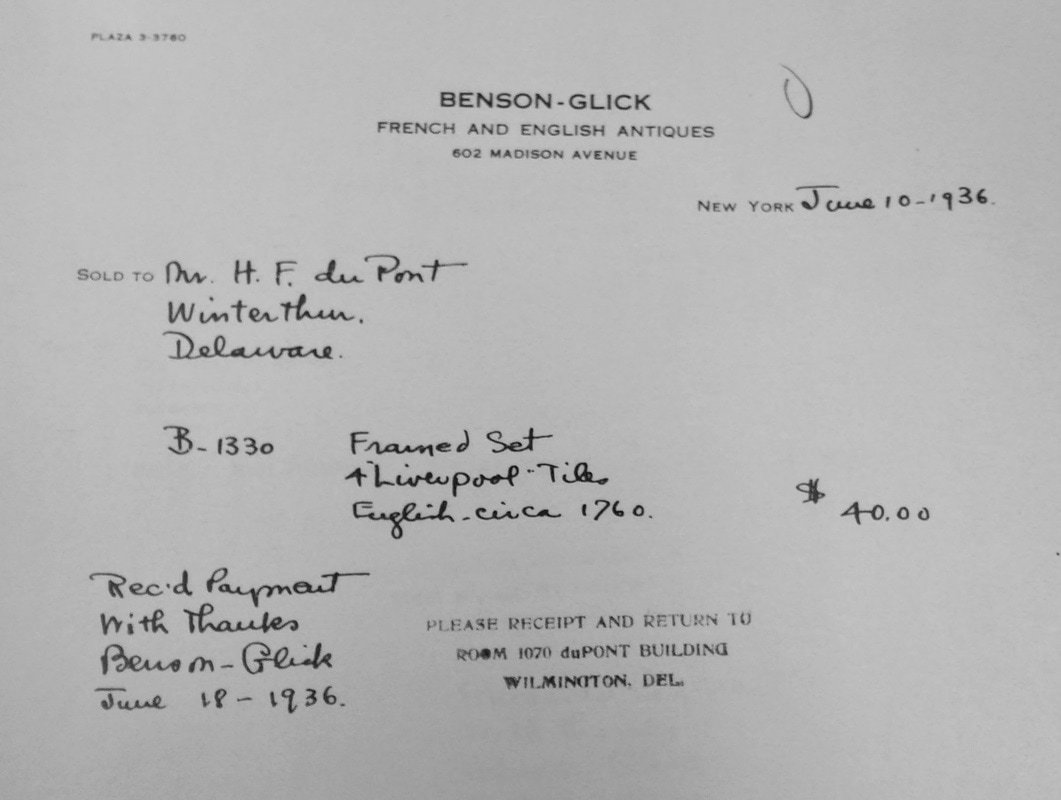 Bill of sale for 4 Liverpool Delft tiles from 1936. Unfortunately most of the descriptions in the daybooks and receipts are vague, making it hard to find provenience. Tiles are traditionally attached to fireplaces using a combination of a mortar (a thin sort of cement) and lime plaster. However, when the Winterthur tiled fireplaces were installed from the late 1920s to the early 1940s, builders bypassed the mortar, instead using gypsum plaster and a creative variety of "modern" materials. Portland Cement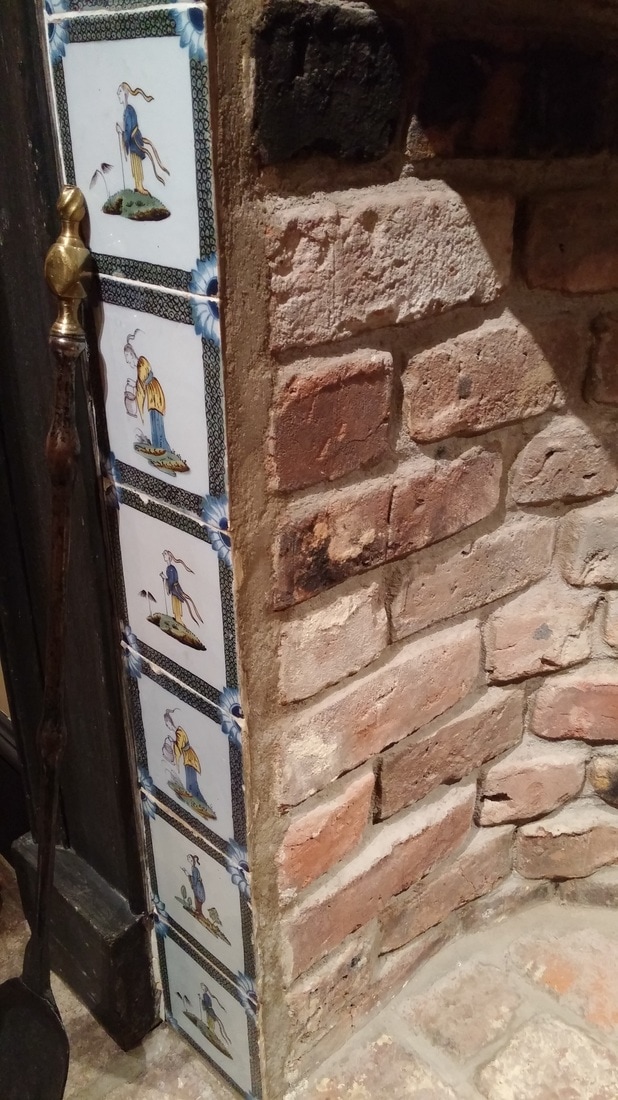 Tiles installed with Portland Cement in the Bertrand Room. The rather culturally insensitive Chinoiserie tiles from the 1750s in the Bertrand Room were installed using Portland cement in the 1930s. According to tile expert, Lesley Durbin of The Jackfield Conservation Studio, Portland cement is an inappropriate material to install Delft tiles. By their composition, tin-glazed earthenwares like Delft tiles are susceptible to the efflorescence of soluble salts. Soluble salts are normally held in the ceramic body, but when exposed to high humidity, they crystalize on the surface, damaging tiles and causing glaze to spall off. Portland cement also is much harder than tin-glazed ceramics, making the prospect of ever removing tiles from this fireplace daunting. Duco Cement?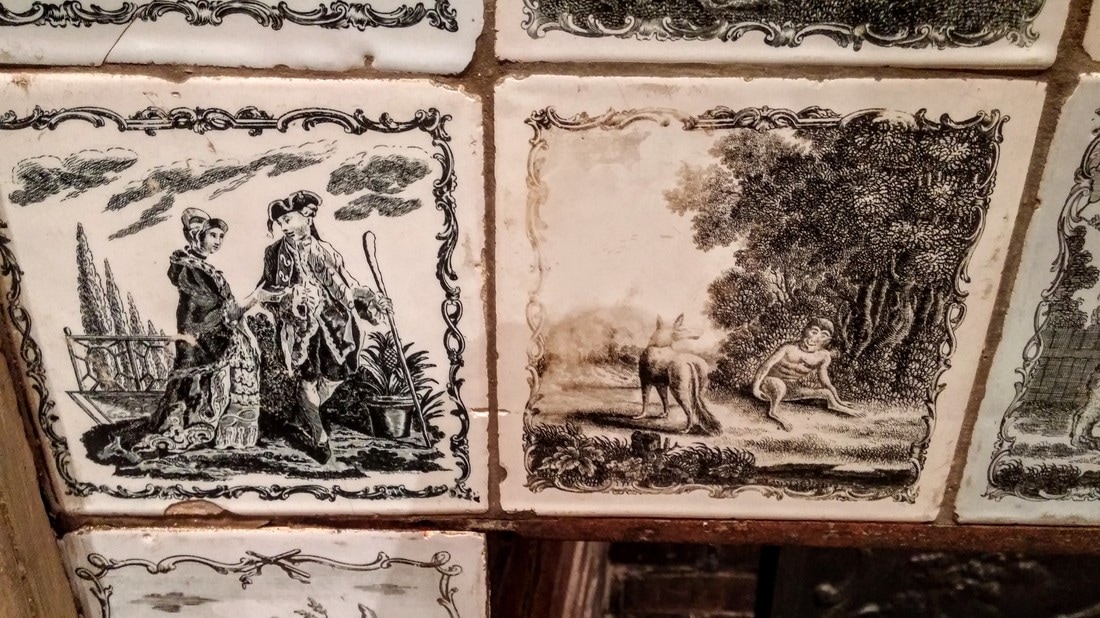 The tiles in the Patuxent fireplace surround were probably attached with DUCO® cement is a fast-drying, cellulose nitrate-based commercial cement. When viewed under long wave ultraviolet light, the grout and mortar fluoresce a light greenish yellow, a classic indicator of cellulose nitrate. The adhesive tends to discolor overtime, giving the grout between these tiles a dark brown stained color. Mysterious Surprises... The front of this innocuous-looking tile masks a mysterious secret. When flipped over.... 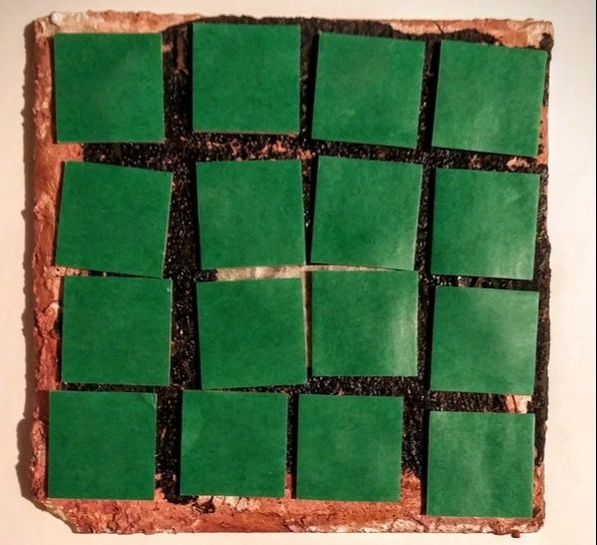 ...whatever this is is revealed. This tile is in storage at Winterthur-- not mounted in a fireplace--but this tile was too crazy to not include in this post. It was coated in a cellulose nitrate adhesive, then a black resin, and finally 16 adhesive tabs were attached over top--all of which retain their plastic barrier layers. Why and when this was applied remains a mystery... Exploratory Excavation of Vauxhall Fireplace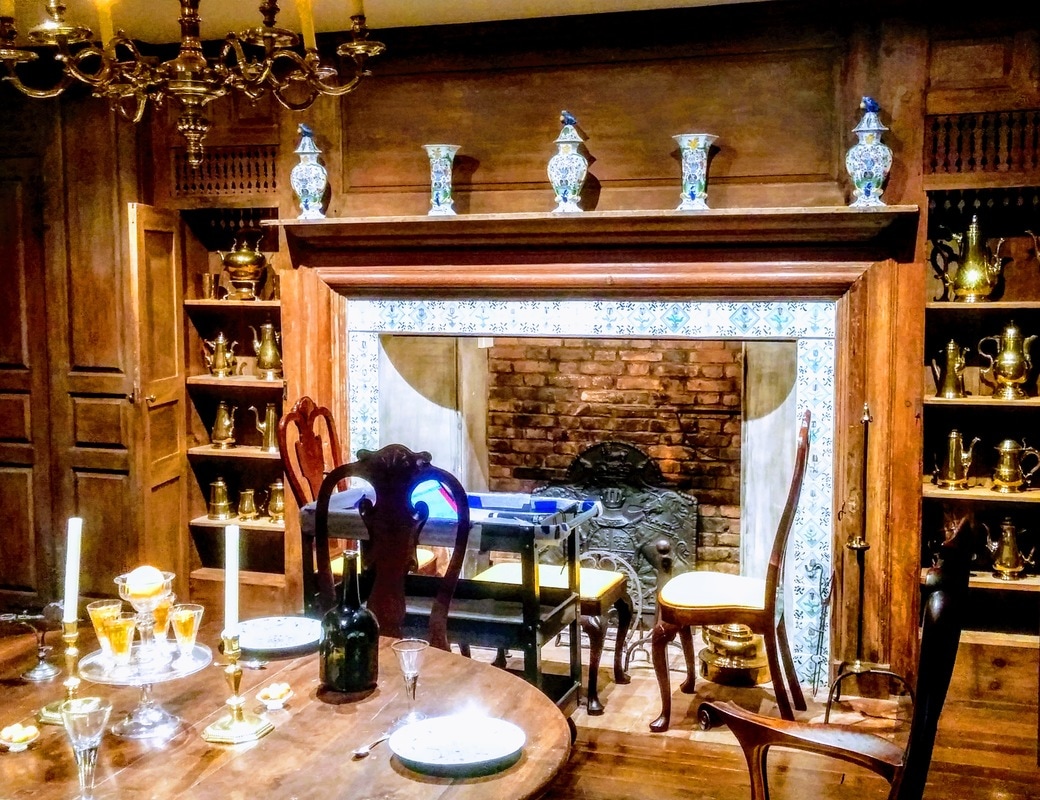 Since building records are eluding me at present, the only way to definitively know how the fireplaces were constructed is to perform exploratory excavations. Vauxhall fireplace on the fourth floor of the museum was damaged in a flood in the 1980s. While it appears structurally stable, the plaster surrounds are powdery and delaminating (below, left). The tiles show evidence of soluble salt damage such as cracking and spalling (below, right). Chemical spot tests reveal that sulphates, common in gypsum plaster (hydrated calcium sulphate, CaSO4•H2O), are the probable culprit. Part of my fellowship project may include dismantling the tiles in Vauxhall fireplace. This would allow me to treat the tiles in the conservation lab (much more ergonomic working conditions as you shall see). In order to conclusively determine how the tiles were mounted in the fireplace, my supervisor, Associate Objects Conservator and Assistant Affiliated Professor, Lauren Fair and I decided to remove one tile from the lower proper right corner of the fireplace. 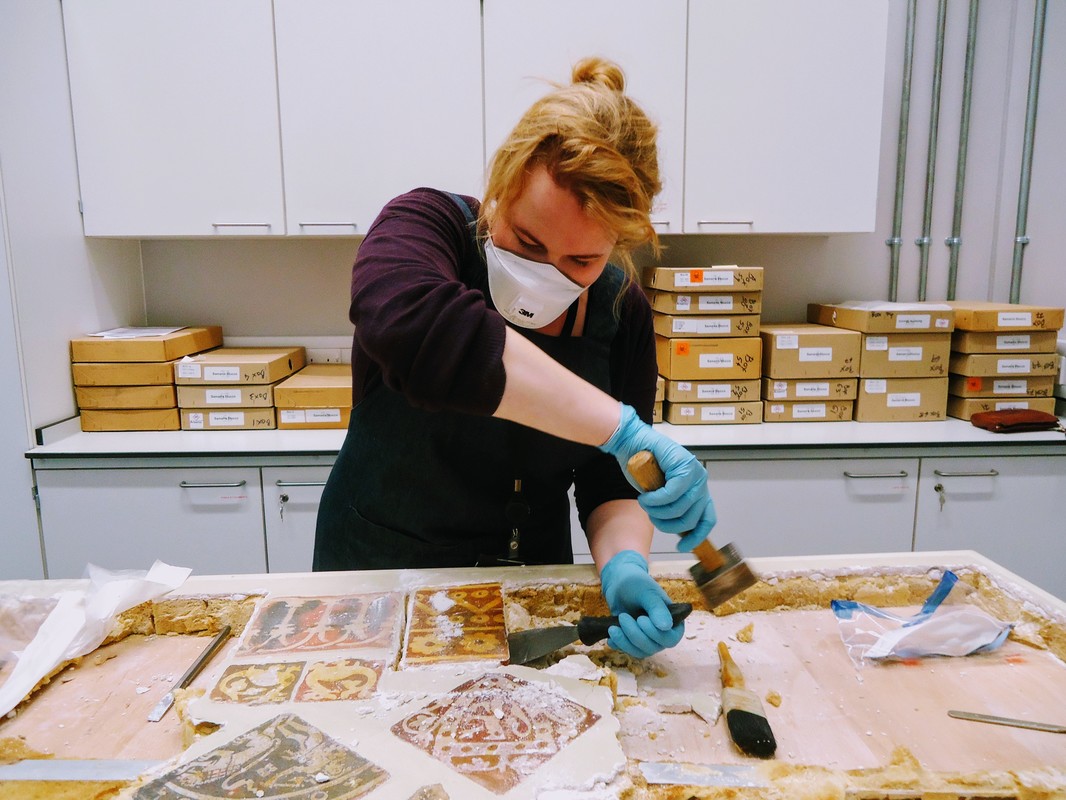 During my internship year, I participated in a project at the British Museum removing Medieval floor tiles from a panel (above). Based on my experience, Lauren and I decided that using a hammer and chisel was the best course of action to remove tiles from the Vauxhall fireplace. After a two-hour delay due to snow, we began the removal process! To protect ourselves from the plaster dust and chips, we wore dust masks, protective goggles, and nitrile gloves and vacuumed dust and debris as we went to minimize disruption to the rest of the objects in the room. To remove the tile, we decided to cut a channel behind the lower tile using a stone-carving hammer and chisel. This was accomplished by sitting or lying on the floor and crouching to strike the plaster at the proper height. Because the tiles are so tightly stacked, the only way to access the tile was from the proper left side. When we finally chipped most of the plaster away, we realized that the tile above had also become detached. To Deinstall or not to Deinstall...When the tiles were removed, we could clearly see that the fireplace had been constructed of brick covered in about an inch of plaster (above, center). The tiles were directly stuck into the plaster without a barrier to protect them from the movement of soluble salts. We still haven't decided whether or not we're going to remove all of the tiles to conserve them. A further consideration of the risks and rewards of deinstall needs to be undertaken. Stay tuned! Thanks for checking back! Be sure to check Twitter for updates under #WeirdTileoftheDay and #WeirdTileWednesday. Tune in on March 15th as I delve into my struggle to find where the tiles came from! 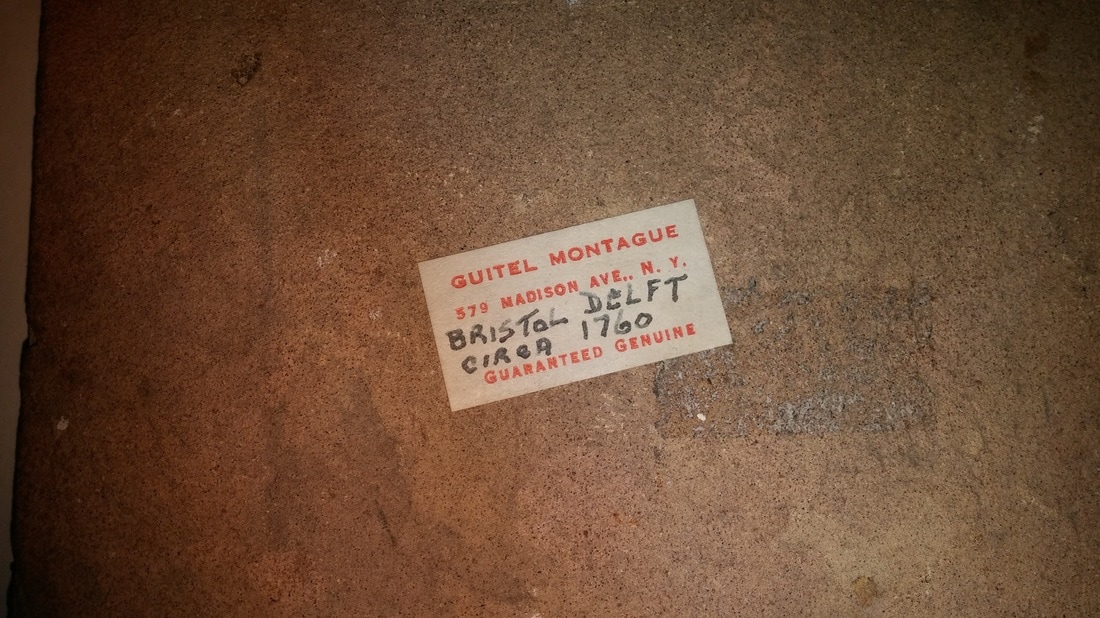 For more information see:
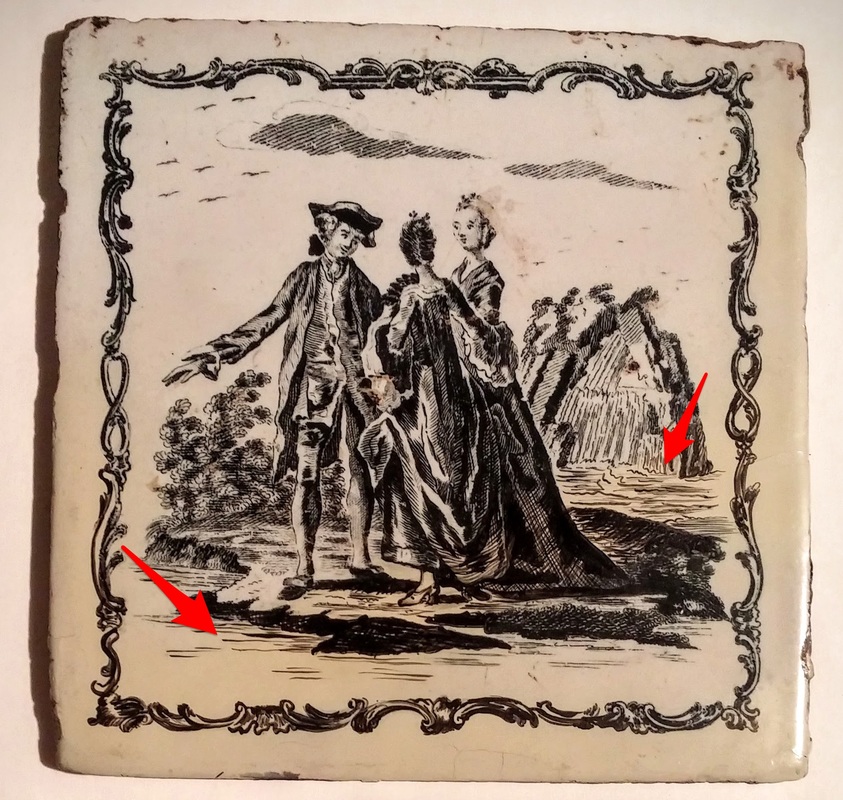
Durbin, Lesley. 18th Century Delft Tiles: English and Dutch Tin Glazed Tiles Circa 1650-1790. http://www.jackfieldconservation.co.uk/18th-century-delft-tiles/ Photos by author unless otherwise stated.
0 Comments
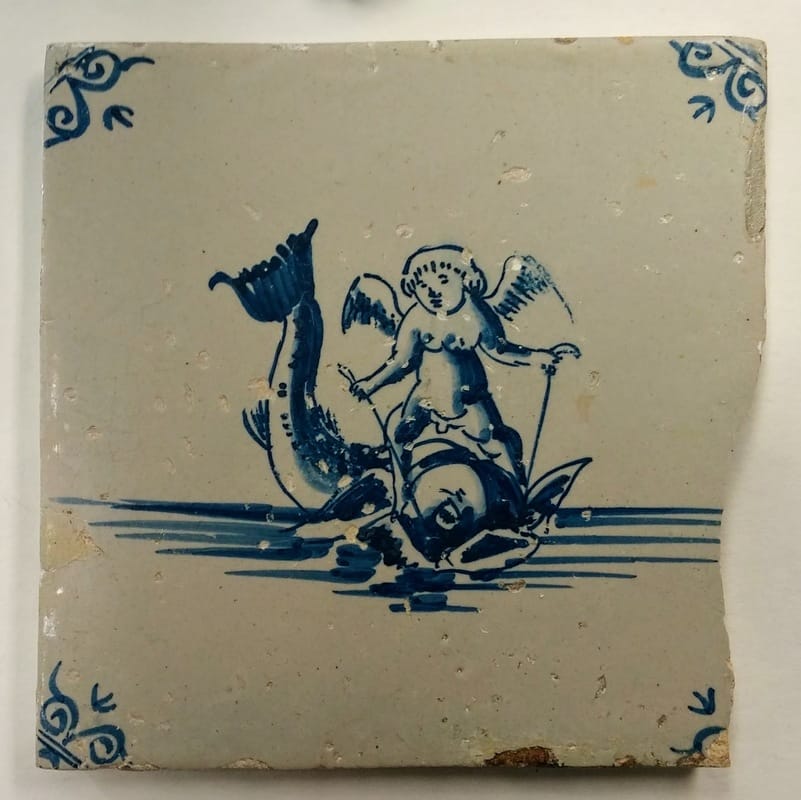
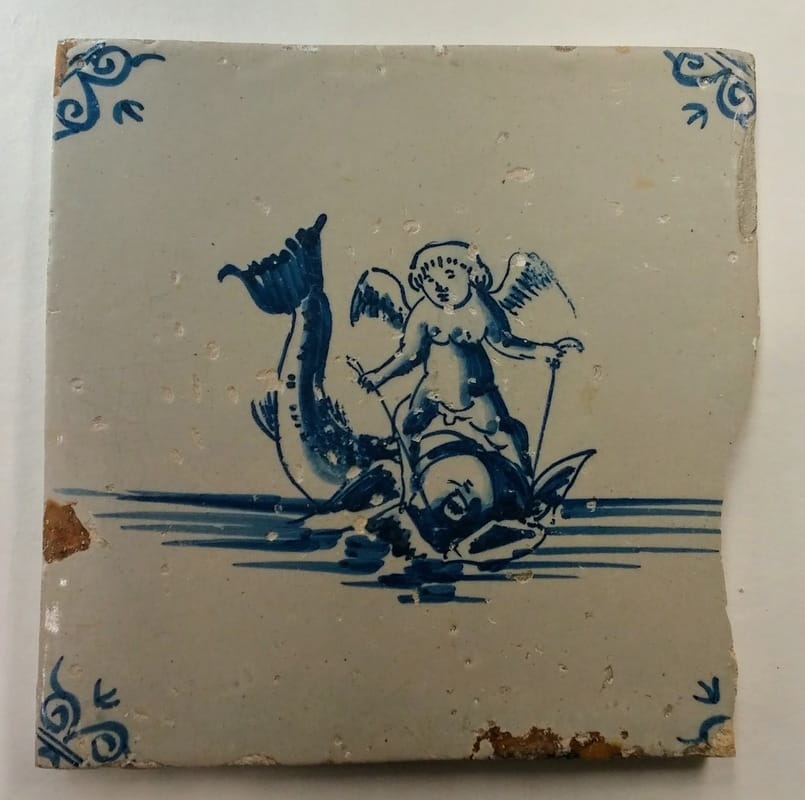
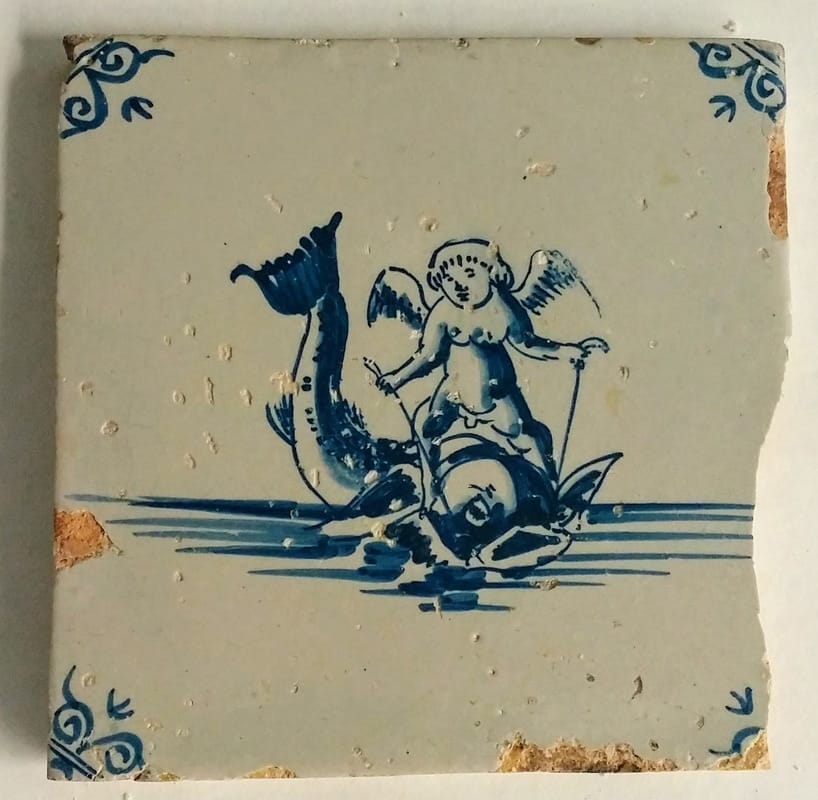
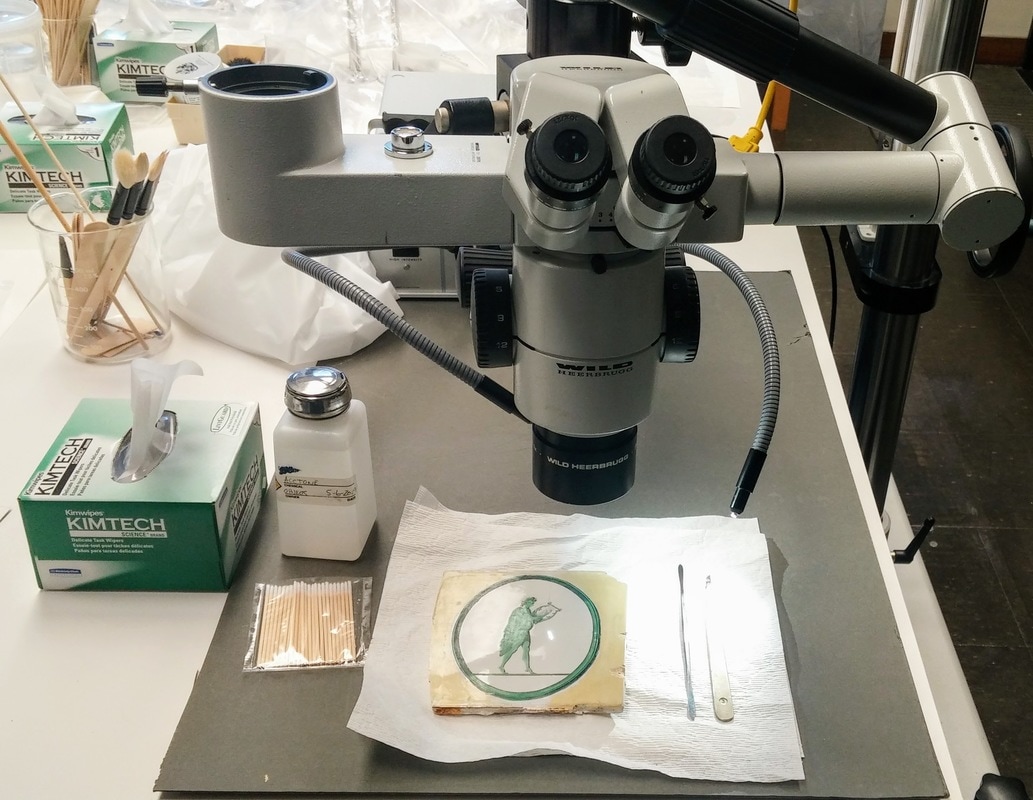
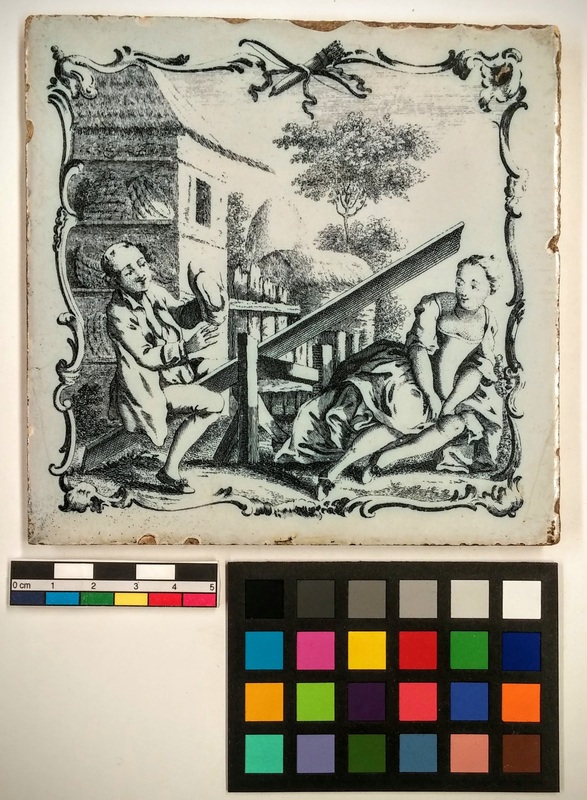
What is Inpainting?When we left off last month, 1969.4732.012 had been filled with Flügger and was ready to be painted. 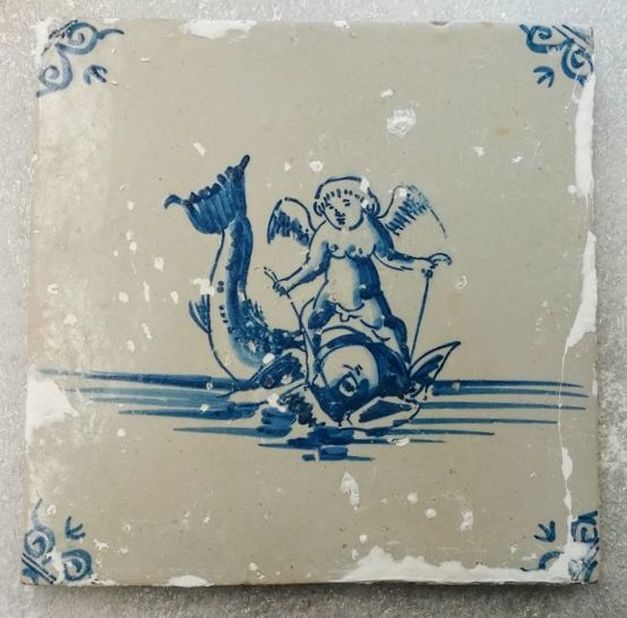 Before inpainting. But filling is not the hard part--especially on a flat object! The challenge comes when you try to inpaint, or match the color of the surrounding original material. The theory of inpainting is that the color of the filled area should not attract the viewer's eye like a white fill would (below, left). Generally with archaeological material from the British Museum, inpainting takes the form of toning the color of a fill to a neutral tone (below, center and right). Sometimes this backfires as in the case of a fill done on the Elgin Amphora before it came into the British Museum's collection. The bright, orange "neutral" tone draws the eye to the fill rather than the original material (below, center). In decorative arts collections like those at Winterthur, if the design is repeated or if other examples exist, it is sometimes replicated. The curator and I decided to go for a decorative arts approach to the tiles. They do not have any known provenience and many of their designs are well-documented. Their main significance in the collection is an aesthetic one. 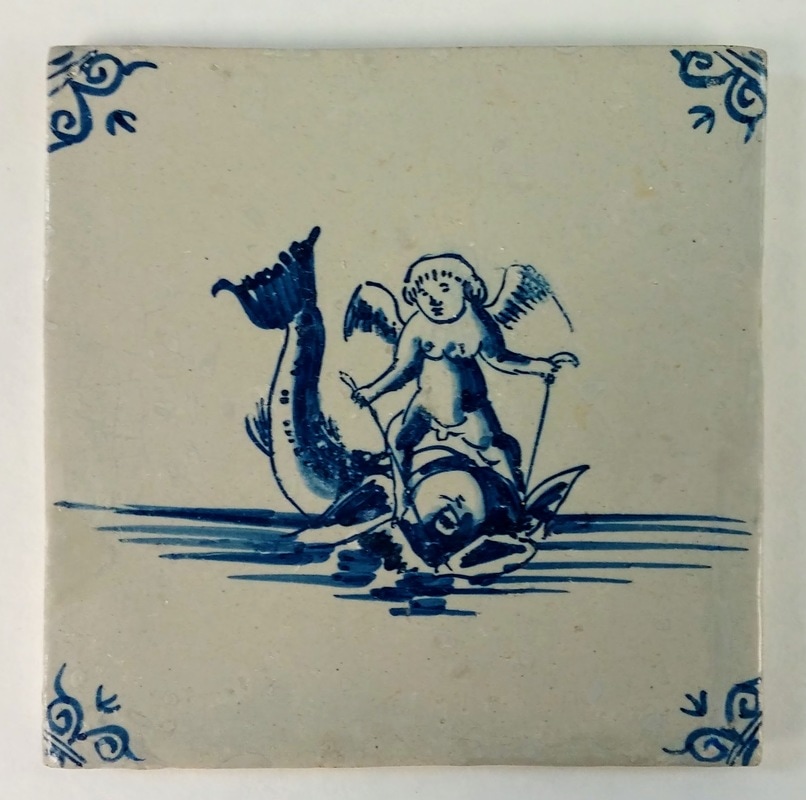 After inpainting. Inpainting should never cover any of the original material. When it does, it is called overpainting. Some restorers in the past painted over the original material in order to create a seamless color. This can have disastrous results when the paint ages poorly (see below). The red rectangles indicate the area of the tile that has been filled. The person who originally restored this tile painted over the fills and onto the glazed surface of the tile. At one time, this probably blended in very well. However, the cellulosic paint has discolored. As you will see, modern conservators use of inpainting can be almost as effective as overpainting at restoring the aesthetic integrity of works of art--but in a much more ethical and controlled way. 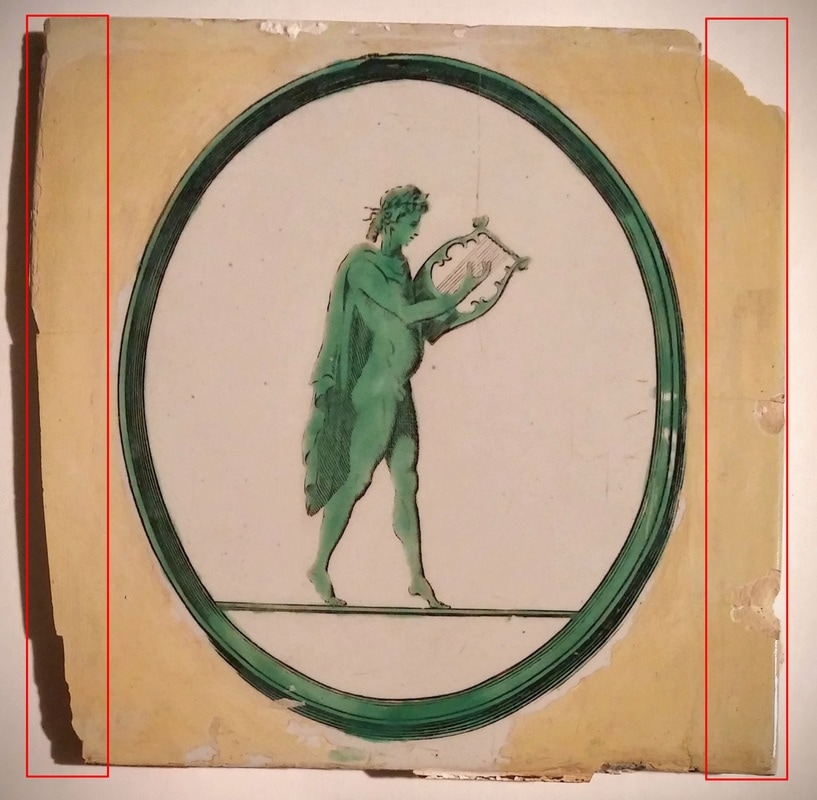 Historic fills and overpaint have aged poorly. The fills are made of a brittle epoxy material and the paint has discolored and is flaking. Both the fills and the paint will be removed. 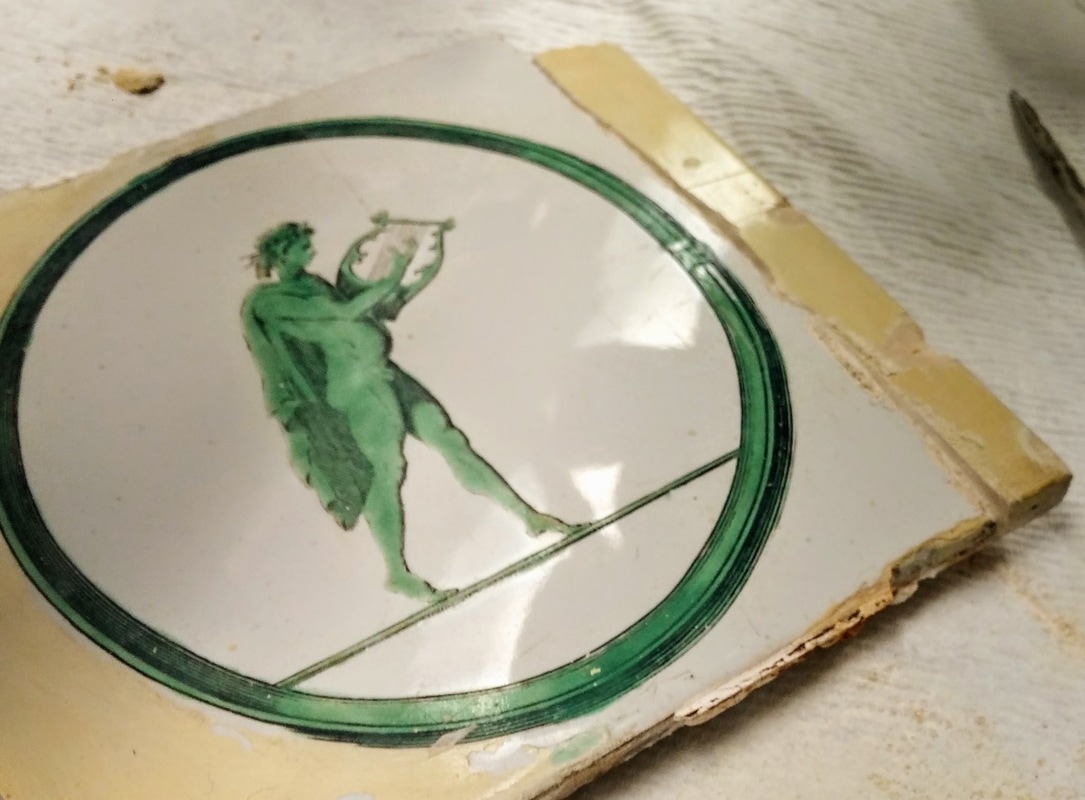 Removing some of the paint with a scalpel under a microscope to expose the filled area (right, yellow) and original white area. Pigments, Media, and Other MaterialsSome conservators prefer inpainting with dry, ground pigments, like this beautiful (and functional) display in the Winterthur Objects Conservation Lab. These are finely ground and applied to fills in a medium, such as Primal WS-24 or Golden Acrylics Porcelain Restoration Glaze.  Dry ground pigments, Winterthur Objects Lab. I've only really used them to make epoxy color fills for porcelain. These fills are very permanent so any guesswork with matching the color is best avoided. 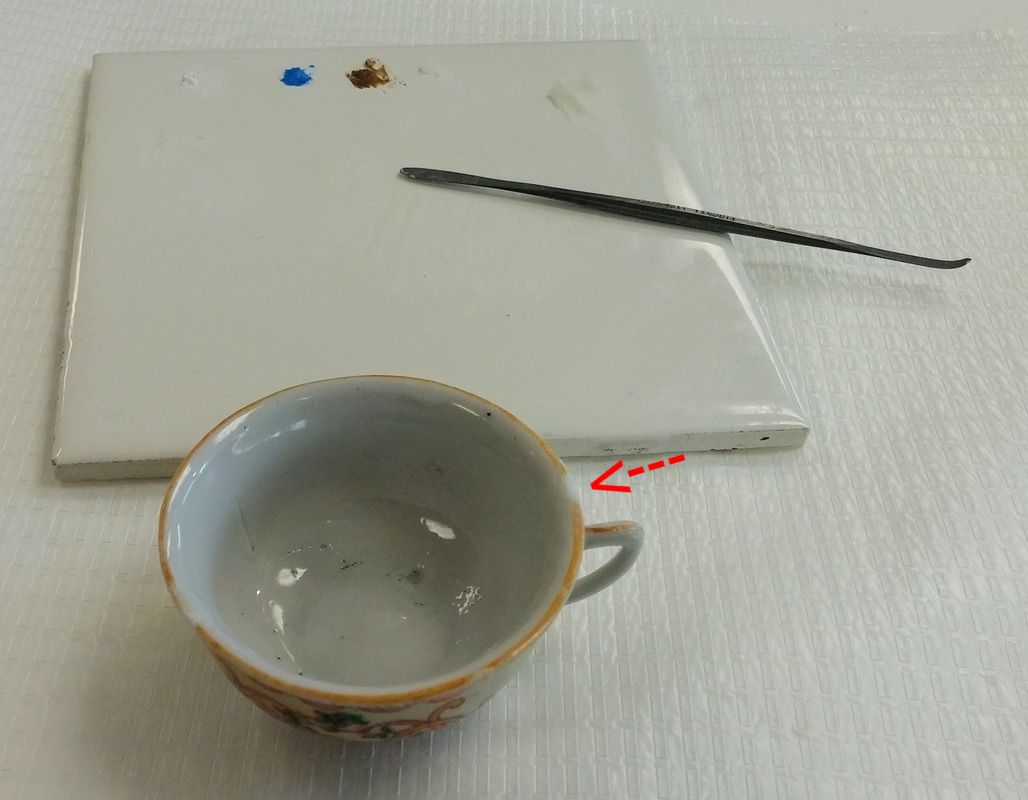 Epoxy color fills (red arrow) are most often used on porcelain as they allow conservators to match the color and translucency of porcelain. Sometimes conservators opt not to use them at all because of their irreversibility and tendency to yellow with age. I personally prefer using Golden Acrylic paints, because they are what I'm most familiar with. A major disadvantage of working with acrylic paint is that it dries slightly darker. This is especially challenging when trying to exactly match the color of a large area of fill! 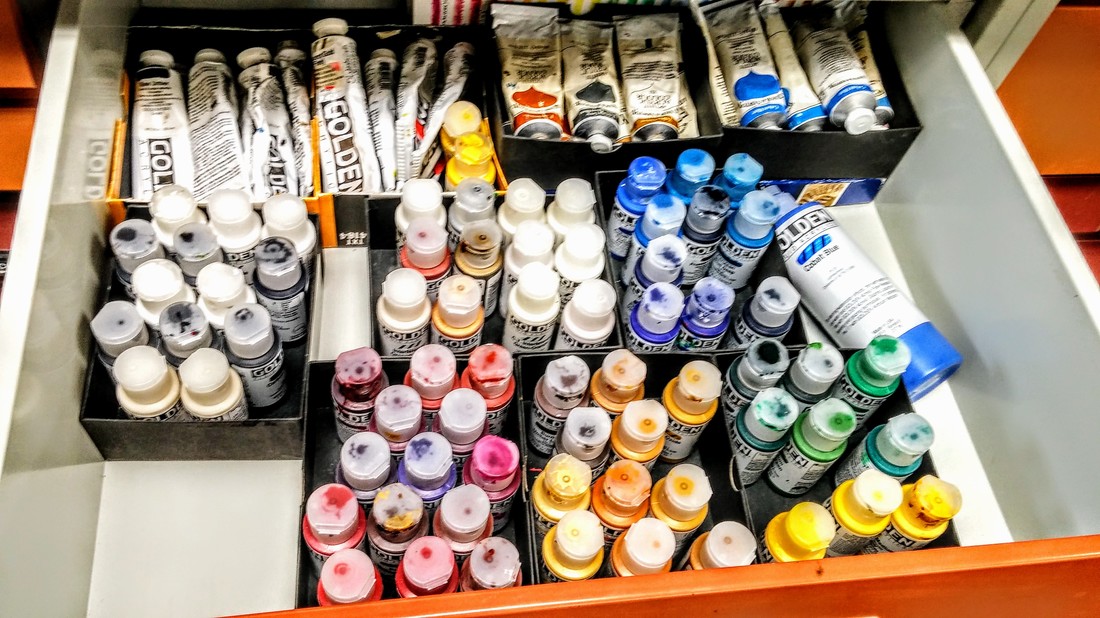 The last crucial materials for inpainting are the proper brushes (I especially like sable). I like using a Size 4 round brush and a 1/8" flat brush (a) for large areas of fill (as large as then can be on a 5 x 5 inch tile). Sizes 1 and 00 or 000 brushes are great for smaller fills or inpainting detailed designs (b). Brush (c) is a cheap Size 1 synthetic brush that I destroyed. It's great for replicating the spots and imperfections of a surface. 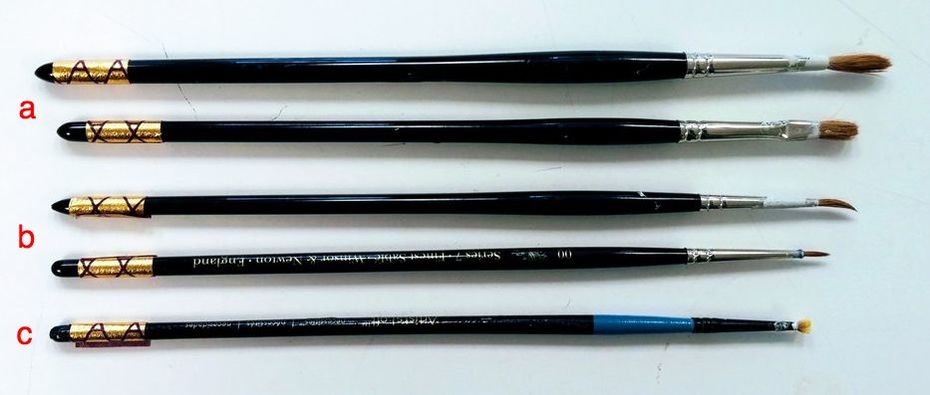 Inpainting Dutch and English Delft tiles For the two tiles I will present, I've been experimenting with a mix of acrylic paints and Primal WS-24, an acrylic dispersion. When dried, Primal has a hard, clear, glaze-like appearance. It can also be sanded with MicroMesh, fine-grade sandpaper to make the surface even more even. 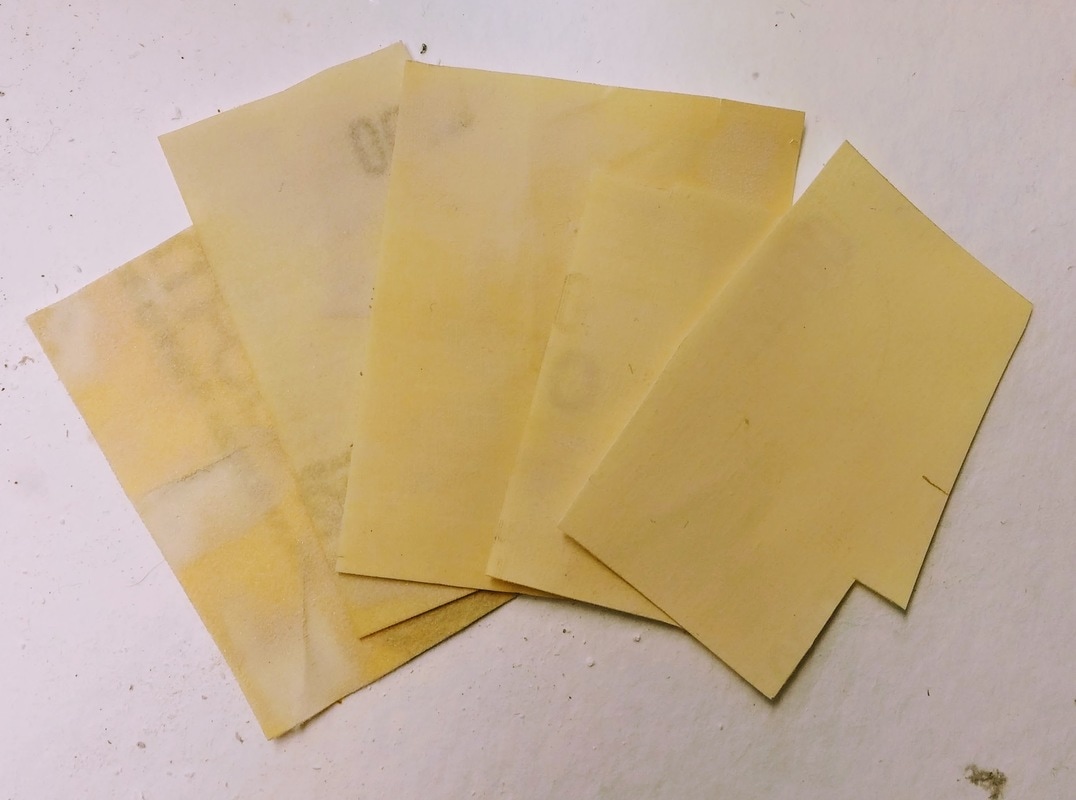 MicroMesh fine-grade sandpaper in grits 1500-12000 (left to right). Sometimes the conservation gods allow you to color match on the first try. This 17th century Dutch tile only took an hour to inpaint. But this is hardly the norm. Sometimes it takes hours and hours to get it right. If you were asked what color the English Delft tile below is, you would probably say white, right? In theory, yes. But when compared with the bright white of the detachable plaster fills (below, right), it appears much more gray. Matching this color involved mixing 8 different colors of paint including: Titan Buff, Titanium White, Paynes Gray, Cobalt Blue, Hansa Yellow Light, Yellow Ochre, Alizarin Crimson, and Raw Umber. As per advice from my high school paintings teacher (thanks Ms. Mortl!), I never use black paint. I added the different colors in very small amounts to Primal to match the tin-glaze. This process takes the longest--especially for such a large area of fill. The slightest difference in color will really stand out and distract the viewer.  The lovely yellow sponge of my Sta-wet Palette keeps acrylic paints fresh over many days of work. Once the correct color is made (after many many many attempts), it was applied to the fills and allowed to dry for a week. The paint layers had dried differently, leaving a slightly raised and uneven surface. You can see in the photo on the left that this caused the fills to appear darker. To remedy this, I polished the painted surfaces with grades of MicroMesh up to 12000. This gave the tile a seamless surface, allowing the tile to be seen as it once would have looked, while allowing careful observers to see that it had been filled. Thanks for checking back! Be sure to check Twitter for updates under #WeirdTileoftheDay and #WeirdTileWednesday. Tune in in two weeks as I discuss how tiles were once mounted in fireplaces!
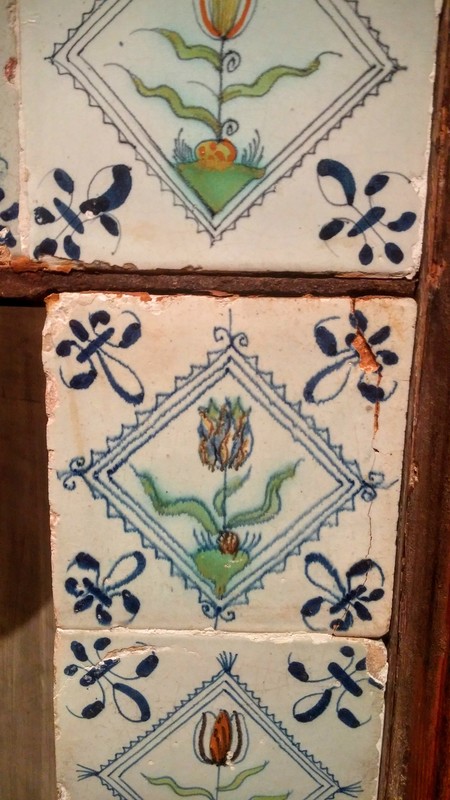
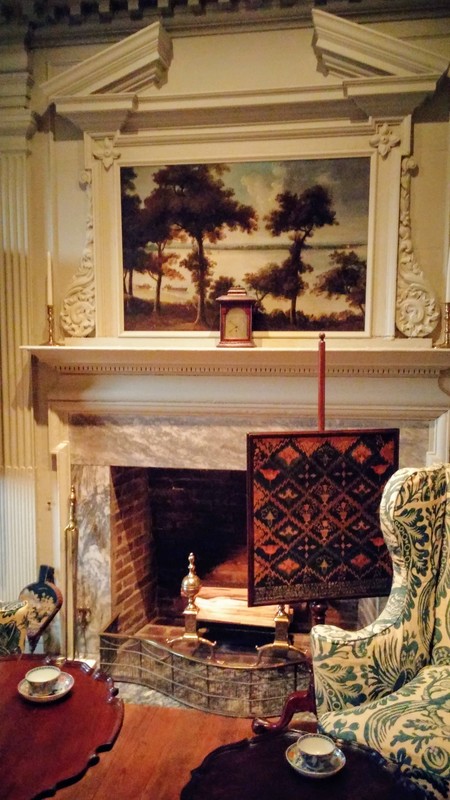
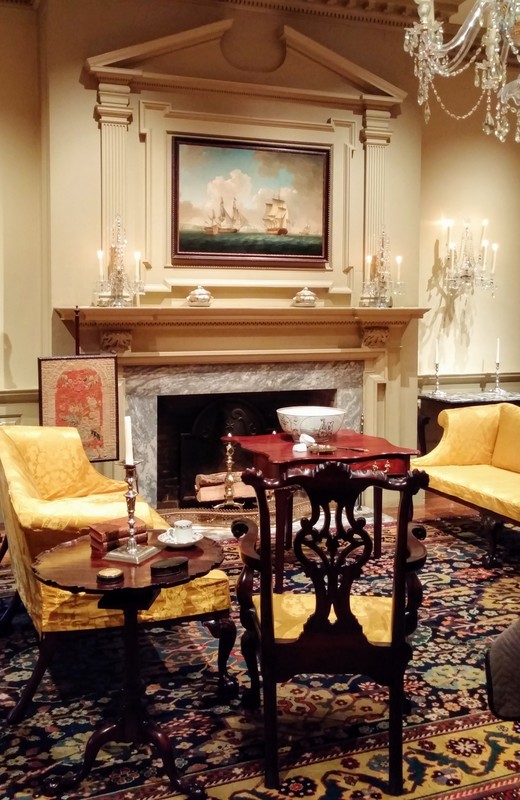
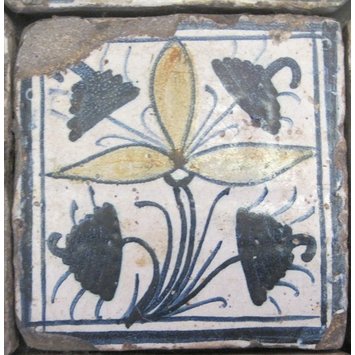
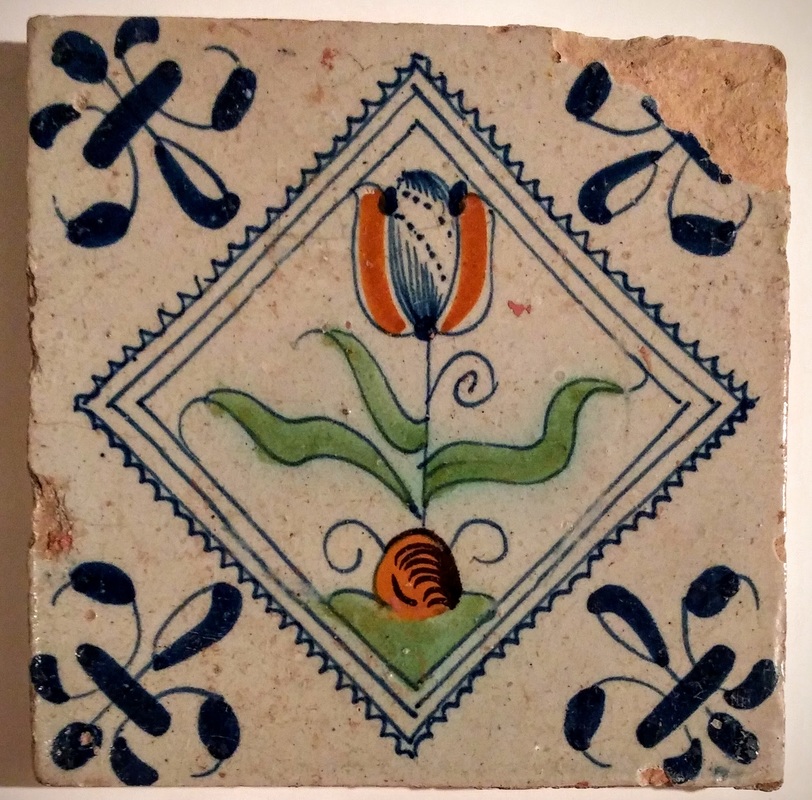
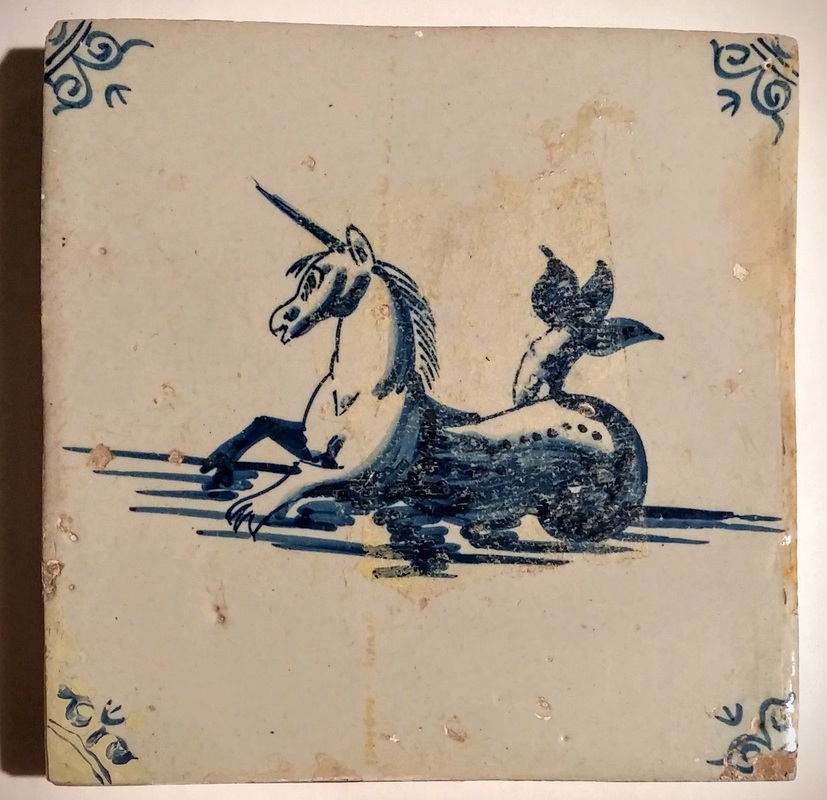
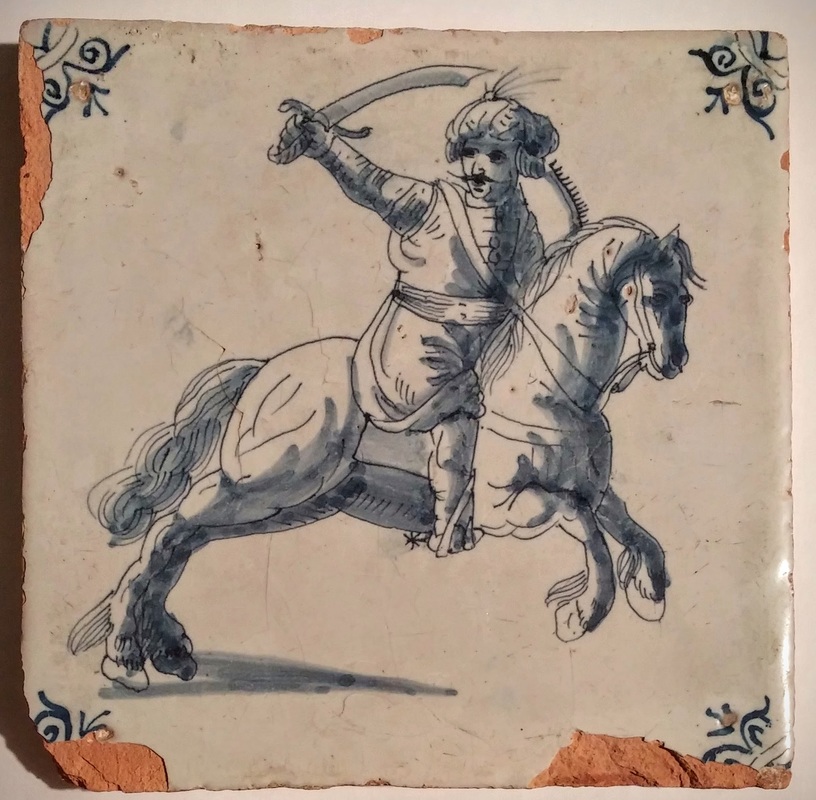
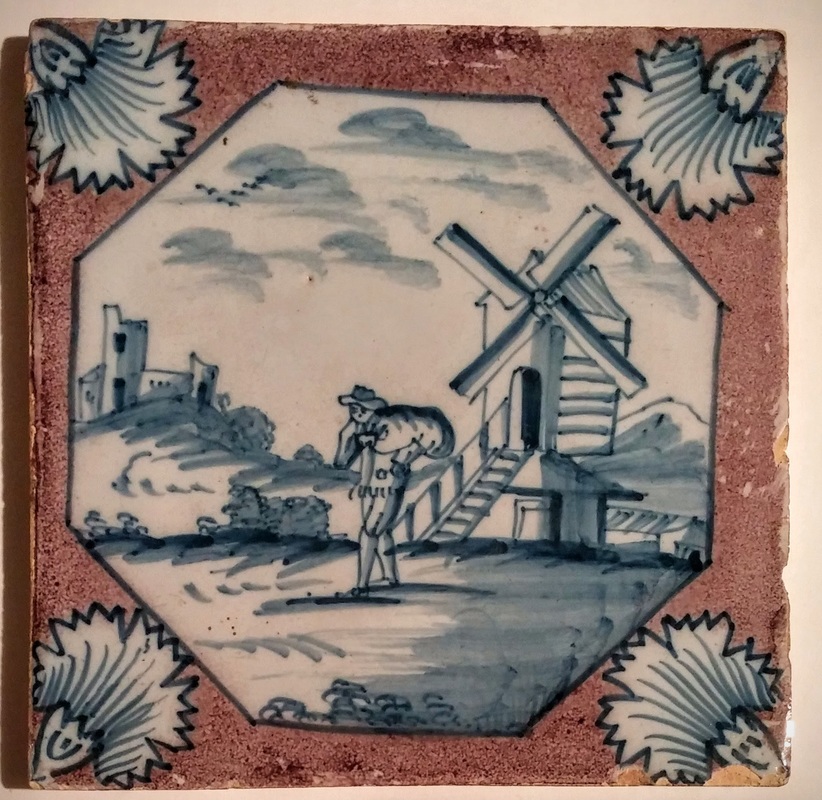
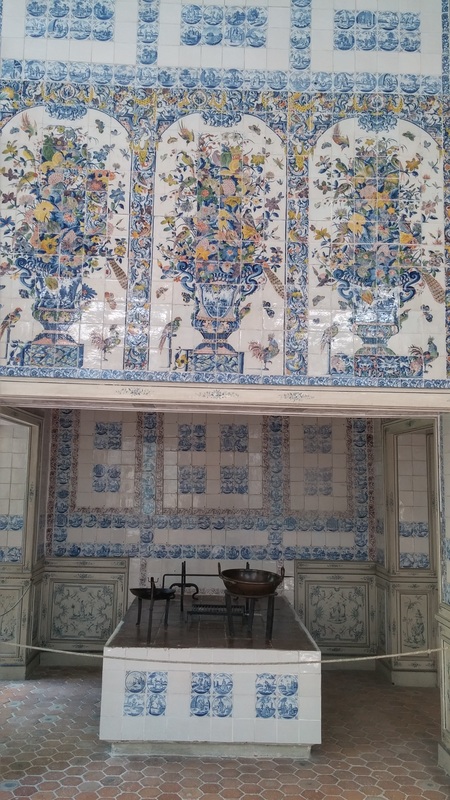
In cold climates, like in Northern Europe and North America, fire was often the primary source of warmth. Control of fire and the ability to bring it inside one's dwelling was paramount to survival. However, having fire indoors was also incredibly dangerous. Though the City of London banned wooden chimneys in 1419, buildings continued to be constructed of wood until after the Great Fire in 1666. 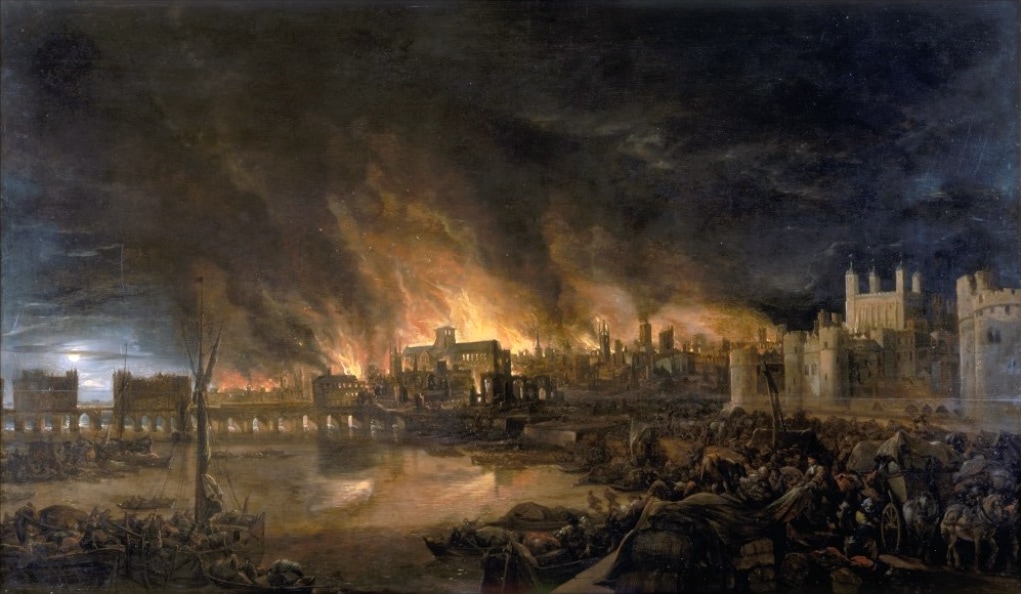 80% of the buildings in London were destroyed in the Great Fire. Some contemporary Britons saw the destruction as a sign from God, based on the year it occurred (1666). Unknown artist (Wikipedia). Winterthur Museum contains 59 fireplaces, some of which are merely facades. Of those, 11 have Delft tile surrounds of British or Dutch origin. To maintain consistency with the pieces in the collection, this post will focus primarily on the history of British and Dutch fireplaces in Europe and colonial North America. 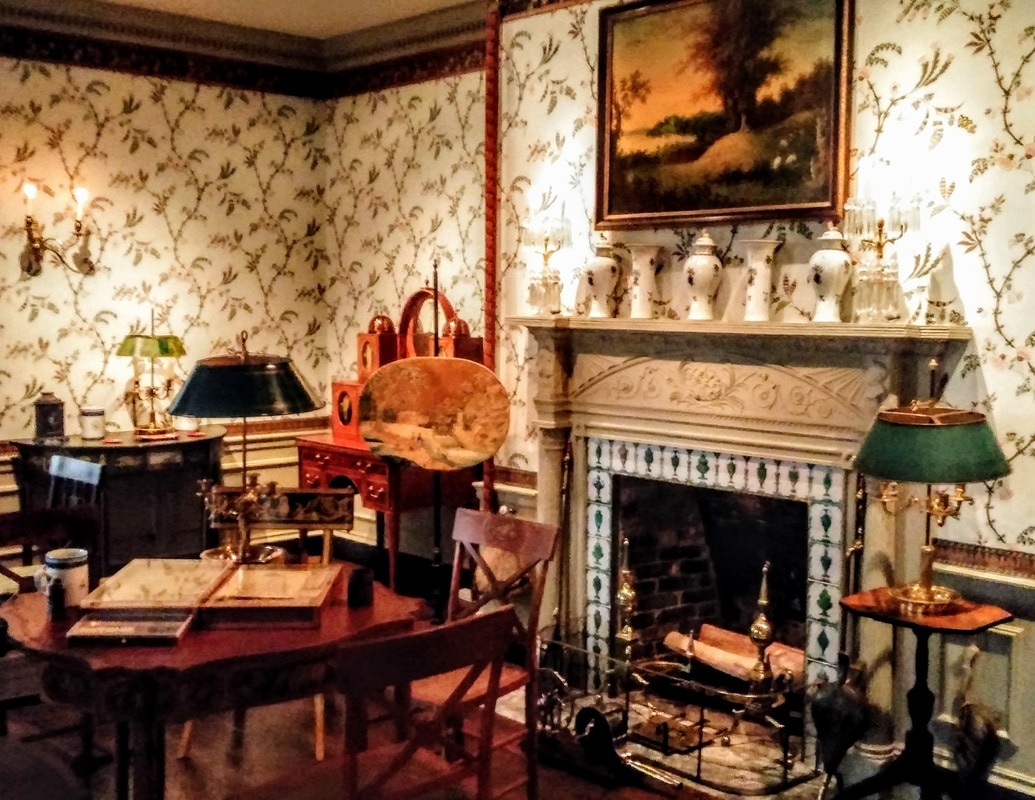 Imlay Room, Winterthur. Green enameled "urn" tiles were chosen by H.F. du Pont in the 1930s to match the colors of the room. Though they were born out of utilitarian necessity, fireplaces came to symbolize comfort, often showing off the wealth and taste of homeowners. Roman Britain: Central HeatingWriting around 7 B.C., Greek-born Roman philosopher Strabo writes in his Geography of Britain: it is "the home of men who are complete savages and lead a miserable existence because of the cold" (II.5.8). Indeed the gray climate of Britain must have been a shock to Roman soldiers from the southern reaches of the empire. After conquering parts of the island by 47 A.D. after nearly a century of attempt, Roman architects and engineers built hypocausts. A type of underfloor heating, a hypocaust from old Londinium's Billingsgate Bath House can be found under a modern office building (below). The basic principle consists of an elevated floor under which hot air is blown from a furnace. As this was labor-intensive to maintain, large villas and bath houses most commonly employed hypocausts. 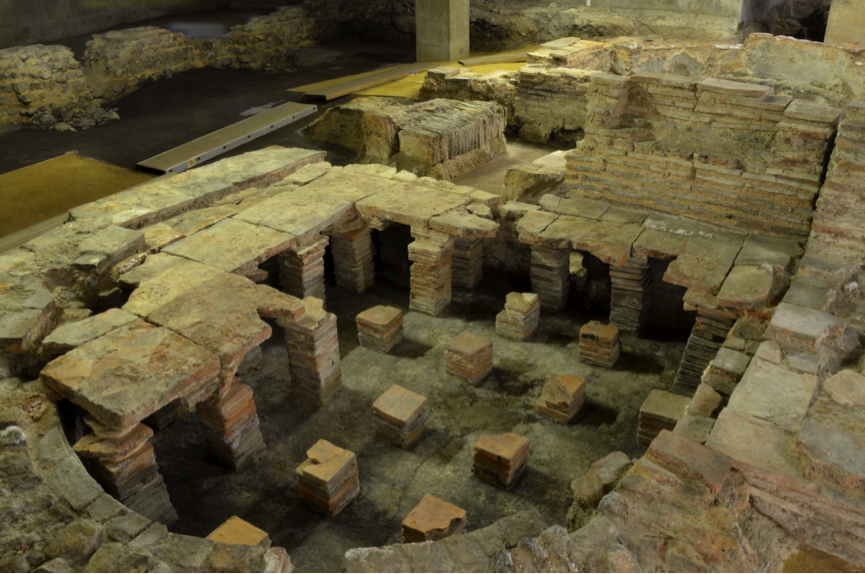 The "dark ages"When the Romans left Britain around 410 A.D., seemingly modern conveniences like central heating went with them, not to be seen again until the 1850s. In the new cultural movement, germanic tribes like the Anglo-Saxons built structures with large, great halls heated by a central hearth, à la Beowulf or scenes from the TV show Vikings (a guilty pleasure). The smoke was moderately successfully drawn through an open hole in ceiling. Presumably these spaces were dark and smoky and one can only imagine the problems that rain or snow would cause. These central hearths were used for cooking as well as warmth. 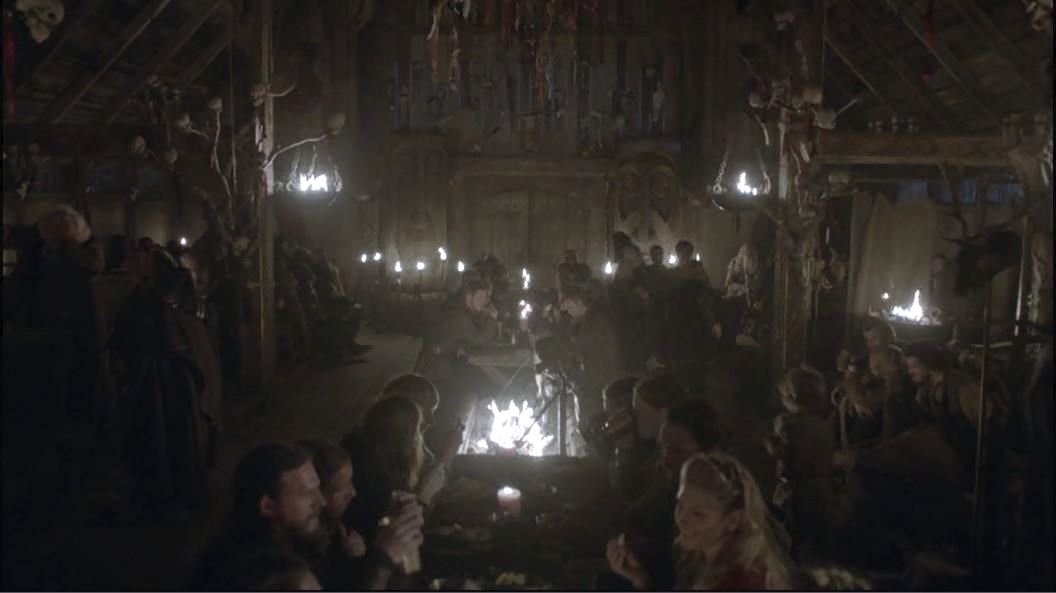 Imagining of a dark and smoky great hall. Vikings on the History Channel. 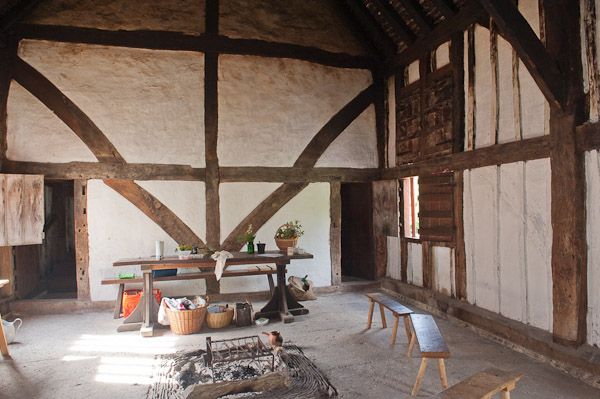 Reconstructed Medieval Hall, Weald and Downland Open Air Museum. Origins of Proper VentilationIn the middle ages, around 1200, Norman fireplaces, with proto- and actual chimneys represented a significant improvement on open air central hearths. The "Norman fireplace" from the Tower of London is a rare surviving example of this type. 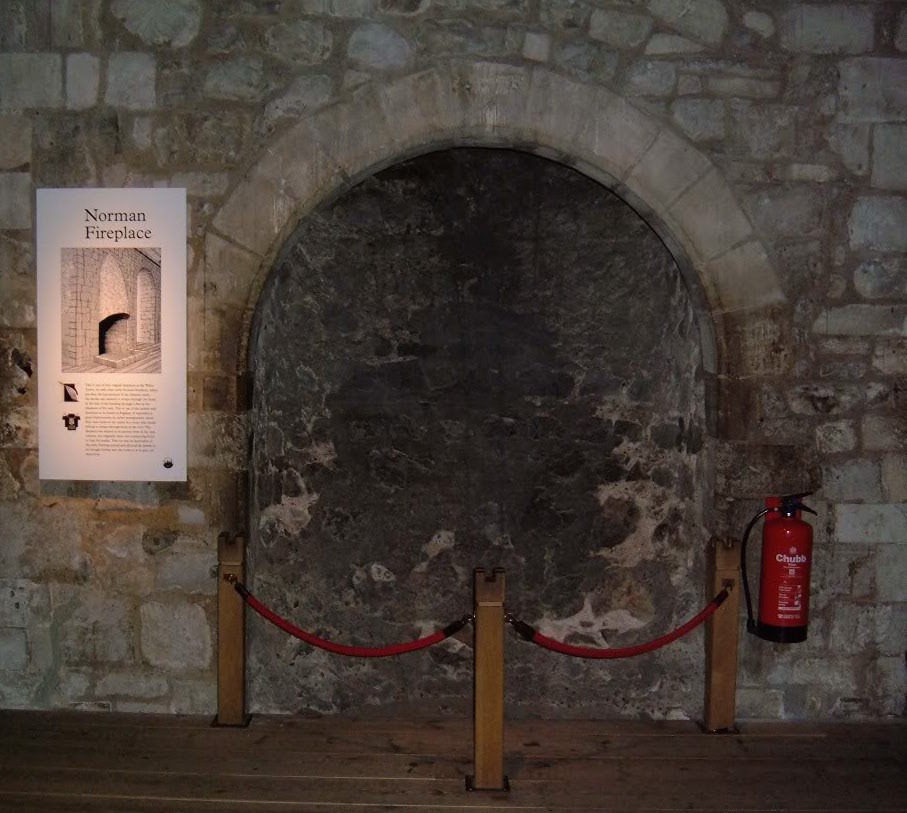 One of four Norman fireplaces in the Tower of London. This Norman fireplace probably had a hood, made of wood and cloth over it to direct smoke up the flue and outside. The fireplace at the Tower of London is carved directly into the thick stone wall. This design is similar to a "jambless" (without jambs, or sides) fireplace which was commonly used by the Dutch both in Europe and in the early American colonies. These more often employed chimneys, as the walls of colonial houses generally were not 10 feet deep. 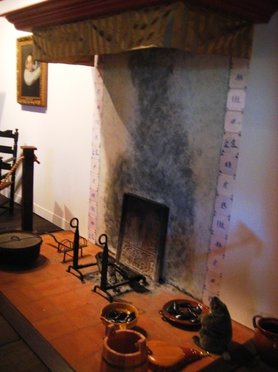 Reproduction jambless fireplace with Delft tiles. Crailo State Historical Site, Image Copyright Columbia County Historical Society. A Variety of Uses: inglenookThe "inglenook" fireplace was the next innovation. An archetypal specimen can be seen in daily use at Hampton Court Palace. Built in the early 1500s, this stone and brick fireplace is the epitome of a utilitarian Tudor fireplace. The fireplace is recessed into the wall, creating a chamber in which to cook. A chimney vastly improved working conditions and smoke was no longer as much of an issue. In an added bonus, spices, salt, and other foods that were susceptible to mold and moisture could be kept in the inglenook fireplace to keep them dry. This was especially useful in the humid climate of England. 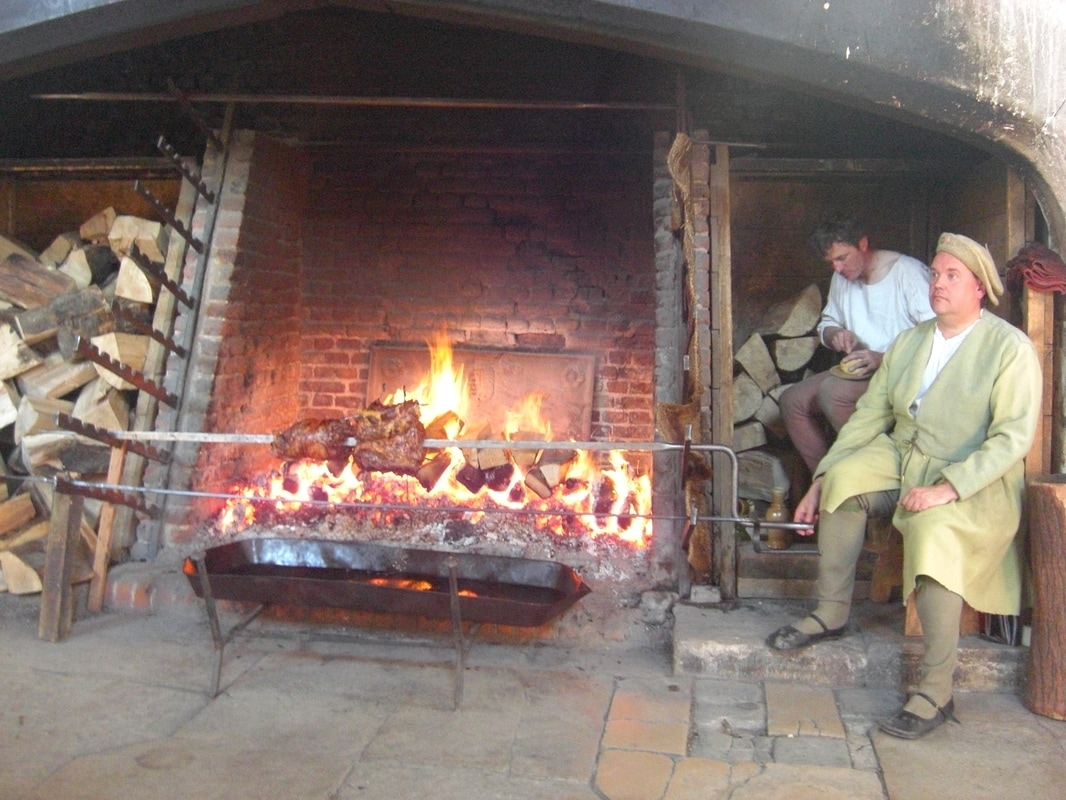 Hampton Court Palace inglenook fireplace, complete with reenactors and roasting meat. 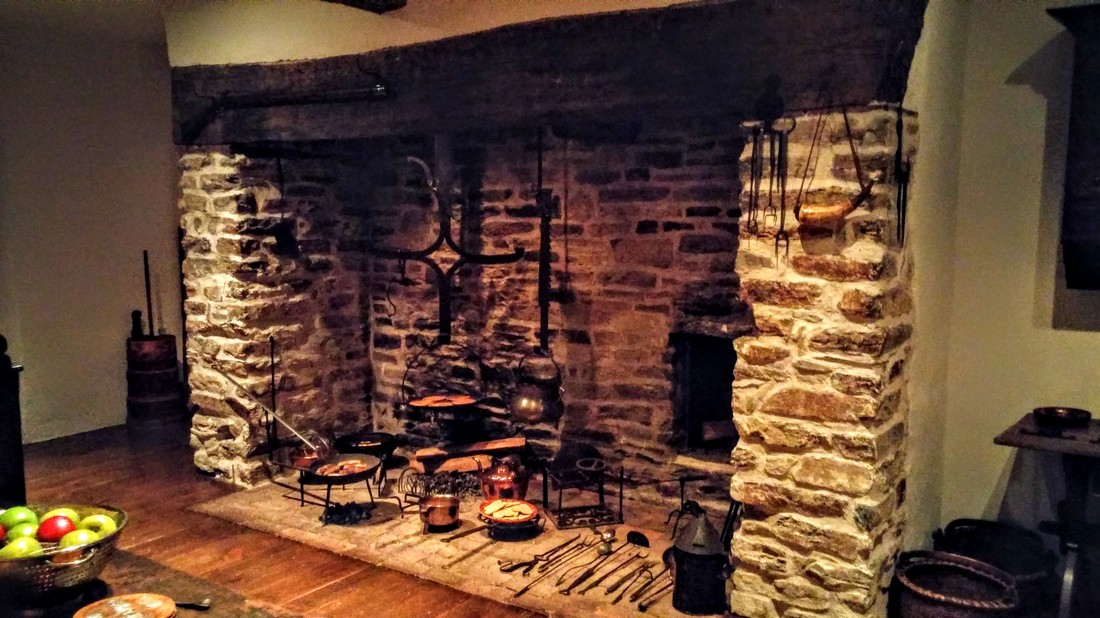 A similar, more utilitarian version of an inglenook fireplace in the Kershner Kitchen at Winterthur, c. 1755. in the rest of the HomeThough their main purpose still was to provide heat, fireplaces in public areas of the home were generally more decorative. Tiled fireplaces did not come into prominence until the 1650s, but they remained popular in North America through the early 1800s. Early fireplaces incorporated Dutch tiles with hand-painted scenes, flowers, and sea monsters. When English transfer-print tiles blazed onto the scene in the 1750s, the cheaper tiles were all the rage in the new world. Tiled fireplaces, rather than those with ostentatious marble, gave the middle class a cost-effective way to display their wealth and taste. 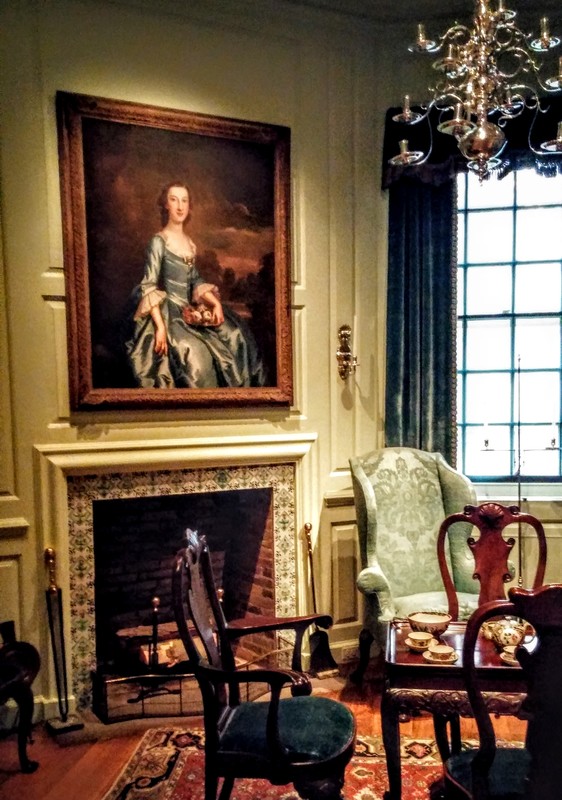 Fireplace in Readbourne Parlor at Winterthur with c. 1650s Dutch tulip tiles. 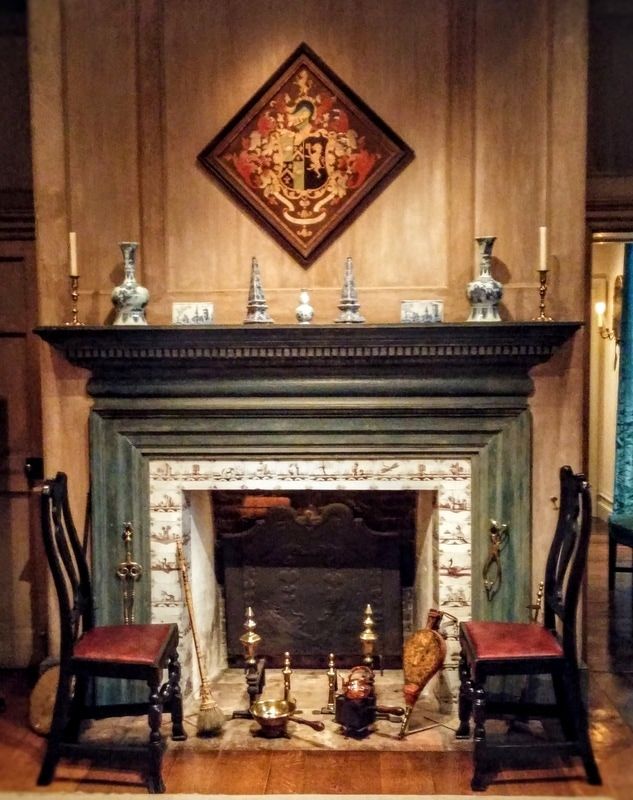 Fireplace in the Walnut Room, Winterthur with Dutch hand-painted manganese tiles. The room was originally from Belle Isle, which was built in the 1760s, though the tiles are probably not original to the fireplace. Changing fashions in the late Georgian era compelled homeowners to replace their tiled fireplaces with marble surrounds and long wooden mantles to display collectibles. Though tiles remain in fireplaces in some historic homes, the vast majority of them were either covered with a different material like marble, or removed. Tiles made a brief comeback in the Victorian and Art Nouveau periods, but many of these surrounds were removed in the following decades. A notable exception is this neo-Gothic fireplace in Cardiff Castle (below), which is impressive, if anything. 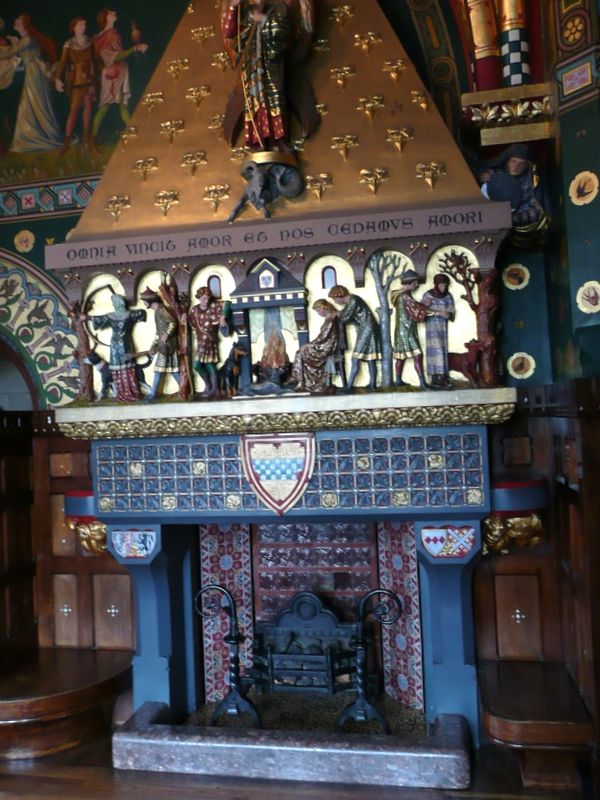 Fireplace in Great Hall of Cardiff Castle (Wikipedia). The invention of radiators by Franz San Galli in 1855 made fireplaces mainly decorative in middle and upper class homes by the turn of the century. Even though they are no longer needed to provide heat, many modern houses still have fireplaces (even if they are electric). Thanks for checking back! Be sure to check Twitter for updates under #WeirdTileoftheDay and #WeirdTileWednesday. Tune in next week as I discuss how tiles were once mounted in fireplaces (preview below). 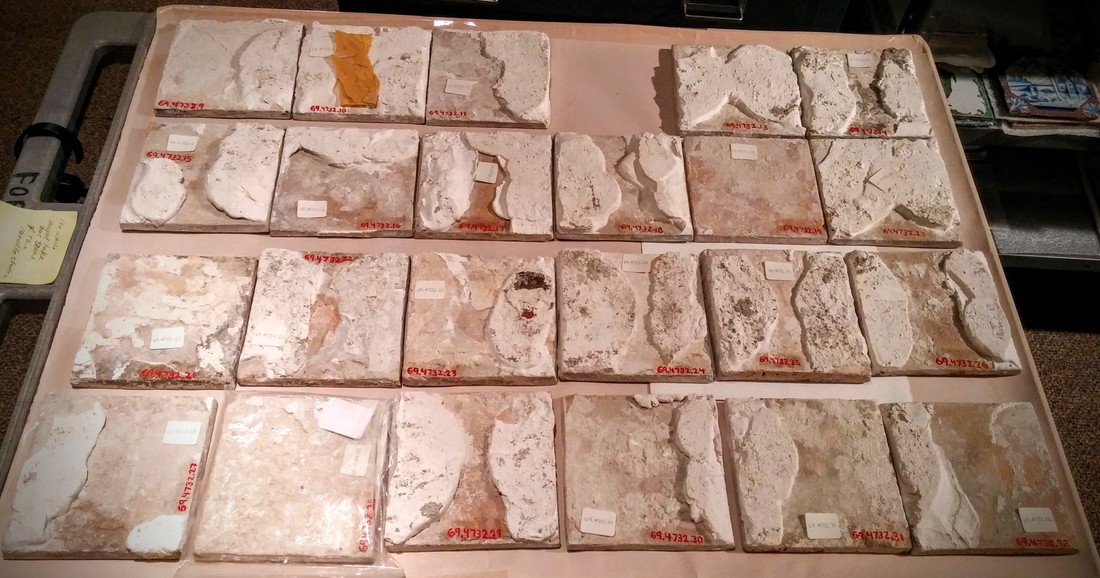 For more information see:
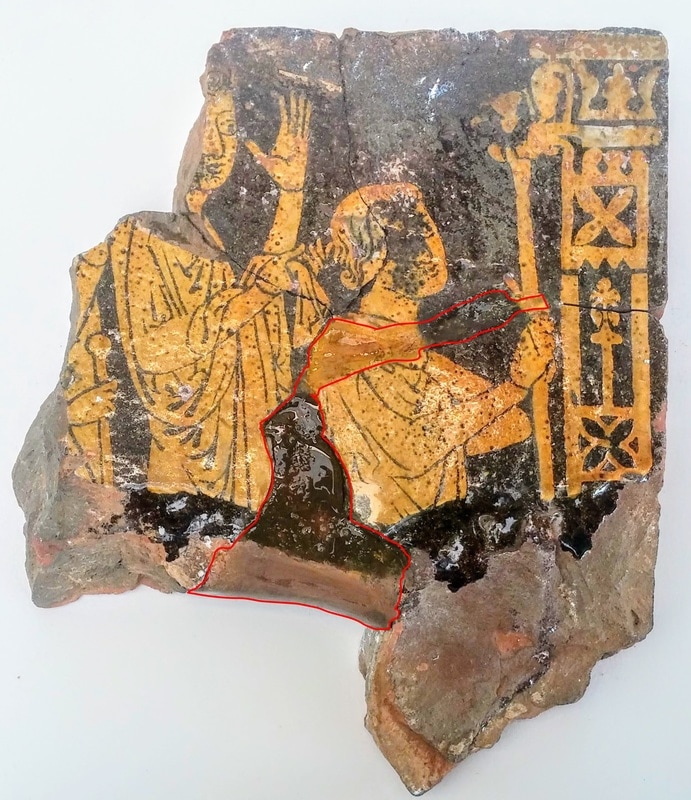
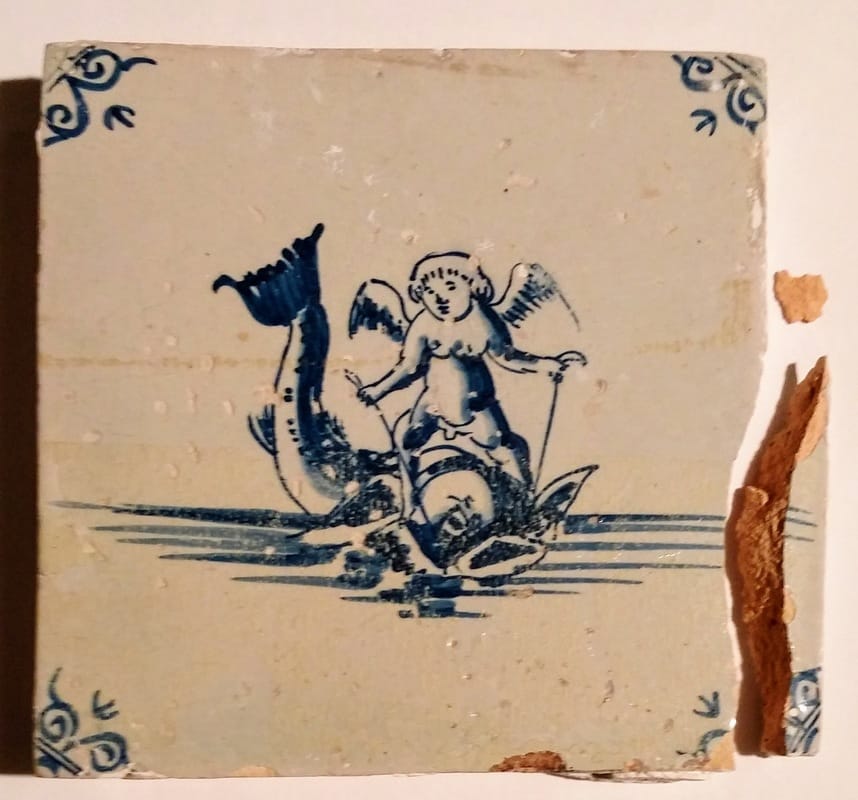
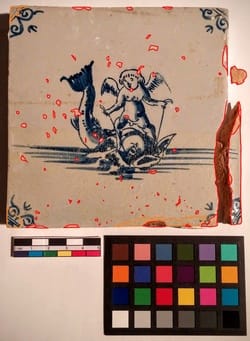
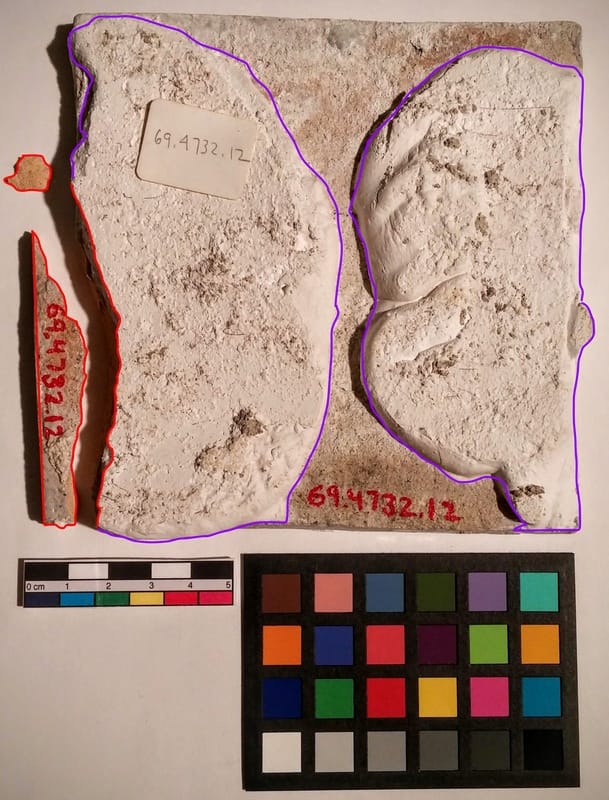
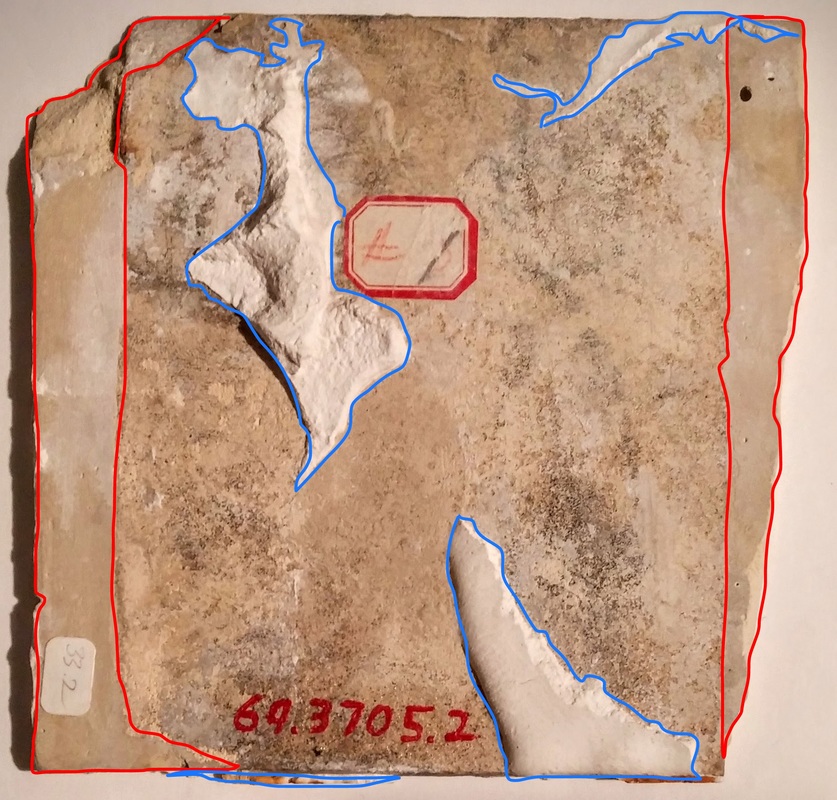
Henry J. Kauffman, 1972. The American Fireplace: Chimneys, Mantelpieces, Fireplaces & Accessories. New York: Thomas Nelson Inc. Trudy West, 1976. The Fireplace in the Home. North Pomfret, Vermont: David & Charles. Photos by author unless otherwise stated.  This post will be a bit shorter than the others because of the holidays! However, I wanted to share an update on the progress of the treatment of 1969.4732.012., one of the tiles from the "sea monster" set. This tile and others decorated with various "sea monsters" were once part of the fireplace in the "New York Bedroom" at Winterthur. However, the room and the fireplace were both de-installed in the 1960s. The tiles were removed, but huge remnants of plaster (outlined in purple, below) were left on the backs of the tiles. Areas on the front surface of the tile had chipped off and become lost (outlined in red, below).
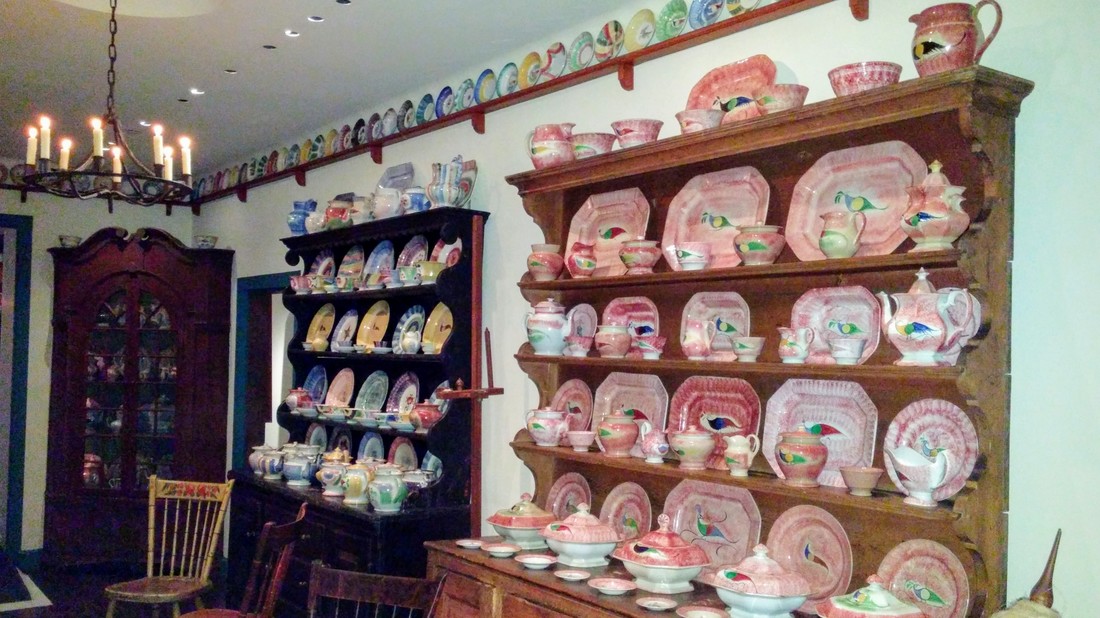
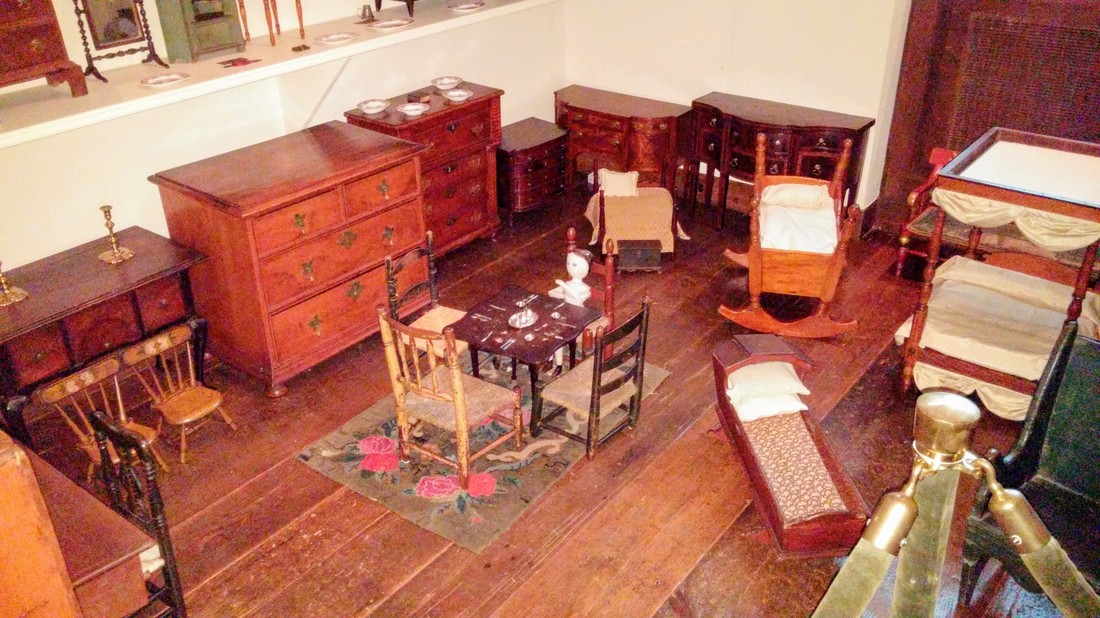
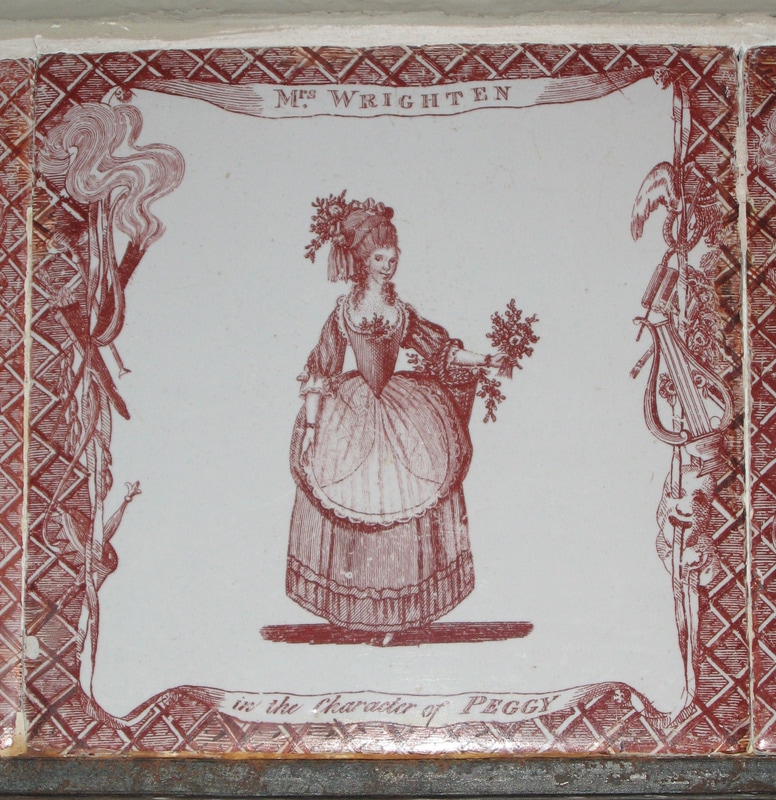
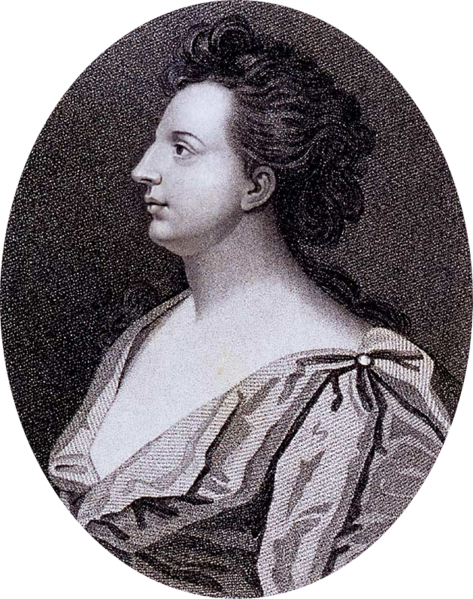
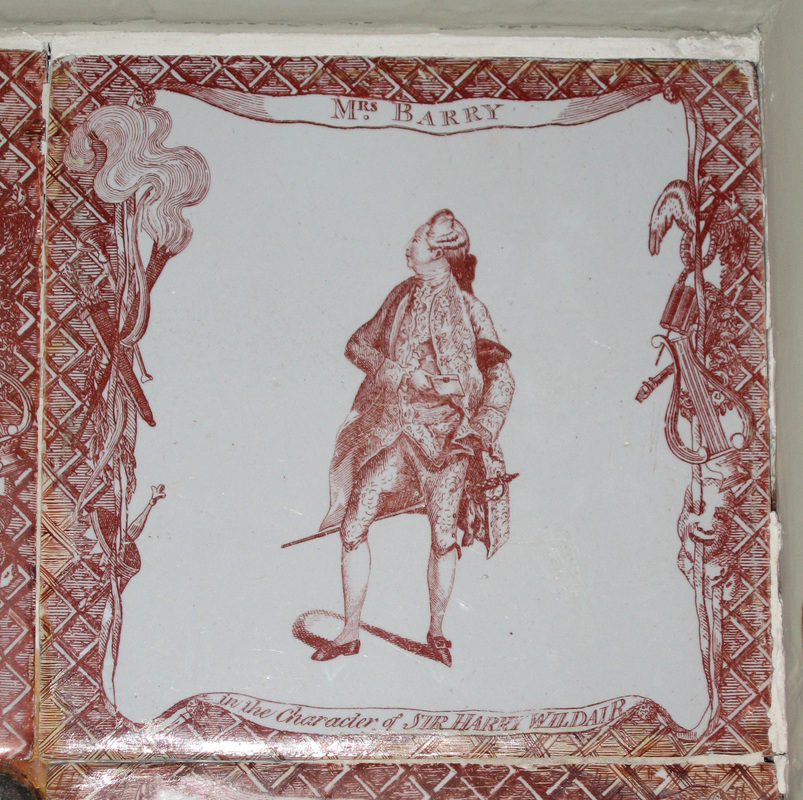
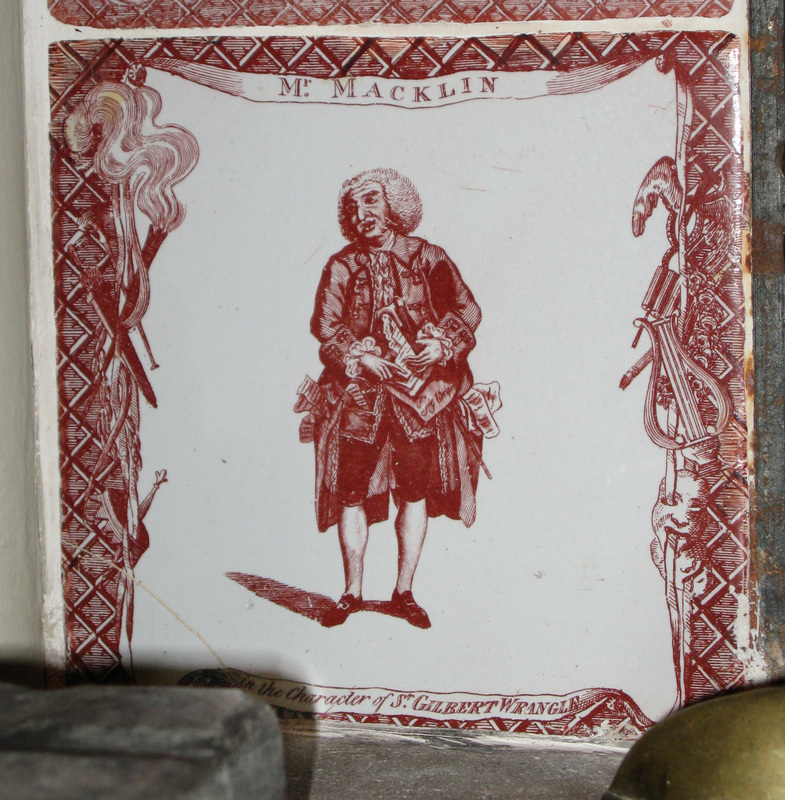
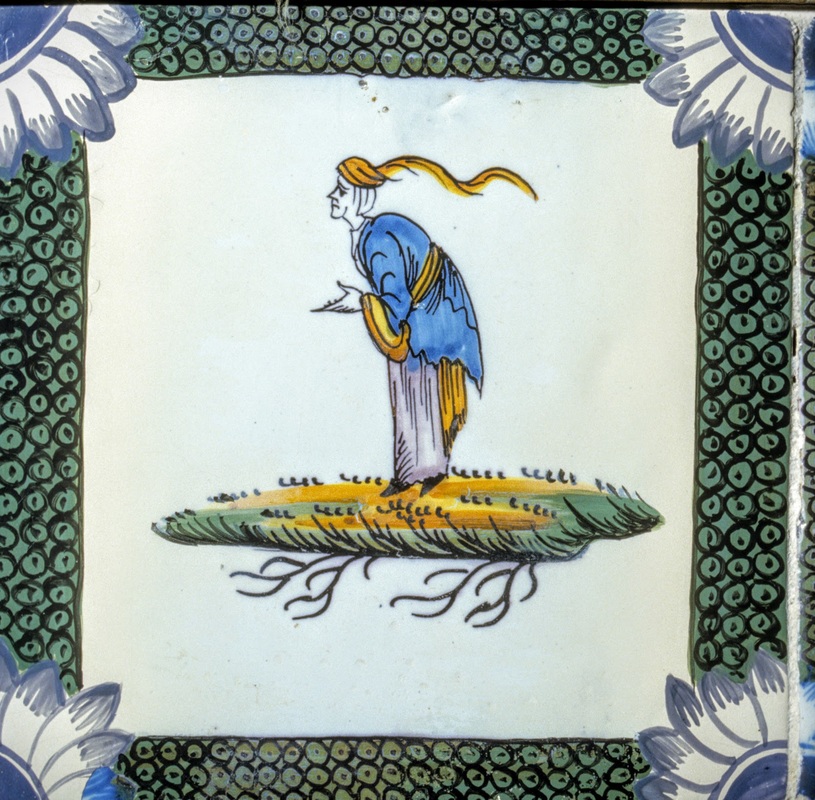
Prior to starting any conservation work, I consulted Senior Curator of Ceramics and Glass Leslie Grigsby to discuss treatment goals for this tile. These included: removing the plaster mounting material, removing yellowing fills and replacing them, and in-filling chips in the glaze to restore aesthetic integrity to the tile. Picking away at PlasterAfter testing a variety of methods, I determined that the easiest way to remove the thick plaster (2 cm in areas!) was to create channels in it using a small file. I then could chip sections away using a scalpel. This work was done under an elephant trunk, or extractor, to reduce the amount of dust in the air while I was working. I also wore a surgical mask to prevent breathing in fine plaster dust. As you can see below, this is messy work! 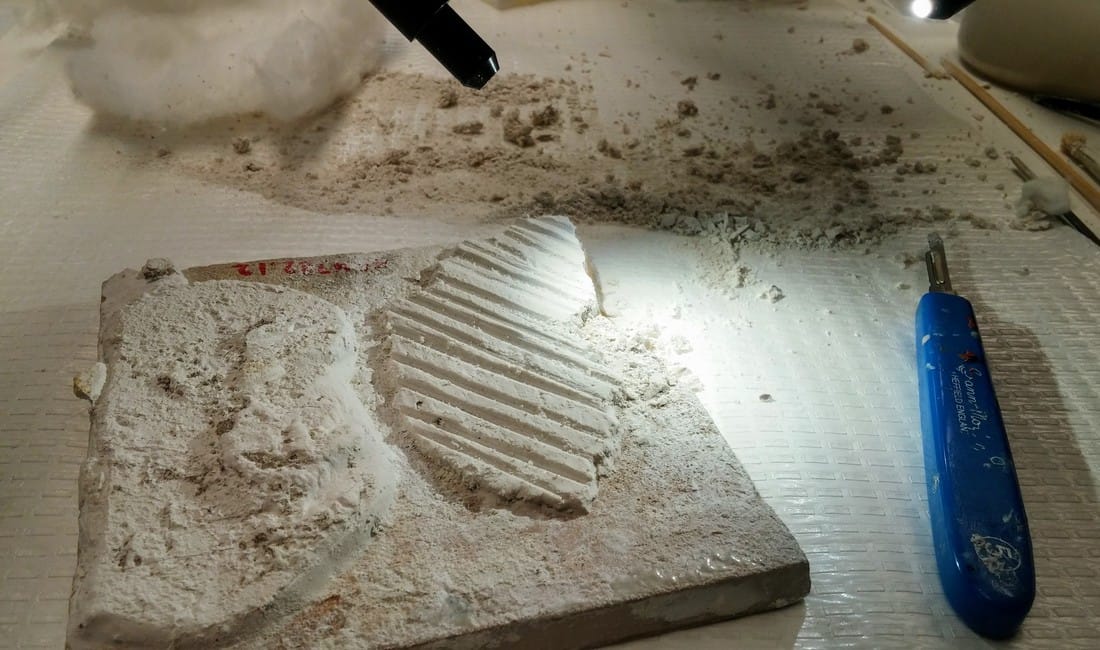 Channels have been cut, in the process of removing sections with a scalpel. 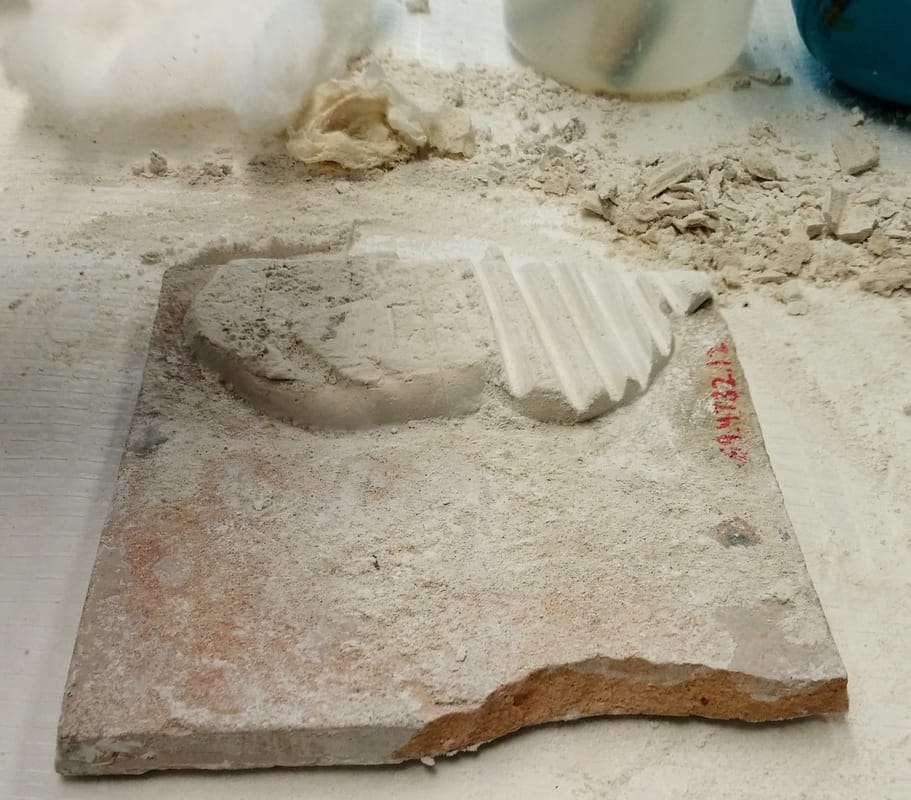 Side one has been removed. Channels are being cut into the other plaster lump. 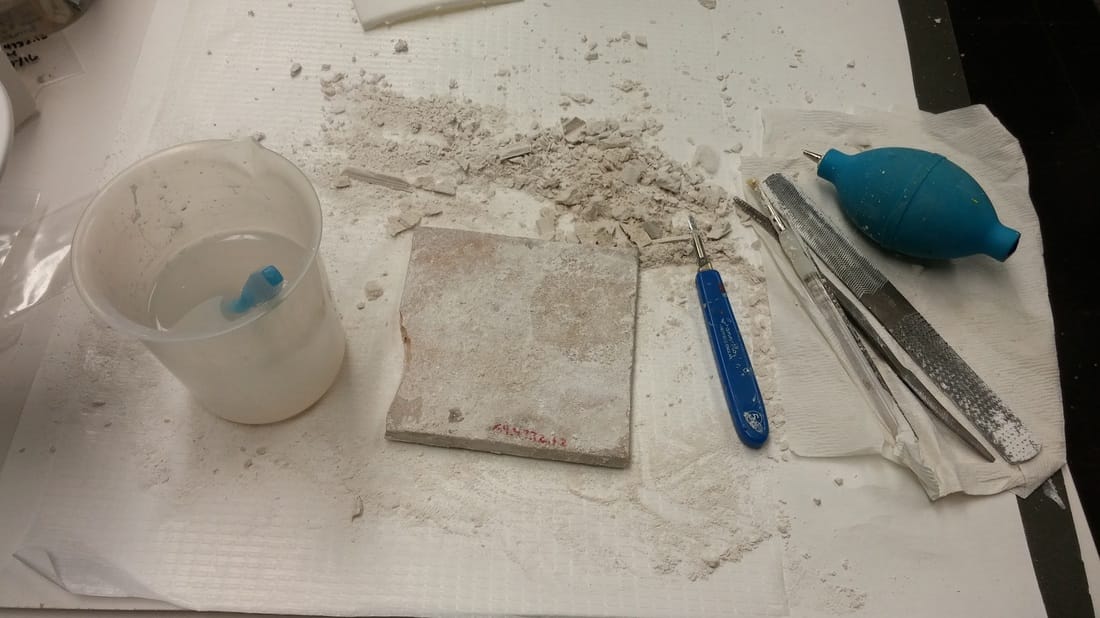 Tile with plaster mounting material removed, tools of the trade from left: water and brush, scalpel, various files, and an air puffer to remove plaster dust. Voila! Removing the FIllsA historic restorer had used an epoxy covered in yellowed paint to fill chips in the edges of the tile (below, left). This adhesive had turned dark brown and was brittle and flaking (below, middle). I removed it by softening it in acetone and using a scalpel to pick it off (below, right). After coating the chipped areas with an acrylic adhesive to protect the underlying ceramic, I began filling the missing chips using Flügger, a conservation-grade acrylic spackle (and my absolute favorite thing). 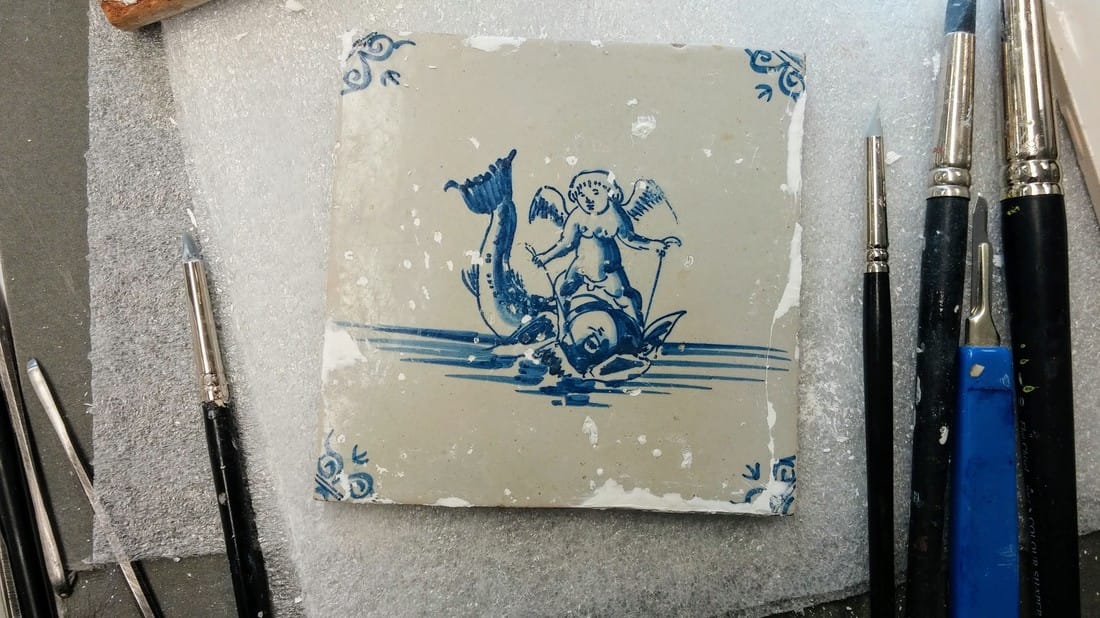 After sanding and perfecting my fills, I will in-paint them with acrylic paints to match the surrounding glaze. This color is proving tricky to replicate as it contains small flecks of brown, gray, yellow, red, and blue rather than being one solid color. Stay tuned! Thanks for checking back! Be sure to check Twitter for updates under #WeirdTileoftheDay and #WeirdTileWednesday. Tune in January 18th to explore an incredibly brief history of western fireplaces. 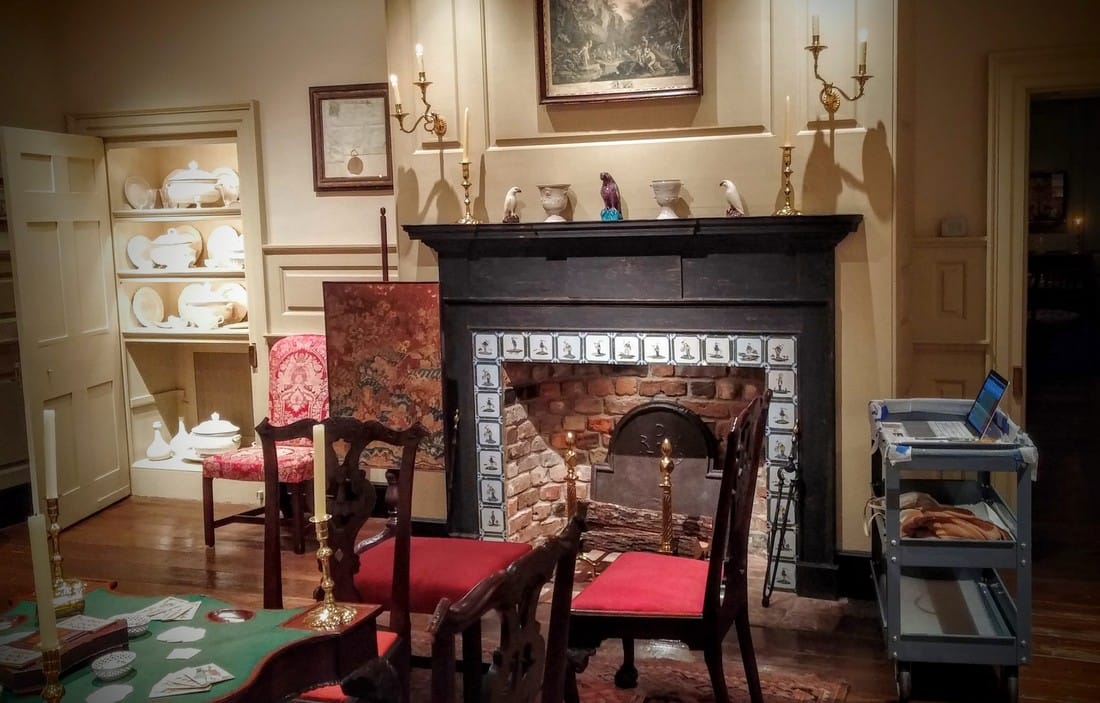 The Bertrand Room at Winterthur, decorated in the Chippendale Style (c. 1760). 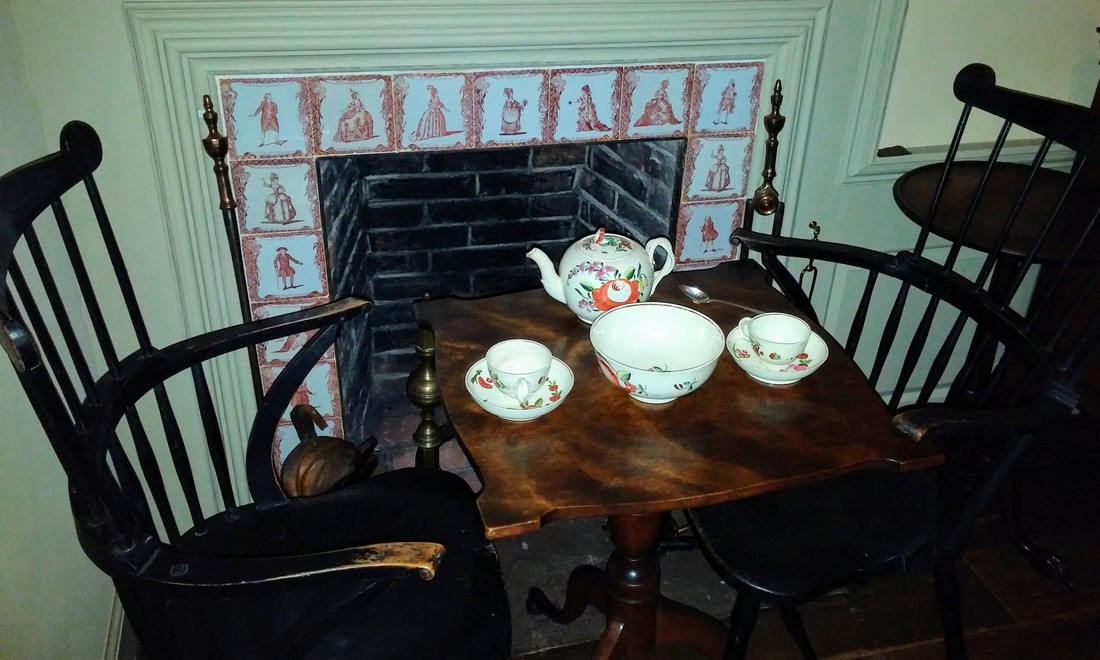 The Simsbury Room (above) is a very small room located on the 8th floor in the main house, off of Spatterware Hall and near an amazing collection of children's toys (below). Installed in 1940, the wooden interiors and fireplace tiles came from a house that once stood at 570 Hopmeadow Street in Simsbury, Connecticut (Springman & Lahue 2011, 41). The house was built around 1765 by a Thomas Berber. It was dismantled in 1925 after the death of its last owner. This is the first time I have been able to trace any set of tiles back to their original location! 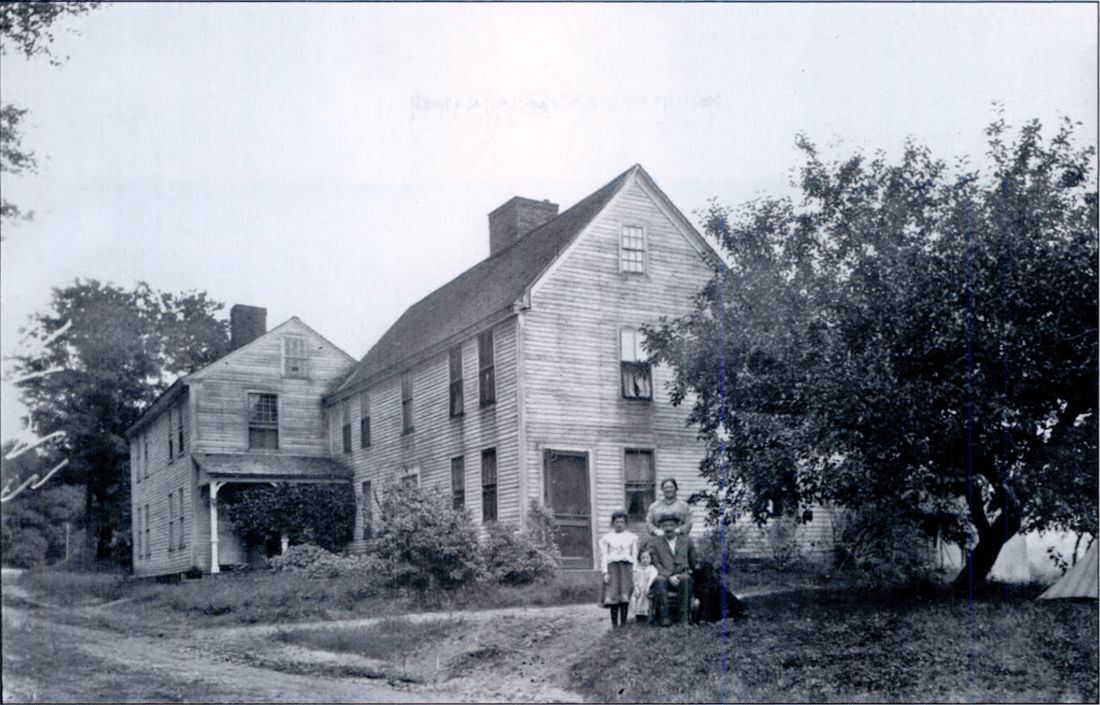 House where the tiles and interiors in the Simsbury Room came from (Springman & Lahue 2011, 41). The tiles in the Simsbury Room are red enamel transfer-printed tin-glaze earthenware tiles from Liverpool. They were manufactured by Sadler and Green from approximately 1777 to 1780. The images on the tiles were taken from prints found in various publications including Bell's Shakespeare and Bell's British Theatre. Both publications featured the most popular plays of the late 1700s alongside prints of iconic actors and actresses. The actors and actresses pictured were not all contemporaries, even though they are all dressed in clothing typical of the late 18th century. All of the actors and actresses performed in London, especially in the theatre districts of Covent Garden and Haymarket from the 1670s-1770s. 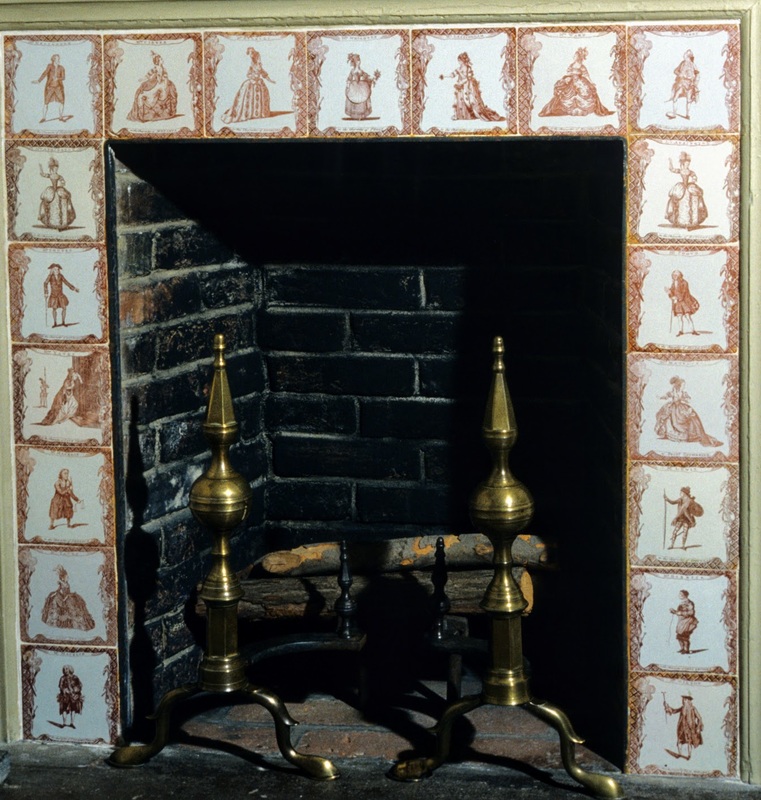 The set in the Simsbury Room does not include the entire set of actors and actress tiles. More examples in both red and black transfer print can be found in museums around the world (below). There are however very few examples of actor/actress tiles installed in fireplaces in historic houses. 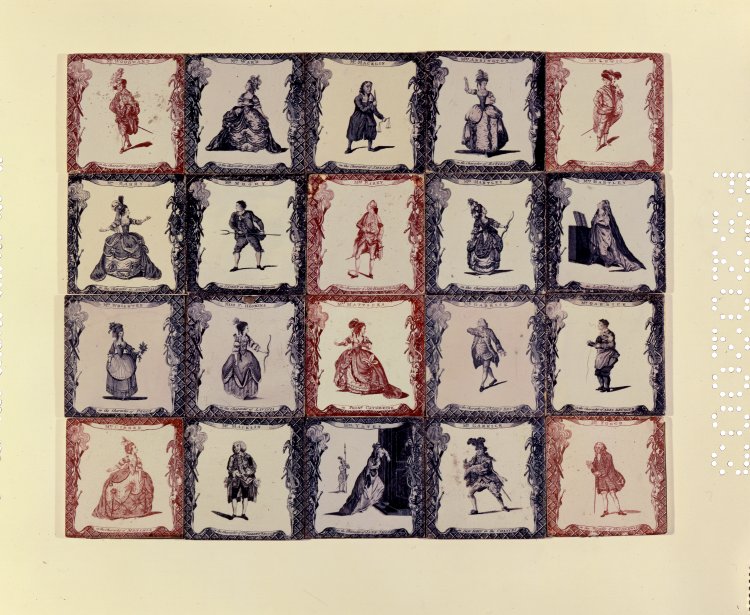 Tiles with actors and actresses in the British Museum's collection, red and black transfer-printed tin-glazed earthenware. Appear to be from the same set as the ones in the Simsbury Room. The men and women pictured on the tiles represent the most famous actors and actresses of the late 17th to late 18th centuries. While all of their stories are fascinating, I will briefly discuss four of the most famous in their day--whose stories may or may not have stood the test of time. Mrs BarryElizabeth Barry (1658-1713) was one of the most famous actresses of the Restoration theatre renaissance in London. Theatre had been banned by Cromwell's puritanical Republic (1640-1660), but was restored by the "Merrie Monarch," Charles II in 1660 when he was restored to the throne. Another change in theatrical conventions, women rather than teenage boys played female roles on-stage. In this tile, Barry plays the character of Sir Henry Wildair, a so-called "pants" or "breeches" role in which a woman played a young male character. This practice is especially common in operas with mezzo-sopranos often portraying teenage boys for comic effect. Barry was the lover of John Wilmot, 2nd Earl of Rochester--one of Charles II's closest friends. Their story is the focus of a current production of The Libertine at the Royal Haymarket Theatre in London. Though contemporaries apparently regarded Barry as "the ugliest Woman" in real life, they promulgated she was "the finest Woman in the World upon the Stage." (A Comparison Between the Two Stages, 1702). Mr Macklin
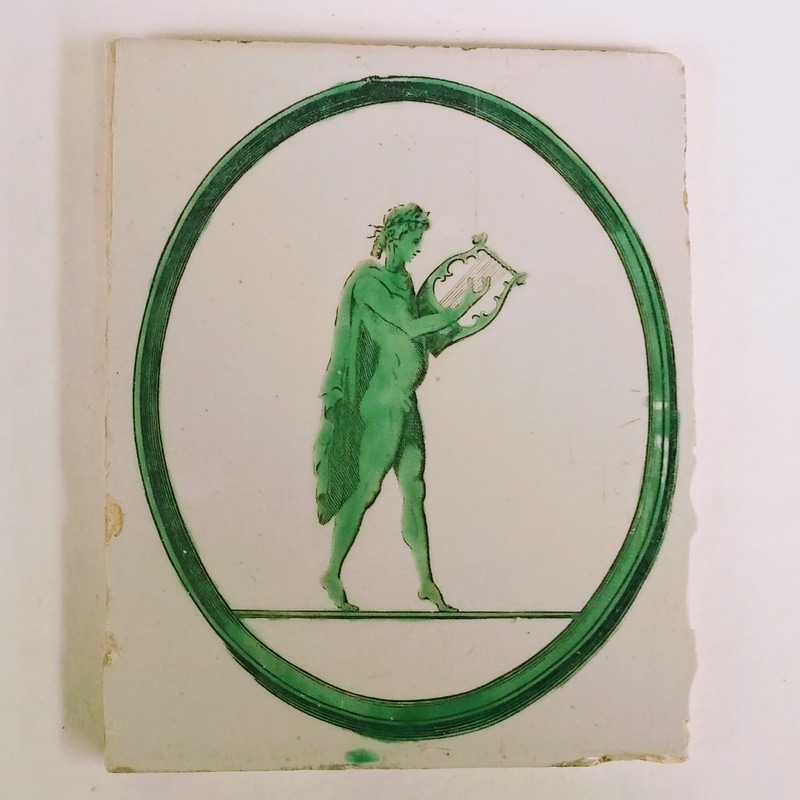
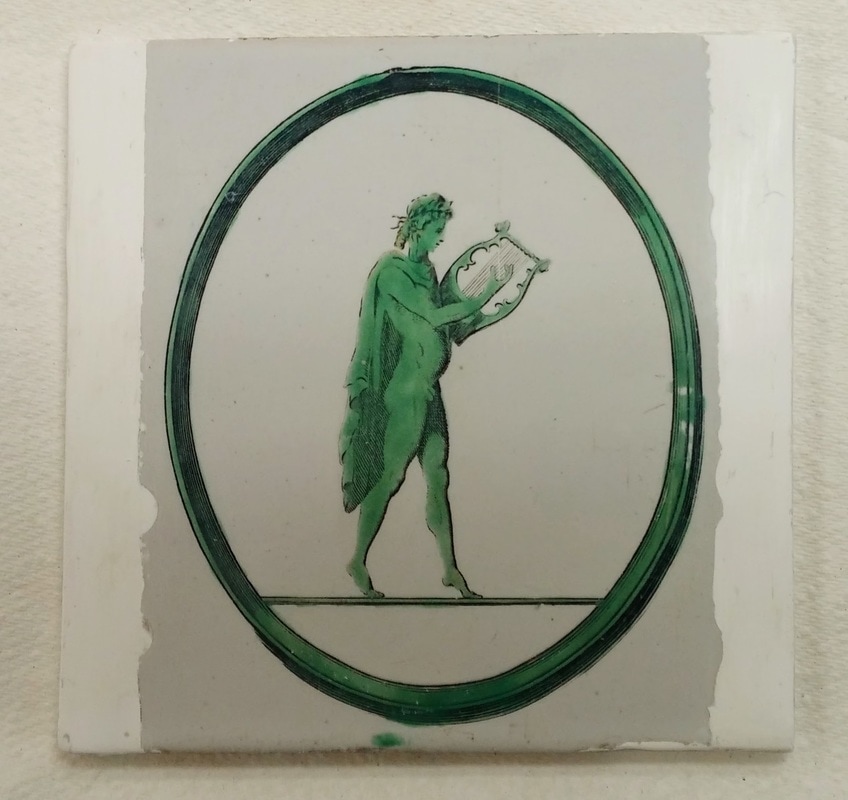
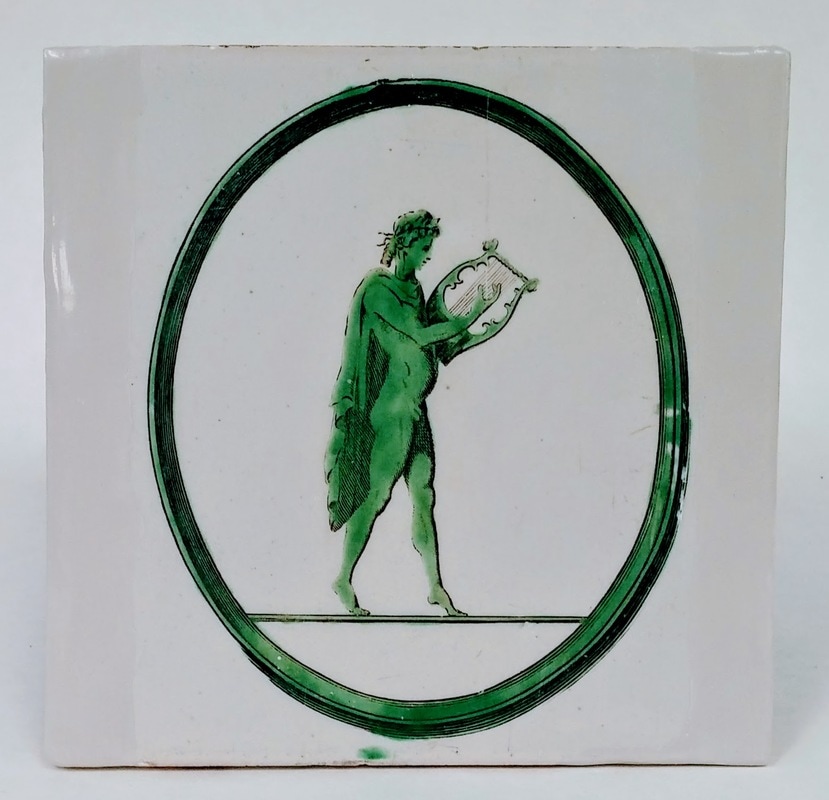
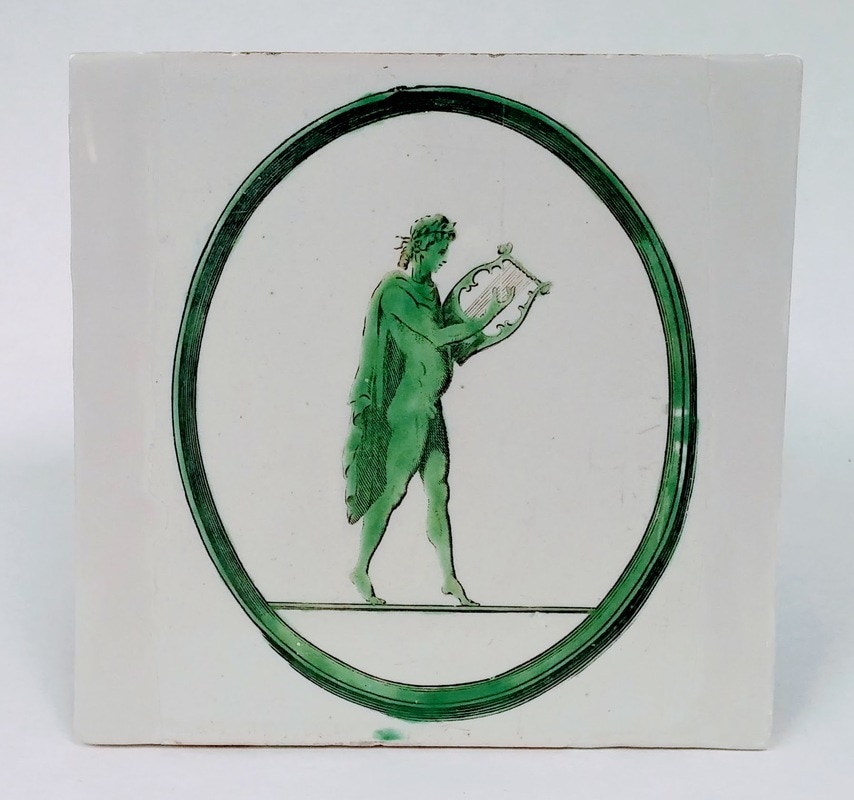
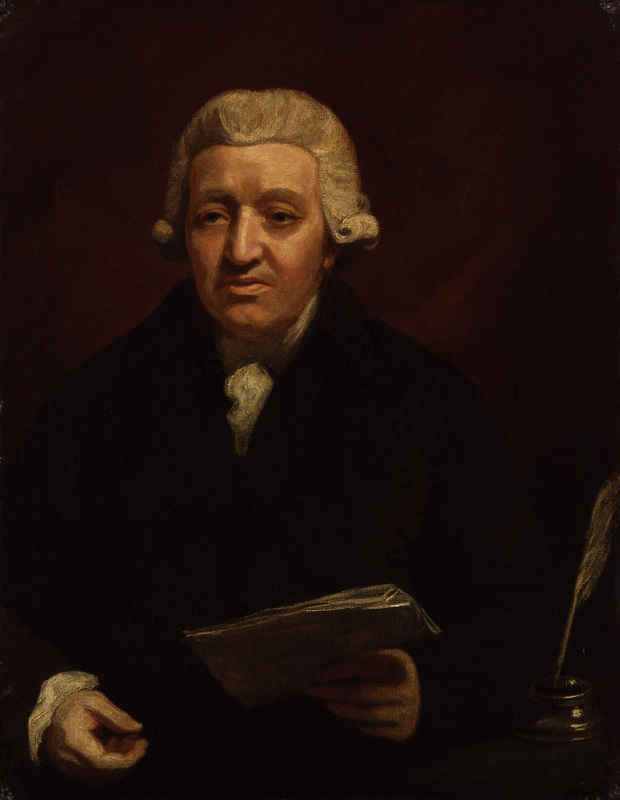
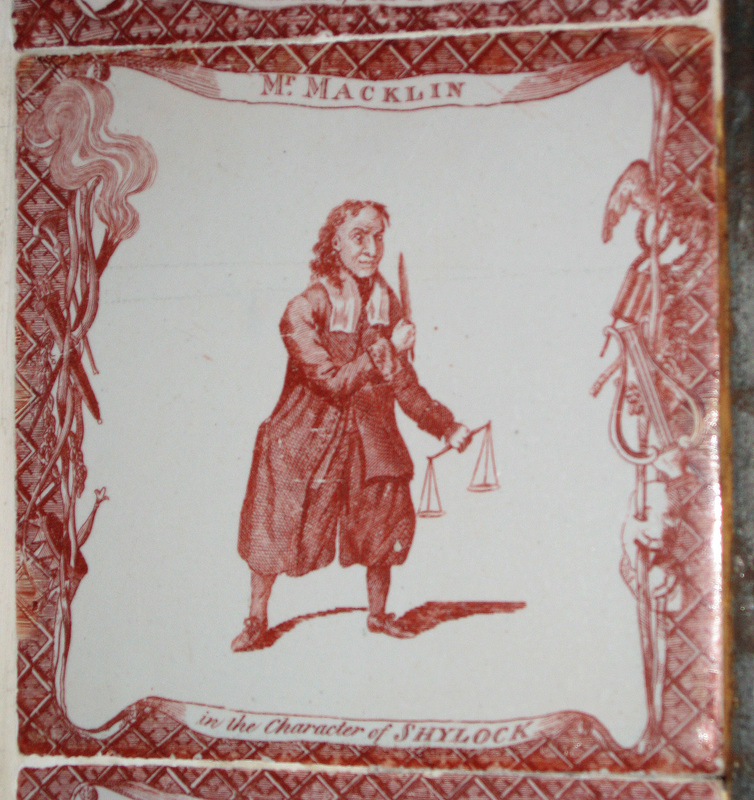
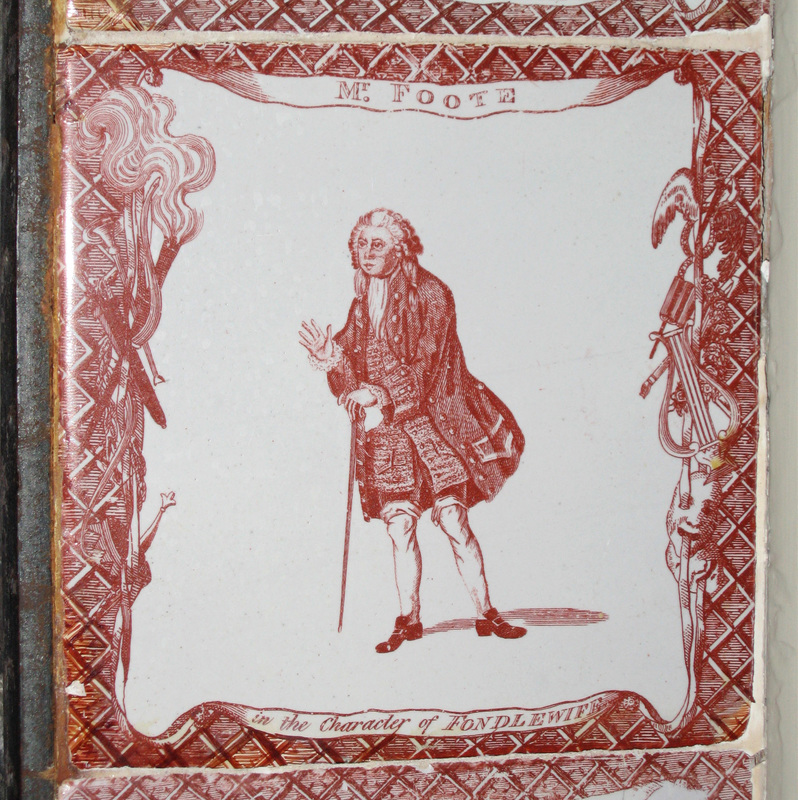
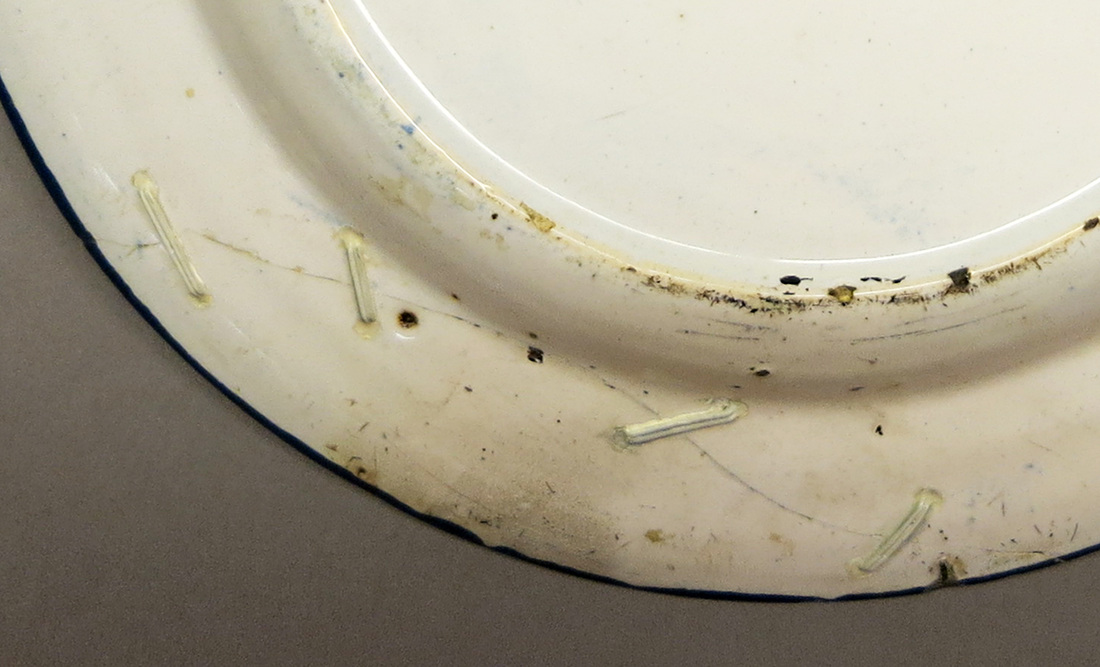
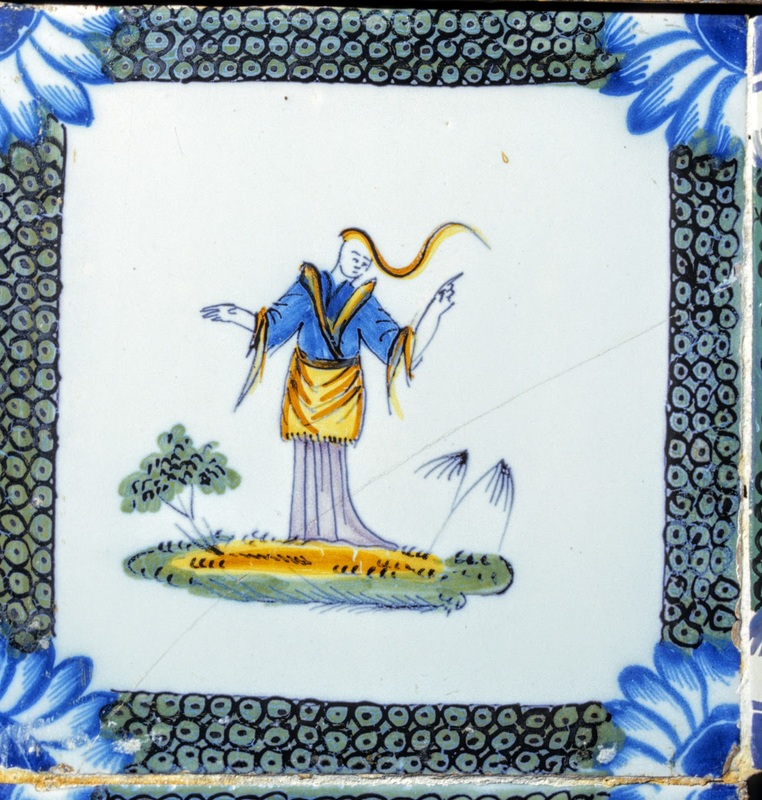
Macklin appears on two tiles in the Simsbury fireplace. On the left he is in the character of Sir Gilbert Wrangle from The Refusal by Colley Cibber. On the right he portrays his iconic role as Shylock, which made him a household name. King George II even apparently lost sleep over Macklin's especially dark and evil interpretation of the moneylender. Mr FooteSamuel Foote (1720-1777) was an acting student of Charles Macklin's. In his 40s he lost a leg in a riding accident. Though he still continued to act, he primarily focused his efforts into being the producer and eventual owner of the Haymarket Theatre. He also wrote biting satire of his contemporaries, earning the moniker "The English Aristophenes," after the Athenian comic playwright. In the tile above he plays the rather dubiously named "Fondlewife" from William Congreve's The Old Bachelor. Mrs YatesFinally, Mary Ann Yates (née Graham, 1728-1787) was considered the premiere British dramatic actress from shortly after her debut in the 1750s until she retired at 55. According to contemporaries, she was also a first class diva, often showing up late to rehearsals On the tiles above, she is pictured as Lady Townley from Sir John Vanburgh's The Provok'd Husband and as Jane Shore, one of the many mistresses of Edward IV of England, in Nicholas Rowe's Jane Shore. Thanks for checking back! Be sure to check Twitter for updates under #WeirdTileoftheDay and #WeirdTileWednesday. Tune in next week for a brief update on some of the treatments I've been working on (preview below). :) For more information see: Encyclopedia Britannica for biographical information about the actors listed above. Springman, Mary Jane and Lahue, Alan, 2011. Images of America: Simsbury. Charleston, SC: Arcadia Publishing. An Incredibly Brief History of Ceramic RepairsAs long as humans have been making ceramics, they have tried to find ways to fix these objects that shatter when dropped. In antiquity, this most often took the form of restoring function to a broken pot. This was accomplished in a variety of ways. Sometimes sherds (fragments of a pot) would be put together by drilling holes in the ceramic and using some sort of material, like plant fiber or metal wire, to tie two pieces together. From around the 1800s onward, restorers and menders began utilizing adhesives like animal glues to readhere ceramics. They also made "fills" out of materials like clay or plaster to fill missing pieces in the ceramic. Like today, early restorers used paints to disguise these fills. Even though modern conservators use similar techniques to their historic counterparts, the materials we now use have changed. 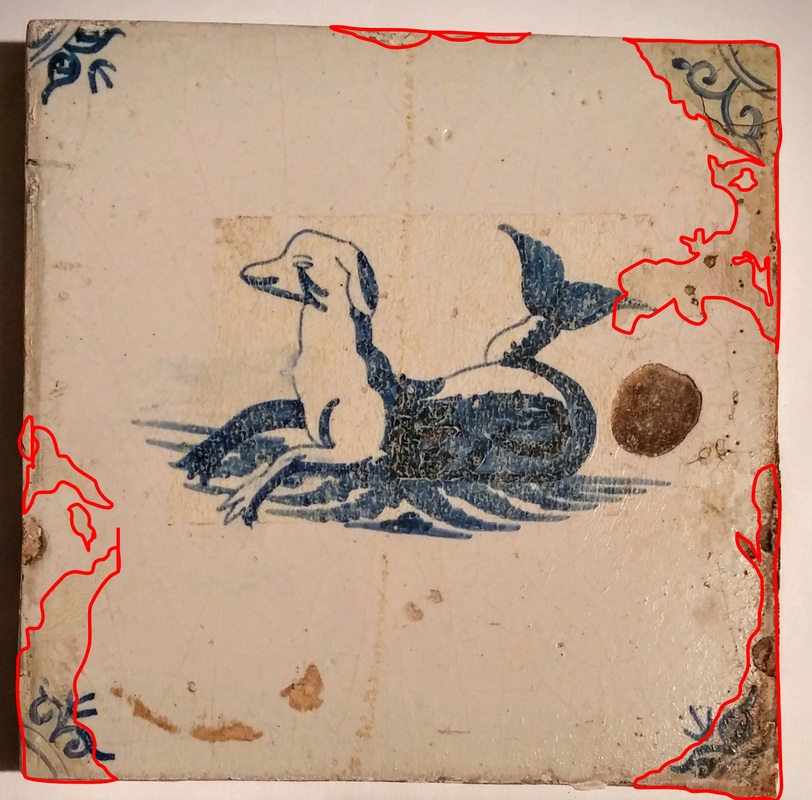 Dutch Delft tile c. 1650 with discolored historical repairs, outlined in red. The paint used to restore the tile has yellowed with age. The yellowed area in the center of the tile is residue from a piece of tape. Winterthur Collection. The materials these historic restorers used don't necessarily age well. Paints, adhesives, and other materials used in the past by conservators and others to repair broken ceramics deteriorated with age (see above!). Even materials used in the past 50 years are now discoloring and failing, necessitating the intervention of a conservator. Repairs from anytime before the present are commonly deemed historic repairs/restorations. The tiles in Winterthur's collection display a variety of fascinating, innovative, and sometimes disfiguring repairs. Some of the most interesting examples include repairs with metal rivets, discolored paint, and strange fill material. Rivets? Repairs with metalWhile remnants of natural resins, like bitumen can be found as adhesives on ancient ceramics, evidence exists for the repair of highly valuable ceramics with metal as far back as 7000 B.C. The Ancient Greeks made grooves between two sherds to be joined. Lead was poured into the grooves to bind them together. Nineteenth century restorers also used lead "solders" to repair ceramics, but they introduced a new technological advancement--iron rivets--to ceramics restoration. 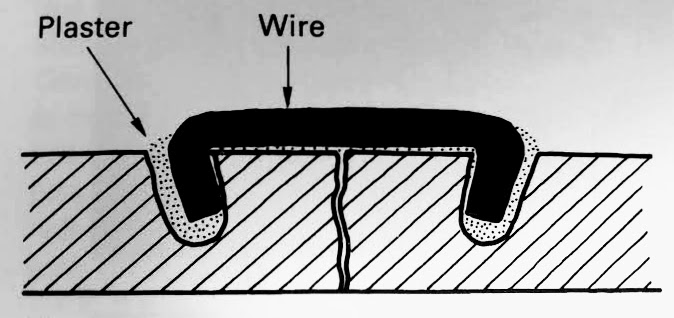 Diagram showing how rivets were constructed. (Buys & Oakley 1993, pg. 65 Figure 5.1 a). To create the repair, holes were drilled into the ceramic body at a 15 degree angle with a hand drill. Rivets, essentially metal staples, were fit into the holes to re-introduce tension into a broken vessel. Repairs with rivets can still be found on ceramics today, those made out of iron alloys have a tendency to rust. Conservators closer to the present began removing these "unsightly" rivets. The Liverpool tile above was treated by Philadelphia restoration firm H.A. Eberhardt and Son, probably around 1950. The restorer removed the rivets on the back of the tile and filled in the space left behind with plaster. He or she then overpainted the front of the tile to hide the repair. Over time, the paint has yellowed (above, left). Overpaint and OverfillIn their quest to create seamless restorations, early conservators often overfilled and overpainted ceramics. The edges of the green enamel, transfer-print tile below were probably ground down when it was installed in a fireplace. A conservator at some point in the past decided to create large areas of fill to restore the tile to its original dimensions. Areas outlined in red demarcate the historic fill, which was made with an unknown, yellowed, spongy material. Blue areas show remnants of plaster left over from when the tile was mounted in a fireplace. The overpaint on the front of the tile has yellowed significantly. When it was restored, it would have been the same white as the central oval to disguise the fill material--now it clearly shows where the fill is located. In another example of overpainting, these chinoiserie tiles are installed in the Bertrand room fireplace. The Michaelmas Daisy corner elements are original on the tile on the left, but have been remade on tile on the right. A historic restorer put plaster over the original surface of the tile and replicated the border and corners in paint. He or she painted over everything but the figure. Ethical Considerations Some may see these historic repairs as disfiguring, but when we as conservators "re-conserve" artifacts, we remove significant evidence of the history of that object and destroy evidence of the fascinating history of conservation. After consultation, some curators and conservators choose to remove historical repairs that are distracting (ie. yellowed paint or adhesive) or actively causing damage to objects (ie. rusting rivets that are no longer holding the ceramic together). Whether they are taken out or not, it is best practice to photograph and document these interesting and inventive historical repairs. Same as now, early conservators, repairers, and restorers were doing the best with the materials they had to fix the objects in their care. I will be starting to treat some of the tiles in this post in the coming weeks! Because the goals of treatment mainly involve restoring the aesthetic integrity of the tiles, I will remove the discolored overpaint and historic fills on the tiles above. However, I have made sure to record each step of my conservation treatment so the information about historic fills is accessible to future conservators. Tune in December 14th to learn about a series of tiles featuring 18th century actors in the Simsbury Room fireplace! 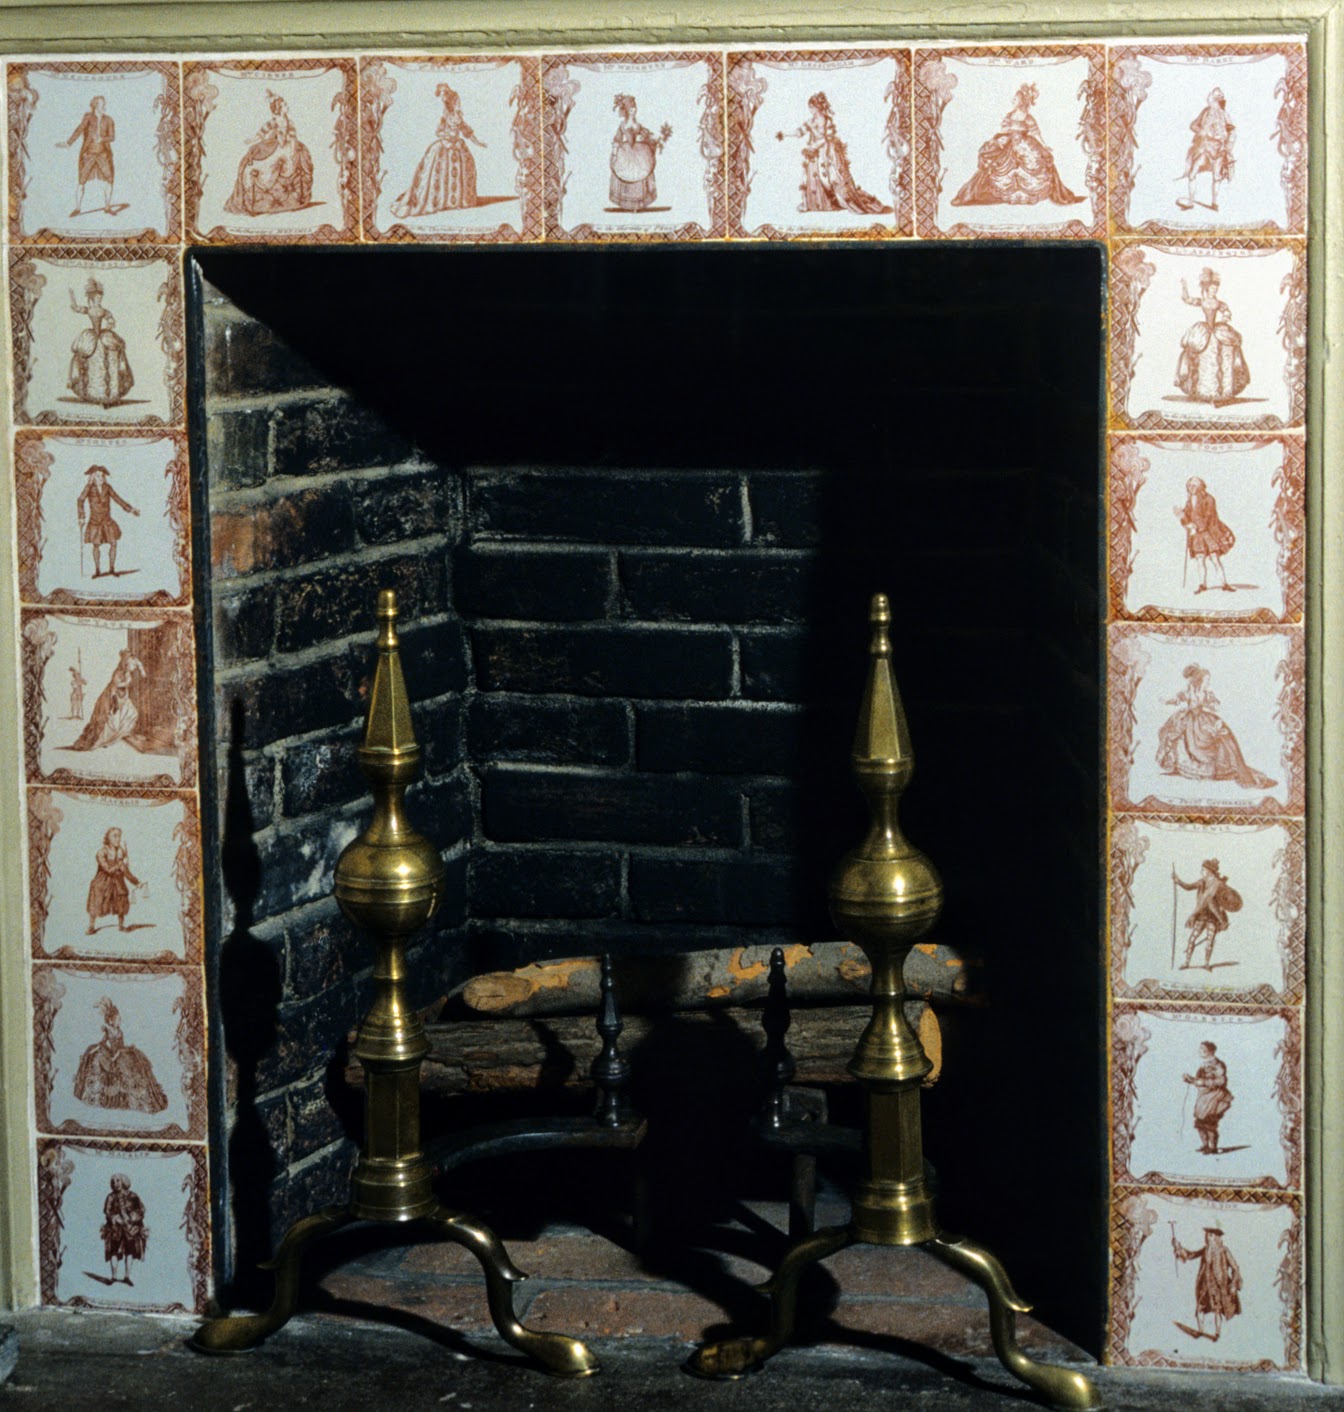 For more information, see:
Susan Buys and Victoria Oakley, 1993. Conservation of Ceramic Artefacts. London: Butterworth and Heinemann. Isabelle Garachon, 2010. Old Repairs of China and Glass. The Rijksmuseum Bulletin 58/1, 35-54. Stephen Koob, 1998. Obsolete Fill Materials Found on Ceramics. Journal of the American Institute for Conservation 37/1, 49-67. On my first day at Winterthur, I met with Senior Curator of Ceramics and Glass, Leslie Grigby to see the unmounted tiles in the museum's storage areas. 160 of the 515 tiles in the collection are kept in storage and 22 are displayed in the Ceramics and Glass Study Area (below). A major component of my project at Winterthur involves conducting a condition survey of all of these tiles.  Talking about the tiles with Senior Curator Leslie Grigsby in the Ceramics and Glass Study Area on my first day at Winterthur. Where to Begin?Before I went into the collection to start my survey, I had to come up with a way to record my data. I decided to create a survey spreadsheet on Microsoft Excel rather than using a paper form. This way I could take my laptop into the collections and enter data right away rather than having to type up my observations later. The information I collected would be used to prioritize my conservation treatments. One of the major challenges in creating a database or survey form is standardizing the nomenclature, or wording that you use. Consistency makes information much easier to find and sort during data review. To this end, I made specific categories and wrote in set terms to organize the information I wanted to collect. 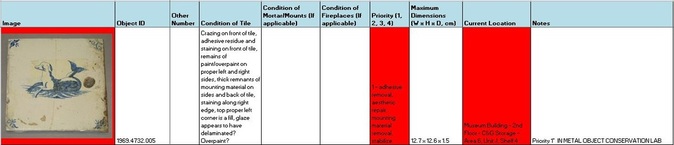 Sample data collected on a tile in storage marked "High Priority." I placed an image of each tile in my spreadsheet in order to make sure I was assessing the correct tile. The next field is "Object ID," where I placed Winterthur's accession number, for example 1969.4732.005. An accession number identifies each individual object in the collection and relates it to similar objects based on the year they were collection and their “accession group number.” For example, a group of objects donated by the same person at the same time would be part of the same accession group.  "Other Number" records any number on the back of tiles from other cataloging systems. "Condition of Tile" is a free text field in which I recorded any condition issues with the tile, such as structural instabilities and historic repairs. "Condition of Mortar/Mounts" and "Condition of Fireplaces" applies more to the mounted tiles in the house. "Priority" sorts the tiles by minor to major condition problems and will help me prioritize which tiles to treat first. "Maximum Dimensions" gives the measurements of each tile. "Current Location" shows where the tile is located in the collection. Priorities A “Priorities” field in a condition survey allows conservators to easily rank objects by conservation needs. For example in my survey, I sorted the tiles into four groups: Low Priority: treatment not necessary, minor aesthetic repairs, dirty surface, structurally stable Medium-Low Priority: treatment suggested, more significant aesthetic repairs, chips, small cracks Medium-High Priority: treatment recommended, significant aesthetic repairs, structural cracks, spalling, chips, large areas of loss High Priority: treatment necessary, ceramics is actively deteriorating, extremely disfigured by historic restorations, or unstable A majority of tiles will probably fall into Medium-Low or Medium-High priority.  View of the spreadsheet showing tiles of every different priority. Organizing the TilesThe first thing I noticed when I got into the collection was that the tiles were stored and stacked seemingly randomly. Because my spreadsheet was sorted by object number, step one involved sorting the tiles by number. 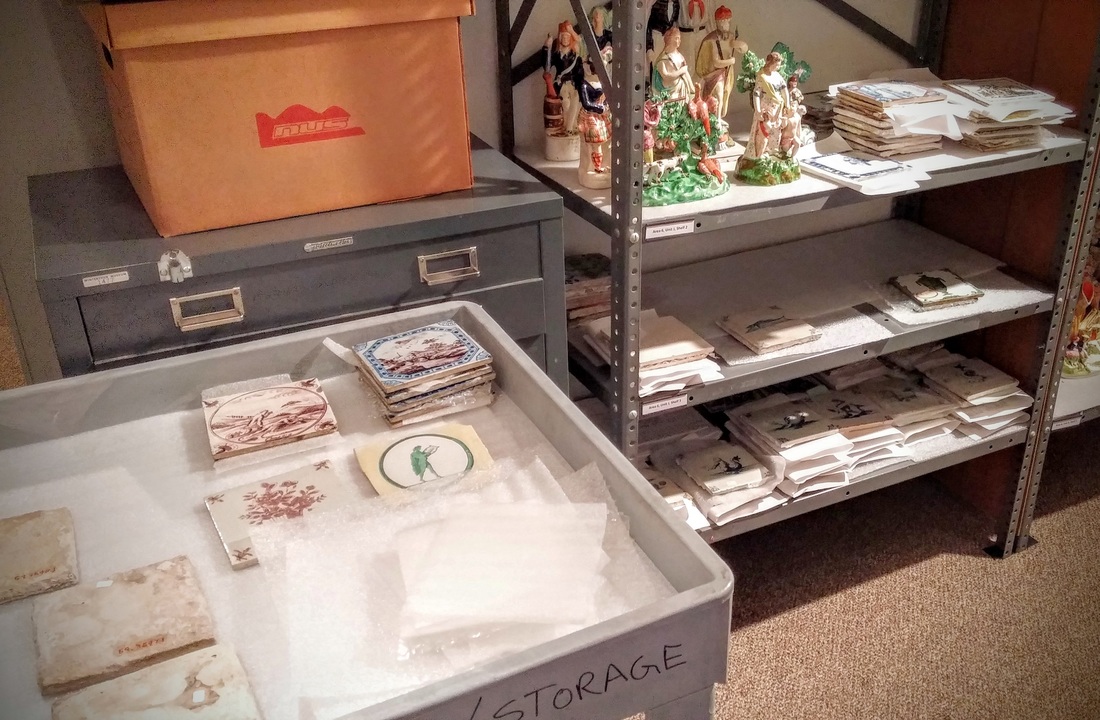 Sorting the tiles by number and design to make condition surveying easier. Once I finished sorting the tiles, I was ready to start my survey! Tune in next week as I talk about some of the major condition issues I noticed as I began to look at the individual tiles more closely.
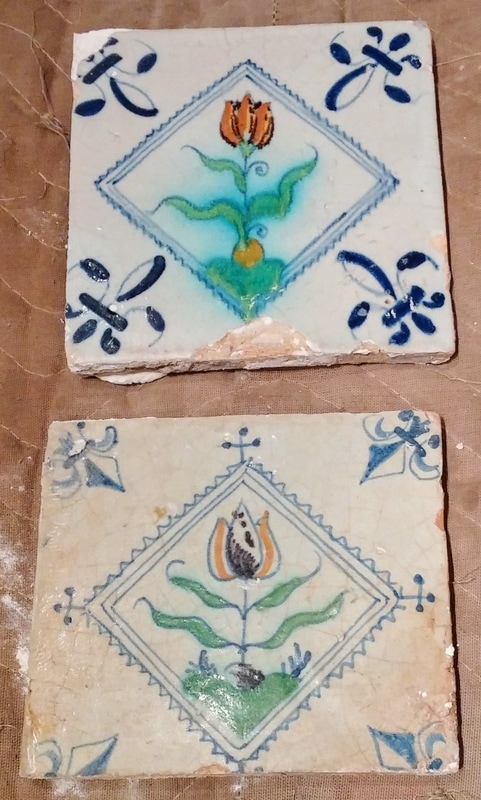
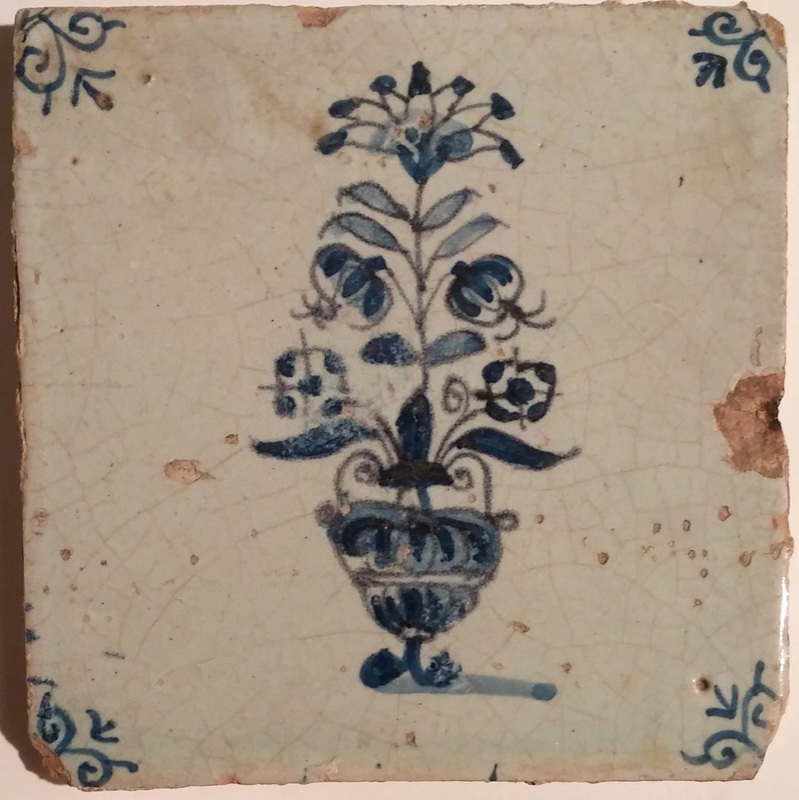
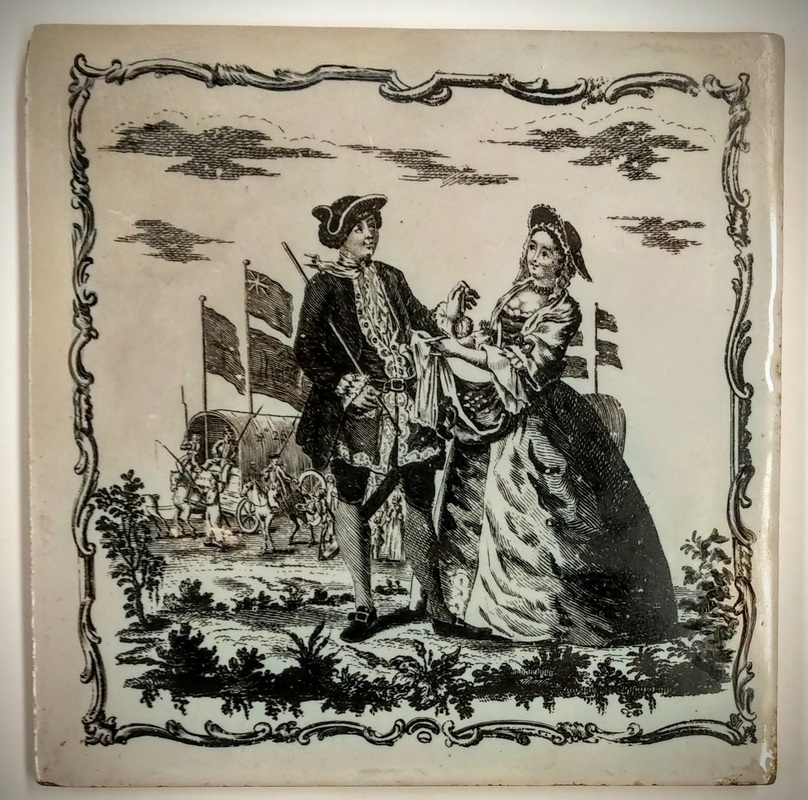
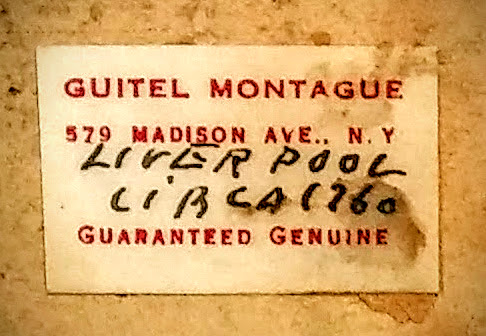
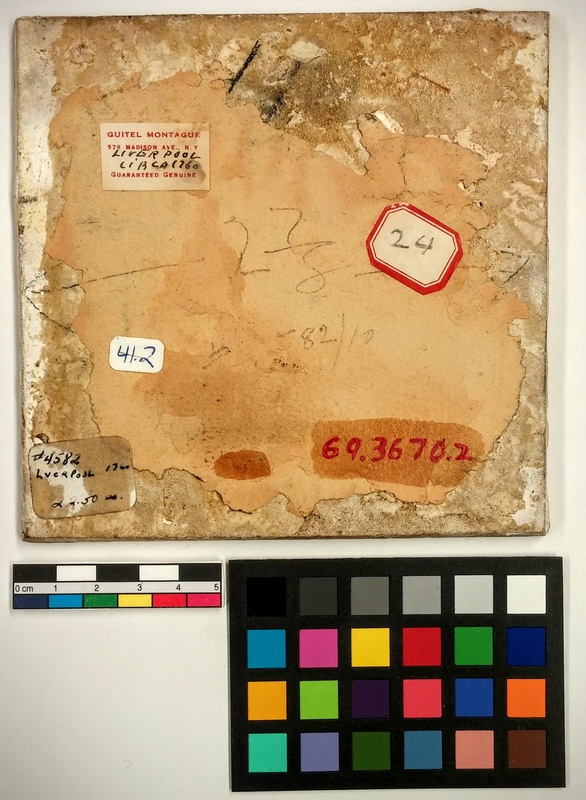
Watch this blog for weekly or biweekly updates and follow me on Twitter to learn more about some of the individual tiles I’ll be looking at on #WeirdTileWednesday and #WeirdTileoftheDay. In 1648, the Dutch Republic gained its independence following the Thirty Years War. Freedom from Habsburg Spain led to the rise of a middle class with money to burn. These newly wealthy merchants spent their riches on fashionable decorations for even the mundane, everyday areas in their houses--kitchens and fireplaces. Early Delft TilesDrawing inspiration from maiolica (sometimes spelled majolica) floor tiles manufactured in southern Europe from the 16th century onward, potters in Delft in the Netherlands began creating hand-painted wall tiles for their newly wealthy middle class clients in the early 17th century. These tiles served a dual purpose of decorating utilitarian spaces, such as fireplaces, while also providing an easily cleanable surface. 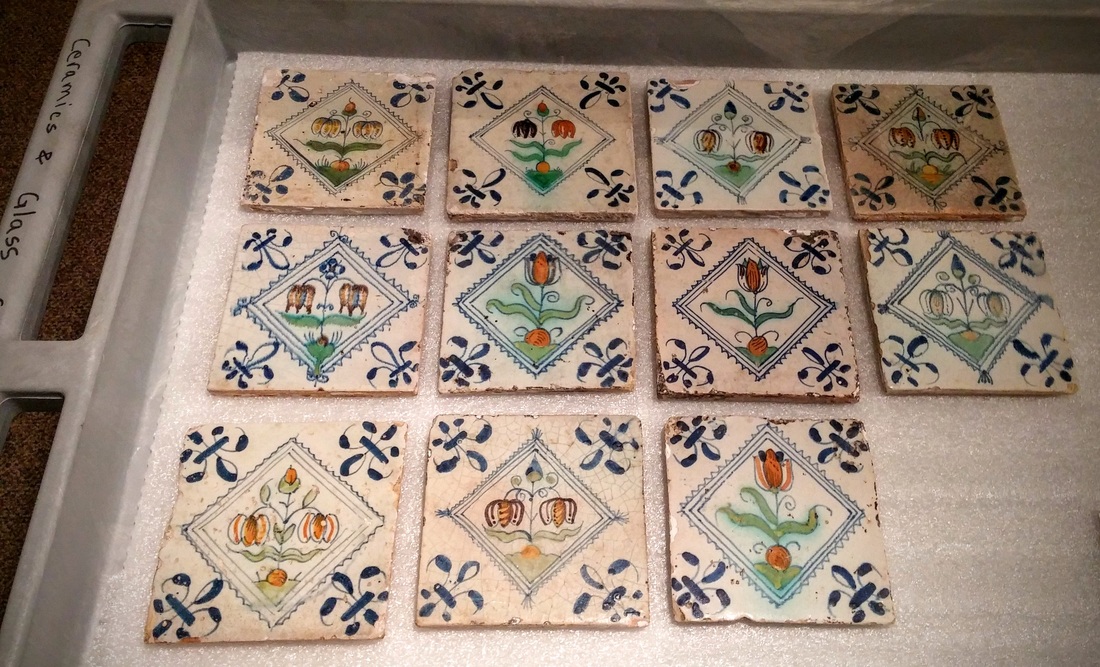 "Tulipomania" flower and vase type tiles in the Winterthur Collection, c. 1640-1675. Early Delft tiles (1620s-1650s) mainly used a palate of blue, orange, and green. The tiles above are the by-product of "Tulipomania," a time in Dutch history where speculation on the hottest commodity of the day, tulips, created the world's first economic bubble. Later 17th and early 18th century tiles emulated fashionable blue-and-white Chinese porcelain brought in to Europe by the Dutch East India Company (below). Manufacturing MethodsTraditional Delft tiles were made of tin-glazed earthenware, a type of ceramic that is much more porous than porcelain, which was not produced in Europe until the early 18th century. Prior to glaze application, the earthenware tiles, usually formed from a mixture of red and white clay, were put through an initial "biscuit" firing. Tin-glaze was then applied to the front of the tile and artists hand-painted the decoration using different colored glazes. The tin-glaze gives these tiles their uniformly glossy, white background color. Dutch tile-makers brought their techniques to Liverpool, Bristol, Glasgow, and London, which grew as centers of production in Britain. The tiles made there first copied Dutch designs. However, in 1756, John Sadler (1720-1789), an engraver in Liverpool, invented a process called “transfer printing.” To create a transfer print, an artist engraved a copper plate with a design. Ink was applied to the plate and transferred to the glazed ceramic tile using paper or glue. The tiles created by transfer print had crisp, uniform designs and were much easier to mass-produce than hand-painted Delft tiles. Utilizing finer, whiter clays common in Britain, Liverpudlian tile-makers produced tiles that did not suffer as extensively from problems like crazing—a by-product of poor glaze to ceramic fit on the lower-fire earthenware tiles from the Netherlands. On these tiles, the ceramic body and glaze expanded or contracted at different rates creating fine cracks in the glaze that allowed dirt and debris to enter into the ceramic. 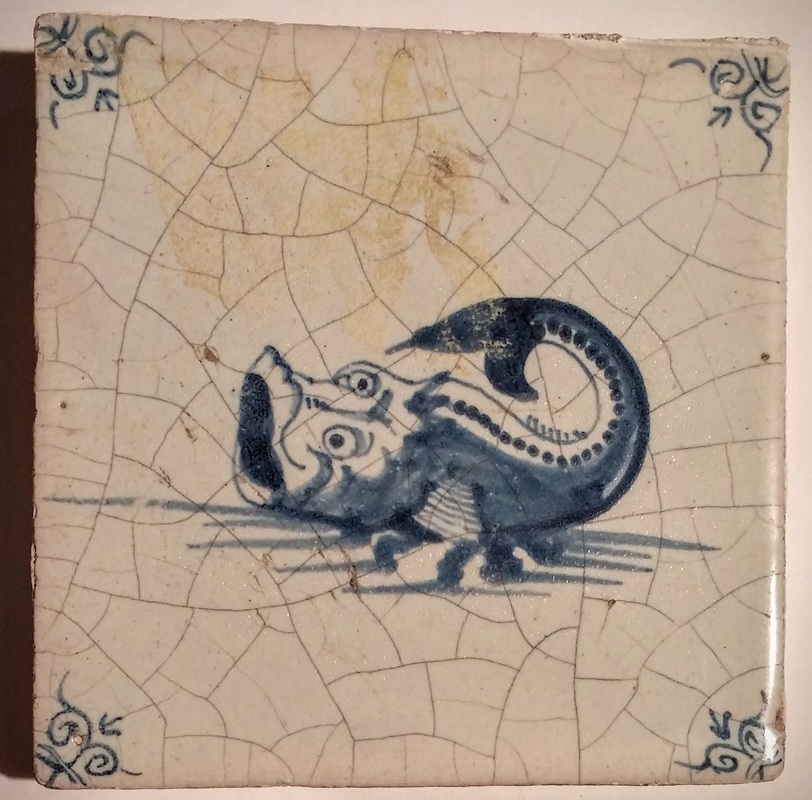 Highly crazed Delft tile, c. 1650-1700, Winterthur Fashion of the DayMy first experience with Delft tiles was at Schloss Nymphenburg (Nymphenburg Palace), near Munich. I was fortunate enough to visit in the summer of 2015. Even before I knew I would be spending a long time researching the tiles, I was fascinated by the amazing designs at the palace (below). They were even used to tile an indoor bath! In the 17th and 18th centuries, Delft tiles grew exponentially in popularity, spreading across Europe and Asia like wildfire. Eventually, these tiles made their way to Dutch and English colonies in the Americas. Delft tiles fell out of fashion in the early 19th century, but they survive in homes and palaces around the world. History of Winterthur's Tiles?Winterthur's tiles are either installed in fireplaces or unmounted. I’m still not sure where the individual tiles in the collection came from, but they are probably not original to the house. I've found some clues on the back of tiles like stickers for antique dealers. The one above reads: “GUITEL MONTAGUE/579 MADISON AVE., N.Y/LIVERPOOL CIRCA 1760/GUARANTEED GENUINE.” Hopefully this sticker will give me potential leads into the history of these tiles--stay tuned! Watch this blog for weekly updates and follow me on Twitter to learn more about some of the individual tiles I’ll be looking at on #WeirdTileWednesday and #WeirdTileoftheDay. See you next week as I start my condition survey of the tiles in the collection!
For more information about the history of Delft fireplace tiles, see:
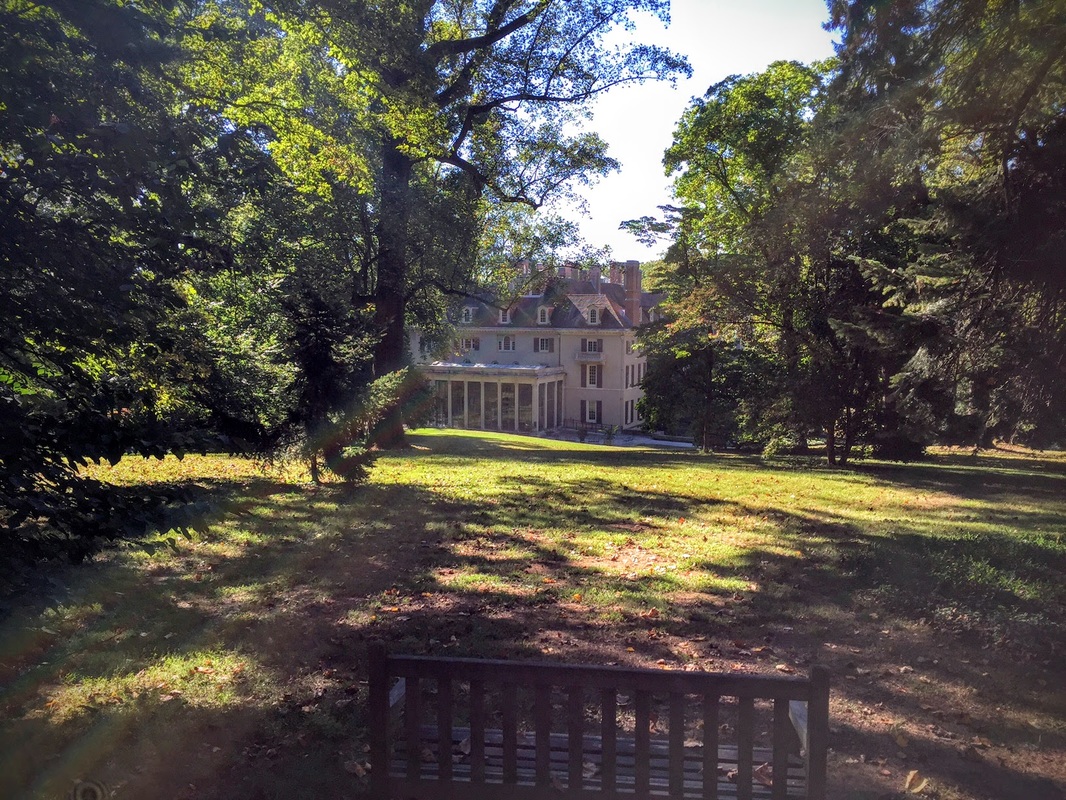
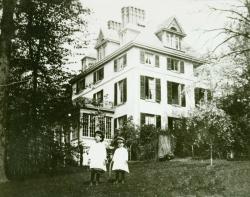
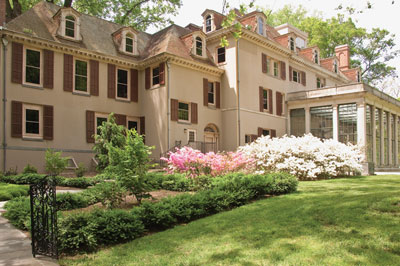
Two weeks after finishing my Masters dissertation from University College London, I started my first real conservation job—the Winterthur Fellowship at Winterthur Museum, Garden & Library and the Winterthur/University of Delaware Program in Art Conservation (WUDPAC for short). I’m incredibly excited to start my conservation career at such an amazing (and beautiful) place! An Incredibly Brief History of WinterthurWinterthur (pronounced winter-tour, if you were wondering) is a museum of American decorative arts. It was established by Henry Francis du Pont (H.F. for short) at his family home in the 1930s. As part of his mission to preserve early American interiors, du Pont sometimes collected entire rooms from houses built in the 1600s to 1850s and installed them at Winterthur. In a particularly dramatic example, one room houses the facades of four colonial homes—with cobblestones in between to create a colonial street scene known as "The Court." To accommodate his growing collection, du Pont added on to the estate until it gradually encompassed 175 rooms, and today includes galleries, a research library and archives, and teaching and laboratory facilities for graduate students in Art Conservation and Material Culture Studies. 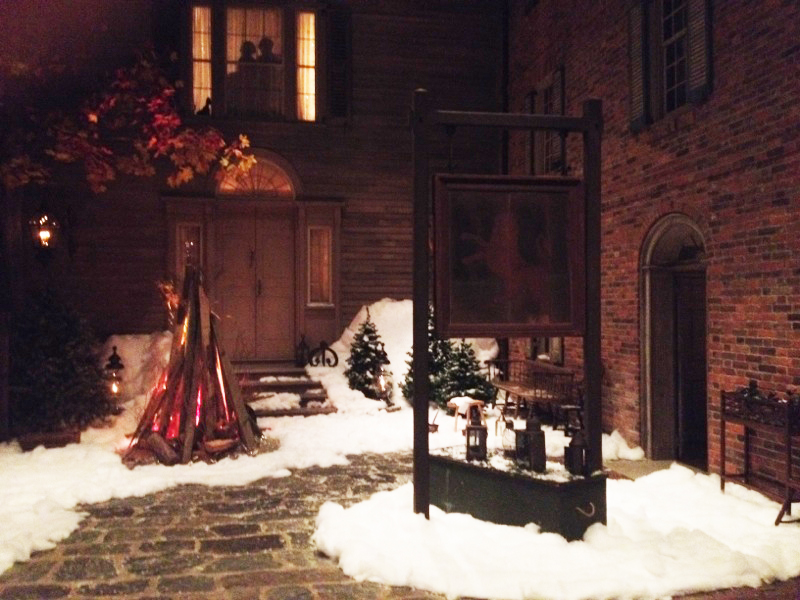 "The Court" decorated for Yuletide, an annual Christmas celebration at the house (Image copyright Winterthur). Conservation Fellowship ProjectMy fellowship project involves researching Winterthur’s collection of 516 Dutch and English delftware tiles—355 of which are installed in 12 fireplaces around the house. Little is known about how the tiles got to Winterthur and when they were installed in the fireplaces. 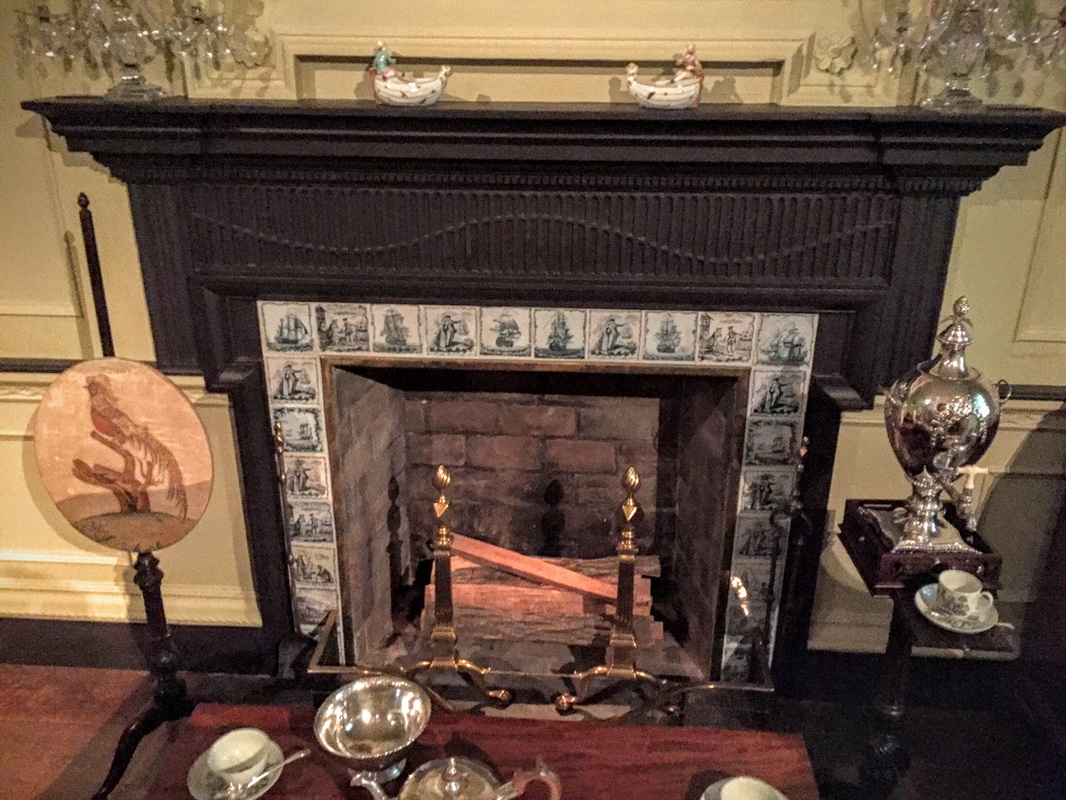 Tiles surrounding the fireplace in the Chestertown Room all are decorated in a nautical theme. Hopefully through archival research and scientific analysis, I’ll be able to piece together more of the tiles’ stories. I also will be treating some of the tiles which are deteriorating or have disfiguring historic restorations. I’ll be creating a storage method for the loose tiles that fits in the limited space and allows for safe handling. 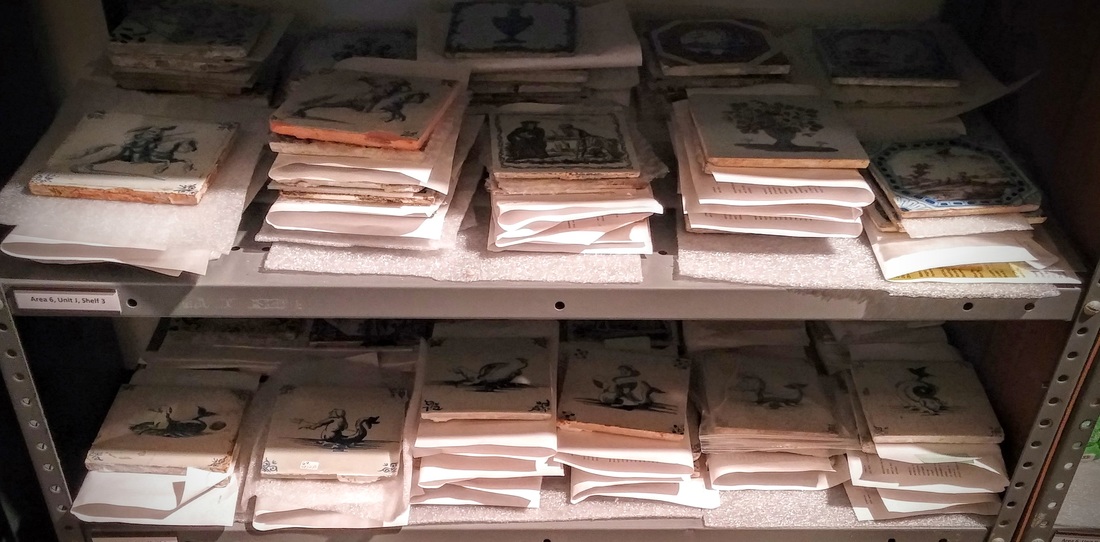 The loose tiles as they are in storage. I’m starting my project by researching the history of Dutch and English delft tiles. The tiles in the collection have many different patterns and designs—appearing to span a period from the 1620s to the 1850s. While researching, I will also be surveying all of the tiles for condition issues. 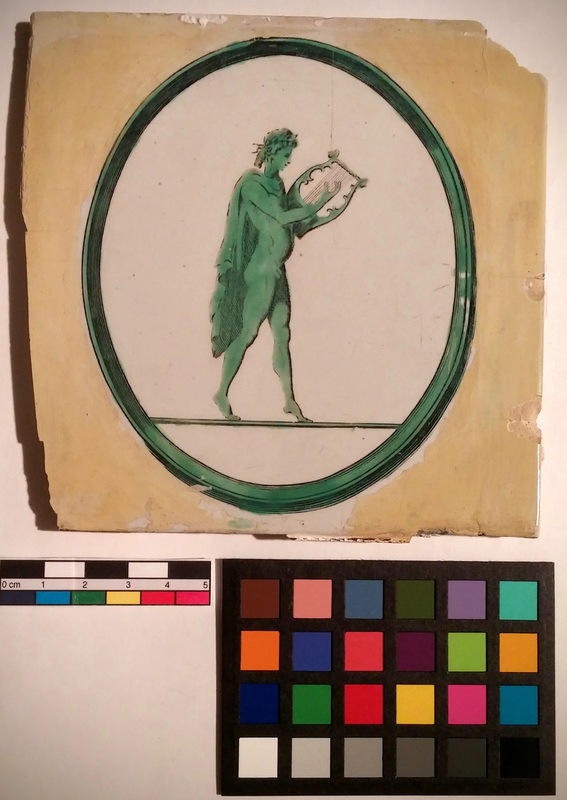 This tile has a disfiguring old restoration. The yellowed areas show where paint was applied over the glazed surface of the tile. This will be documented and removed. I spent the past year at the British Museum as an intern in the Ceramics, Glass, and Metals Conservation Department. In CGM I gained much more experience working with ceramics from all over the world—especially Medieval floor tiles and Neo-Assyrian bricks. 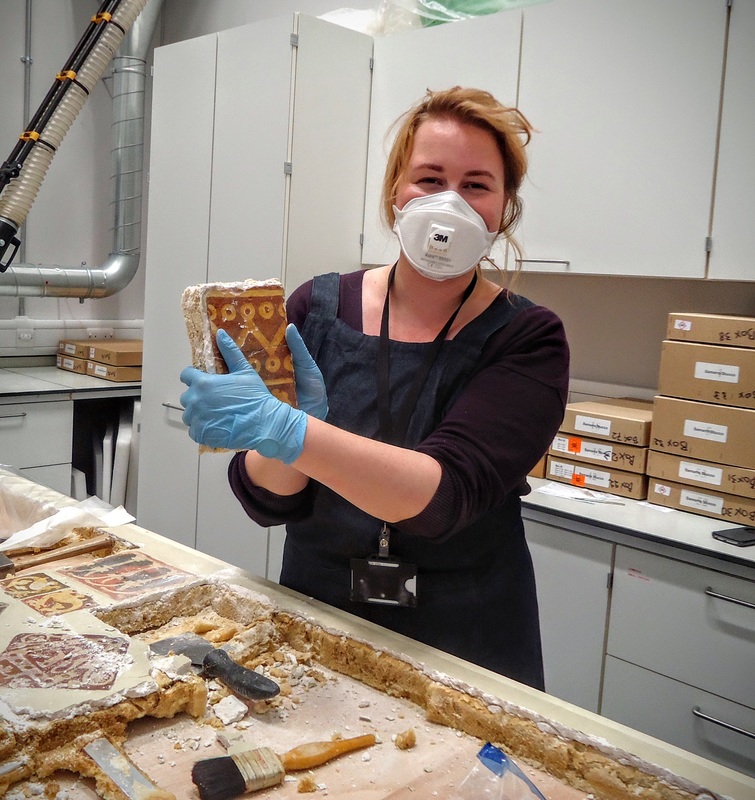 Removing stubborn Medieval floor tiles from their polyurethane and plaster mounts. My experience at the British Museum will hopefully help me find a way to treat the Delft tiles at Winterthur! Watch this blog for weekly updates and follow me on Twitter to learn more about some of the individual tiles I’ll be looking at on #WeirdTileWednesday and #WeirdTileoftheDay. See you next week for an incredibly brief history of Delft tiles!
|
Madeline HagermanWinterthur Postgraduate Fellowship in Objects Conservation Archives
July 2018
Categories
All
|


 RSS Feed
